
guide • Hair Removal (Home)
How to Remove Pet Hair from Clothes Before Laundry (So It Doesn’t Reappear Everywhere)
Stop pet hair from clinging, clogging filters, and re-depositing in the wash. Use a diagnostic-first routine to remove pet hair from clothes before laundry.
By Lucy Anderson • February 22, 2026 • 7 min read
Table of contents
- Core problem and hidden bottlenecks
- 1) Static + friction (the “magnet shirt” problem)
- 2) Embedded fibers (the “woven-in” problem)
- 3) Laundry re-deposition (the “it moved, not removed” problem)
- Reality check: what most owners misread
- Misread #1: “The washer will get it.”
- Misread #2: “More lint rolling is always better.”
- Misread #3: “Dryer first is always the answer.”
- Misread #4: “One tool should work for everything.”
- Practical setup and baseline metrics
- Tools that cover 95% of situations
- Baseline metrics you can measure in 60 seconds
- Step-by-step operating workflow
- Step 1: Sort by hair behavior (not just color)
- Step 2: Choose a target threshold for “good enough”
- Step 3: De-clump first (fast removal before detail work)
- Step 4: Detail removal (pick the right tool)
- Step 5: Contain donors before they contaminate the whole wash
- Step 6: Wash strategy to reduce re-deposition
- Decision table: when to keep, switch, or escalate
- Failure modes and fixes
- Failure mode: Hair sticks worst on black leggings and athletic tops
- Failure mode: Fleece hoodie looks clean until it dries, then hair “blooms”
- Failure mode: You burn through lint roller sheets in one load
- Failure mode: Hair is now in the washer/dryer and transfers to everything
- Failure mode: Hair is trapped in seams, cuffs, Velcro, and waistbands
- Weekly optimization playbook
- 1) Create a “hair station” near the hamper
- 2) Add one “donor-only” laundry day
- 3) Reduce the “hair input” where clothes live
- 4) Re-check your baseline garment weekly
- Final action checklist
Pet hair has a special talent: it looks removable until the moment you wash it. Then it resurfaces on “clean” shirts, sticks to socks, and migrates to towels like it paid rent.
This guide focuses on what actually works to remove pet hair from clothes before laundry, using a diagnostic-first approach. You’ll learn how to check what kind of hair you’re dealing with, how embedded it is, and which tool + workflow gives the best result for your fabrics and laundry setup.
Core problem and hidden bottlenecks
Pet hair clings for three main reasons, and each one needs a different fix:
1) Static + friction (the “magnet shirt” problem)
Synthetic fabrics (polyester, athleisure, fleece) build static and hold onto fine fur. If your clothes crackle when you pull them apart, you’re not just fighting hair—you’re fighting electrostatic attraction.
Bottleneck: You can roll and brush forever, but hair keeps “re-attaching” as you handle the garment.
2) Embedded fibers (the “woven-in” problem)
Knitwear, flannel, wool blends, fleece, and textured fabrics trap hair like Velcro. Short, stiff hairs (many dogs) wedge into the weave; fine cat fur mats into fuzz.
Bottleneck: Adhesive lint rollers work, but you’ll burn through sheets. Dry rubbing can also push hair deeper.
3) Laundry re-deposition (the “it moved, not removed” problem)
Even if the washer dislodges hair, it has to go somewhere. Without a capture point (filter, catcher, or proper dryer prep), hair can redeposit onto other items.
Bottleneck: You think the wash “failed,” but the wash simply redistributed the fur.
Reality check: what most owners misread
Most pet owners misdiagnose the situation and choose the wrong tool or timing. Here are the common misreads to correct:
Misread #1: “The washer will get it.”
Washers loosen hair; they don’t reliably remove it from the load. If you regularly pull out clean clothes with a halo of fur, that’s re-deposition.
Threshold: If more than ~10 visible hairs remain on a dark shirt after washing, your pre-laundry removal step is too light, or your load is mixing hair-heavy items with hair-attracting fabrics.
Misread #2: “More lint rolling is always better.”
Lint rollers shine on smooth cotton and light fur. On fleece, some rollers lift the surface fuzz and leave embedded hair behind.
Tradeoff: Adhesive rollers are fast and satisfying, but they can get expensive and are less effective on deep pile.
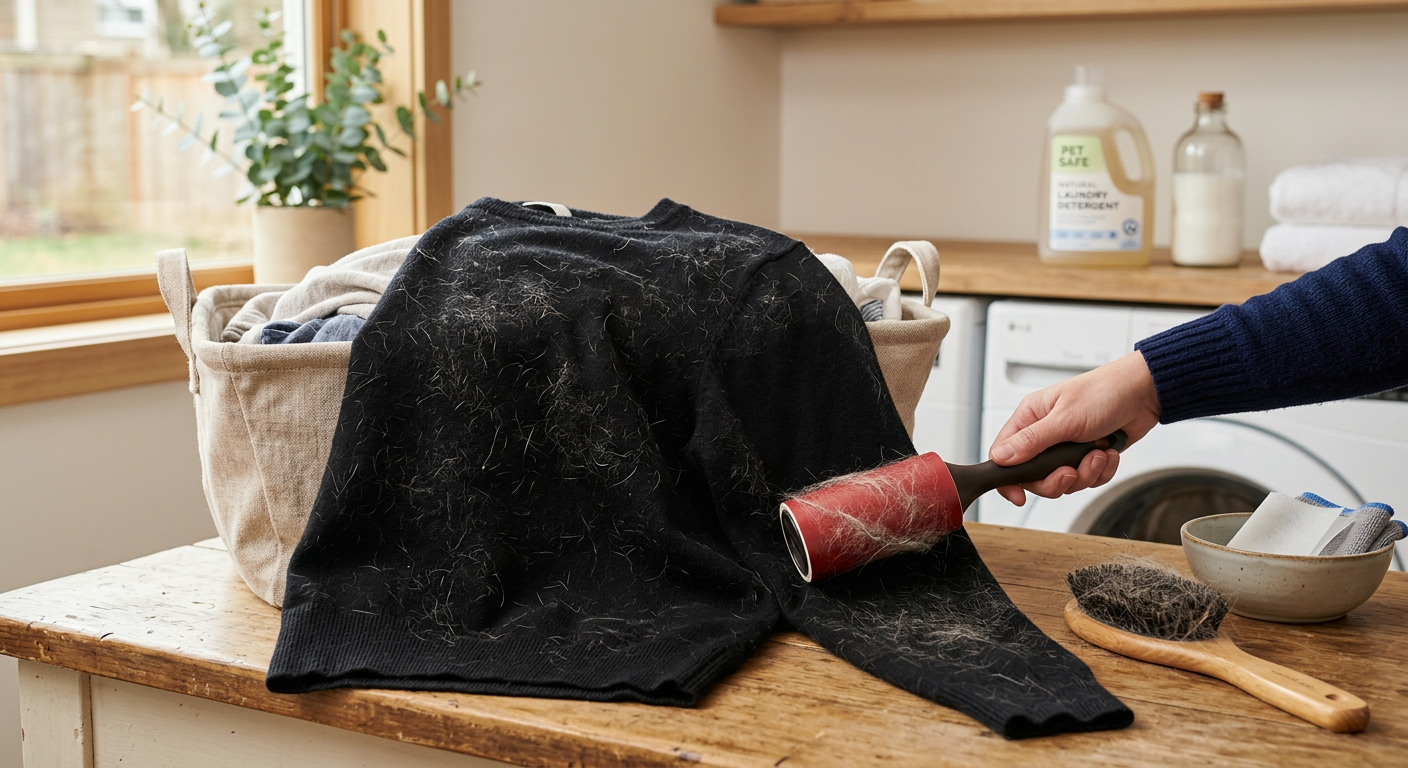
A high-quality sticky option is helpful when you need quick cleanup before leaving the house, like these Lint Rollers for Pet Hair, Sticky, Remover for Couch, Clothes Furniture and Carpet. Dog Hair Remover Cat Hair, Animal Fur, Fuzz. 5 Large Lint Rollers.

Misread #3: “Dryer first is always the answer.”
A short dryer tumble (no heat or low heat) can loosen hair if your dryer venting is good and your lint trap is clean. But if your lint trap is already coated or airflow is poor, you may just turn hair into a static cloud.
Threshold: If your lint screen still looks “fuzzy” after cleaning, or you can peel off a felt-like layer, hair is being trapped—but not efficiently. Clean it more thoroughly before relying on the dryer for de-furring.
Misread #4: “One tool should work for everything.”
Different garments need different approaches:
- •Smooth cotton tees: adhesive + quick brush works.
- •Black athleisure: anti-static handling + adhesive.
- •Fleece hoodie: mechanical scraper/roller that grabs embedded hair.
- •Work uniform covered in short hairs: a combination routine.
A reusable mechanical option many owners like for furniture and some clothing is the ChomChom Roller Pet Hair Remover – Original Size Reusable Lint Roller for Cat & Dog Hair on Furniture, Couch, Carpet, Car, Rugs & Bedding – Portable, Eco-Friendly (White). It’s not a perfect replacement for sticky sheets on every fabric, but it can reduce how often you reach for disposables.

ChomChom Roller Pet Hair Remover – Original Size Reusable Lint Roller for Cat & Dog Hair on Furniture, Couch, Carpet, Car, Rugs & Bedding – Portable, Eco-Friendly (White)
ChomChom Roller

ChomChom Roller Pet Hair Remover – Reusable Lint Roller Pet Hair Removal Tool for Clothes, Couches, Cars and Travel - Cat Dog Hair Remover, Compact, No Sticky Refills Needed (Mini Roller)
ChomChom
Practical setup and baseline metrics
Before you change your whole laundry routine, set up a simple baseline so you can tell what’s improving.
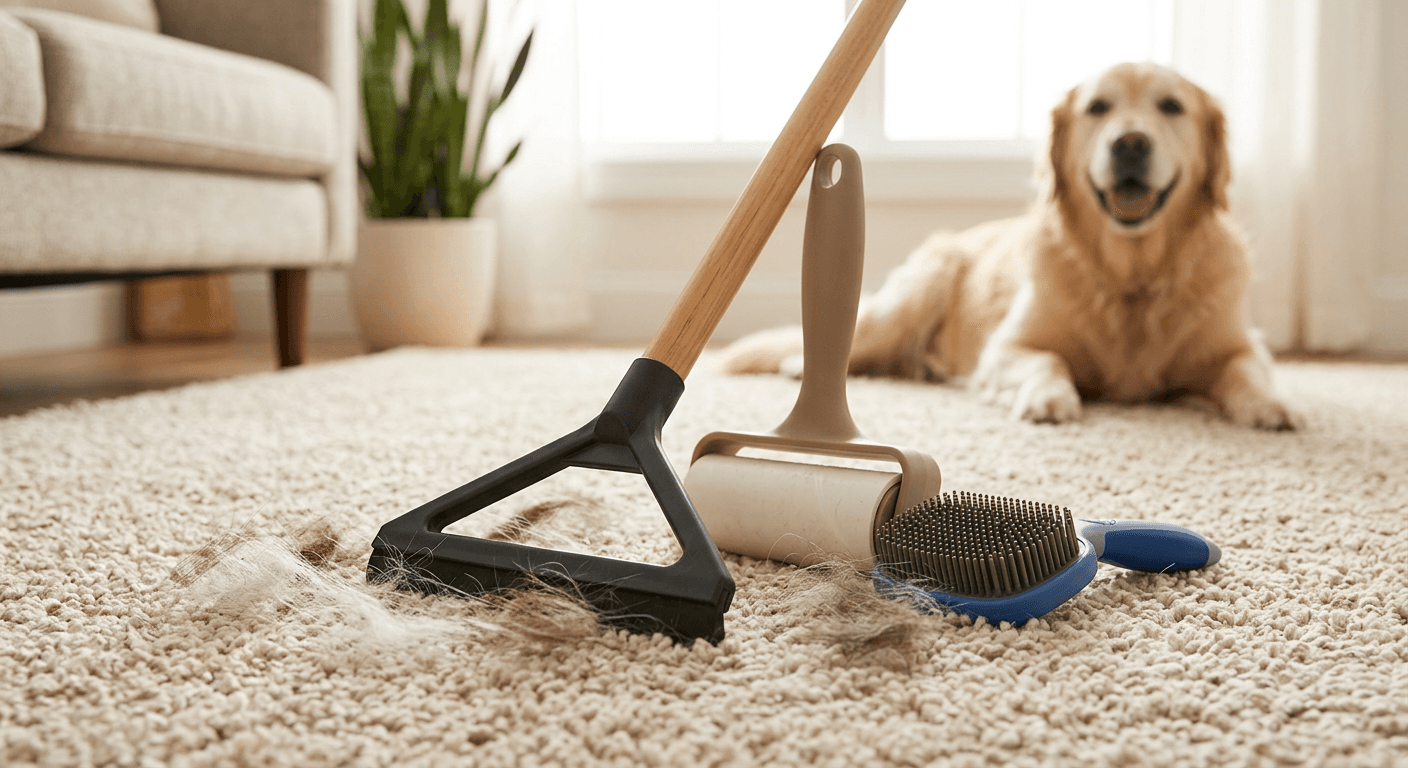
Tools that cover 95% of situations
You don’t need all of these, but understanding their “jobs” helps:
- •Sticky lint roller: Best for smooth fabrics, quick passes, and “doorway” touch-ups. Example: Lint Rollers for Pet Hair, Sticky, Remover for Couch, Clothes Furniture and Carpet. Dog Hair Remover Cat Hair, Animal Fur, Fuzz. 5 Large Lint Rollers.
- •Reusable roller for bulk hair: Best for larger surfaces (hoodies, sweatpants) where you’d otherwise use tons of sheets. Example: ChomChom Roller Pet Hair Remover – Original Size Reusable Lint Roller for Cat & Dog Hair on Furniture, Couch, Carpet, Car, Rugs & Bedding – Portable, Eco-Friendly (White).
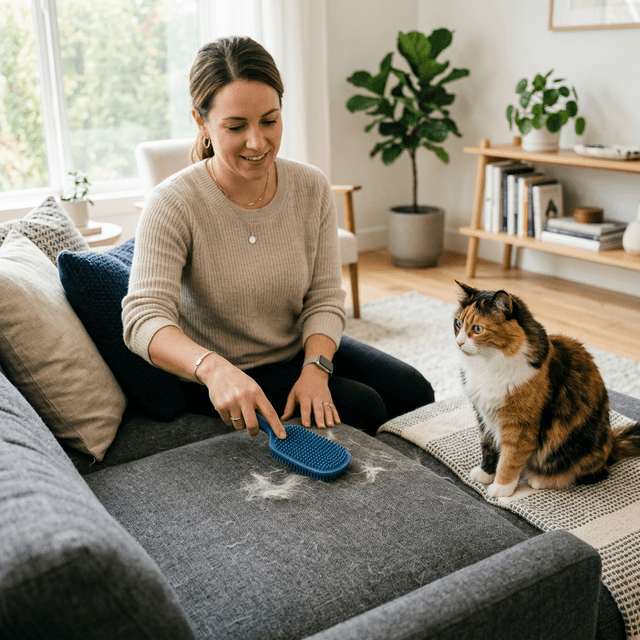
- •Electrostatic grooming glove/mitt: Useful for quick “hand sweeps,” especially on textured items where you can gather hair into clumps before rolling. Example: Pet Hair Removal Glove for Dogs & Cats, Newly Upgraded Reusable Electrostatic Pet Hair Remover Glove, Pet Hair Remover Mitt Tool for Couch, Furniture, Bed, Clothing, Carpet, Car Seat (Yellow).
- •Laundry hair catcher / scraper tools: Good when you know hair is going to hit the washer anyway (pet blankets, bedding, dog towels). Example: Pet Hair Removal Tool: 6 Pcs Dog Cat Hair Remover - Reusable Pet Hair Remover with Laundry Pet Hair Catcher - Portable Carpet Rake Scraper Fur Removal Tool for Rugs Car Mats Couch Furniture.

Pet Hair Removal Glove for Dogs & Cats, Newly Upgraded Reusable Electrostatic Pet Hair Remover Glove, Pet Hair Remover Mitt Tool for Couch, Furniture, Bed, Clothing, Carpet, Car Seat (Yellow)
Sankell

Pet Hair Removal Tool: 6 Pcs Dog Cat Hair Remover - Reusable Pet Hair Remover with Laundry Pet Hair Catcher - Portable Carpet Rake Scraper Fur Removal Tool for Rugs Car Mats Couch Furniture
Brand: Numhosai
Baseline metrics you can measure in 60 seconds
Pick one “sentinel garment” you wash weekly (black leggings, dark hoodie, uniform shirt). Use it to track results.
- •Hair score (0–5):
- •0: no visible hair at arm’s length
- •1: a few strands only in seams
- •2: visible on one panel (front or back)
- •3: visible across multiple panels
- •4: heavy coverage; looks dusty
- •5: matted or “furred” appearance
- •Roller passes: Count how many full-length passes it takes before the roller stops picking up hair. If it takes more than ~12 passes on a t-shirt, you’re probably better off doing an initial de-static or clump-gather step first.
- •Lint trap check (if you tumble first): After a 10-minute no-heat tumble, you should see a meaningful lint/hair layer. If you don’t, hair may be stuck to fabric (embedded) or your dryer airflow is restricted.
Step-by-step operating workflow
This workflow is designed to be repeatable. You’ll do the same checks each time and only escalate when the “simple” route doesn’t meet your threshold.
Step 1: Sort by hair behavior (not just color)
Create three piles:
- Hair donors: pet beds, pet blankets, dog towels, clothes you wore while brushing your pet.
- Hair magnets: fleece, microfiber, athletic synthetics, black leggings, sweaters.
- Neutral items: denim, sturdy cotton, items that neither shed nor attract much.
Rule: Don’t wash donors with magnets unless you’ve removed hair first. That single change prevents a lot of re-deposition.
Step 2: Choose a target threshold for “good enough”
You don’t need perfection for every load.
- •Everyday threshold: hair score 0–2 before washing.
- •Work/going-out threshold: hair score 0–1 before washing.
- •Donor items (blankets): aim for “no clumps” rather than “no hairs.”
Step 3: De-clump first (fast removal before detail work)
This is where most people waste time. Instead of starting with a lint roller immediately:
- •For textured fabrics (fleece, knits): do a quick sweep with a mitt to gather hair into clumps. A glove like the Pet Hair Removal Glove for Dogs & Cats, Newly Upgraded Reusable Electrostatic Pet Hair Remover Glove, Pet Hair Remover Mitt Tool for Couch, Furniture, Bed, Clothing, Carpet, Car Seat (Yellow) can help you “ball up” hair so you’re not chasing individual strands.
- •For smooth cotton: a few broad strokes with a reusable roller can remove the bulk quickly.

Concrete example: If your black hoodie comes out of the closet looking lightly dusty (hair score 2–3), do 30 seconds of clump-gathering on the arms and chest first. Then lint roll. You’ll usually cut roller use in half.
Step 4: Detail removal (pick the right tool)
Now choose one detail method based on fabric:
- •Smooth cotton tees, button-downs, scrubs: sticky lint roller. Use long strokes in one direction; don’t scrub.
- •Athleisure/leggings: sticky roller, but reduce static handling. Turn the garment inside-out first if the inside holds most hair.
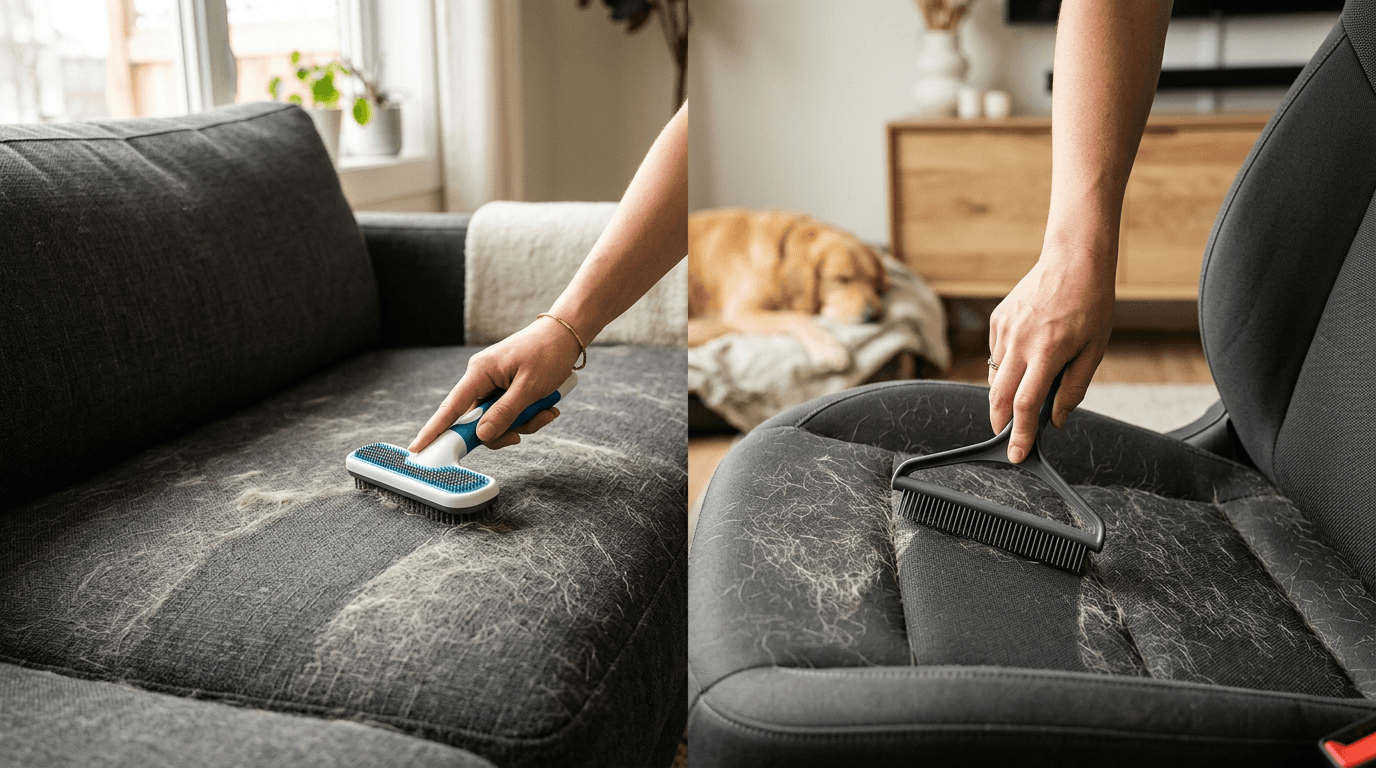
- •Fleece hoodies, sherpa, fuzzy socks: reusable mechanical roller or scraper-style tool. The ChomChom Roller Pet Hair Remover – Original Size Reusable Lint Roller for Cat & Dog Hair on Furniture, Couch, Carpet, Car, Rugs & Bedding – Portable, Eco-Friendly (White) can be useful for larger, fuzzier surfaces where adhesive sheets disappear fast.
ChomChom Roller Pet Hair Remover – Original Size Reusable Lint Roller for Cat & Dog Hair on Furniture, Couch, Carpet, Car, Rugs & Bedding – Portable, Eco-Friendly (White)
ChomChom

ChomChom Roller Pet Hair Remover – Original Size Reusable Lint Roller for Cat & Dog Hair on Furniture, Couch, Carpet, Car, Rugs & Bedding – Portable, Eco-Friendly (Black)
ChomChom
Technique check: If you’re seeing “streaks” where hair remains, you’re either pushing hair with the tool or you’re working against the nap. Flip direction and use shorter strokes.
Step 5: Contain donors before they contaminate the whole wash
For heavy donor items you can’t realistically de-fur perfectly (pet blankets, throw covers):
- •Shake outside if possible.
- •Use a brief tumble (no heat) if your dryer handles it well.
- •Consider adding a hair-catching tool to the wash. A multi-pack like Pet Hair Removal Tool: 6 Pcs Dog Cat Hair Remover - Reusable Pet Hair Remover with Laundry Pet Hair Catcher - Portable Carpet Rake Scraper Fur Removal Tool for Rugs Car Mats Couch Furniture is often used specifically for loads that are guaranteed to shed.

Pet Hair Removal Tool 3 Pack Dog Cat Hair Remover Carpet Scraper Rake Fur Removal Brush Lint Remover Shaver for Car Furniture Couch Green
Brand: AXEGY

Pet Hair Removal Tool for Dog and Cat,Pet Hair Remover Removes Fur and Lint from Couch,Carpet,Cat Tree Tower Bed,Car Interiors,Rug,Mat,Coat,and Various Furniture,Silicone Material,Reusable,2 Pack
SuperAbound
Threshold: If your lint trap becomes a thick mat after tumbling donor items, that’s good (hair is leaving fabric). If your donor items still come out “furred,” you need stronger pre-removal or smaller loads.
Step 6: Wash strategy to reduce re-deposition
This guide is about before laundry, but one wash choice matters for results:
- •Don’t overload. Stuffed drums trap hair in the load instead of letting it rinse away.
- •Separate magnets from donors when possible.
If you routinely remove pet hair from clothes and still see re-deposition, your bottleneck is likely load mixing or overloading, not your lint roller.
Decision table: when to keep, switch, or escalate
Use this table after 2–3 laundry cycles with your baseline garment.
| What you see (after pre-removal + wash) | Likely cause | Keep doing | Switch | Escalate |
|---|---|---|---|---|
| Hair score drops from 4 to 1–2 consistently | Routine is working | Current workflow | N/A | Only if you need near-perfect results |
| Roller takes >12 passes on a tee | Starting with the wrong step | Add clump-gather first | Try reusable roller for bulk | N/A |
| Hair returns mostly on fleece/leggings | Static + embedded fibers | Keep sorting donors/magnets | Add a textured-fabric tool (reusable roller) | Consider separating those items into their own loads |
| Lint trap barely changes after tumble | Airflow issue or hair embedded | Clean lint screen thoroughly | Skip tumble step and focus on manual removal | Check dryer venting if performance is poor |
| Hair appears on items that had none | Re-deposition from donors | Keep donors separate | Add laundry hair catcher for donor loads | Reduce load size; wash donors alone |
Failure modes and fixes
Here are the specific “this is driving me crazy” moments and what to do next.
Failure mode: Hair sticks worst on black leggings and athletic tops
Symptom: You remove hair, put the item down, pick it up, and it looks hairy again.
Fix: Reduce static handling.
- •Remove hair with the garment laid flat (bed or table), not held up.
- •Turn inside-out and treat the inside if that’s where hair clings.
- •Use slower, longer passes with the sticky roller (fast scrubbing increases static).
Failure mode: Fleece hoodie looks clean until it dries, then hair “blooms”
Symptom: Hair seems gone, then reappears as the fabric warms or dries.
Fix: You removed surface hair but not embedded hair.
- •Start with clump-gathering using a mitt like the Pet Hair Removal Glove for Dogs & Cats, Newly Upgraded Reusable Electrostatic Pet Hair Remover Glove, Pet Hair Remover Mitt Tool for Couch, Furniture, Bed, Clothing, Carpet, Car Seat (Yellow).
- •Follow with a reusable roller that grips deeper fibers.
- •Wash fleece separately from donor items.
Failure mode: You burn through lint roller sheets in one load
Symptom: One hoodie consumes half a roll.
Fix: Switch the order and the tool.
- •Use a reusable roller for bulk removal (less waste), then sticky roller for final polish.
- •The ChomChom Roller Pet Hair Remover – Original Size Reusable Lint Roller for Cat & Dog Hair on Furniture, Couch, Carpet, Car, Rugs & Bedding – Portable, Eco-Friendly (White) is a common “bulk first” option.
Failure mode: Hair is now in the washer/dryer and transfers to everything
Symptom: Even clean loads pick up hair.
Fix: Treat the “system,” not just the clothes.
- •Run donor loads separately.
- •Add a wash hair catcher for known-shedders (multi-pack tools like Pet Hair Removal Tool: 6 Pcs Dog Cat Hair Remover - Reusable Pet Hair Remover with Laundry Pet Hair Catcher - Portable Carpet Rake Scraper Fur Removal Tool for Rugs Car Mats Couch Furniture are often used here).
- •Clean the dryer lint trap every cycle; if the screen has a “film,” wash it with warm water and let it dry fully.
Failure mode: Hair is trapped in seams, cuffs, Velcro, and waistbands
Symptom: Garment looks mostly clean, but edges are hairy.
Fix: Targeted passes and tension.
- •Stretch cuffs/waistbands and roll along the edge.
- •For Velcro areas, use short, precise strokes with a sticky roller; don’t press so hard you gum up the hooks.
Weekly optimization playbook
Once you have a working routine, the goal is to spend less time per load while keeping results consistent.
1) Create a “hair station” near the hamper
Keep one lint roller and one reusable tool where you naturally undress.
- •Sticky option for quick touch-ups: Lint Rollers for Pet Hair, Sticky, Remover for Couch, Clothes Furniture and Carpet. Dog Hair Remover Cat Hair, Animal Fur, Fuzz. 5 Large Lint Rollers
- •Reusable bulk tool for hoodies/sweats: ChomChom Roller Pet Hair Remover – Original Size Reusable Lint Roller for Cat & Dog Hair on Furniture, Couch, Carpet, Car, Rugs & Bedding – Portable, Eco-Friendly (White)
Result: You remove pet hair from clothes in 20–40 seconds while it’s already on your mind, instead of battling an entire laundry mountain later.
2) Add one “donor-only” laundry day
If you have pets that shed heavily (Husky, Lab, German Shepherd, long-haired cat), set one weekly load for:
- •pet blankets
- •crate pads
- •throws
- •dog towels
Use hair-catching tools in that load if re-deposition is your recurring issue (see [Pet Hair Removal Tool: 6 Pcs Dog Cat Hair Remover
- •Reusable Pet Hair Remover with Laundry Pet Hair Catcher
- •Portable Carpet Rake Scraper Fur Removal Tool for Rugs Car Mats Couch Furniture](/product/pet-hair-removal-tool-6-pcs-dog-cat-hair-remover-reusable-pet-hair-remover-with--b0g9sdsptc)).
3) Reduce the “hair input” where clothes live
This sounds obvious, but it’s the cheapest improvement:
- •Keep a designated pet blanket on the couch; wash it as a donor.
- •Don’t place clean laundry on the same bedspread your cat sleeps on.
4) Re-check your baseline garment weekly
If your sentinel garment starts drifting from hair score 1 back to 3, it usually means one of:
- •you mixed donors and magnets
- •you overloaded the washer
- •you skipped the de-clump step on textured items
Final action checklist
- •Sort laundry into hair donors, hair magnets, and neutral items.
- •Set a realistic threshold (hair score 0–2 for everyday, 0–1 for work/going-out).
- •De-clump first on textured fabrics using a mitt like the Pet Hair Removal Glove for Dogs & Cats, Newly Upgraded Reusable Electrostatic Pet Hair Remover Glove, Pet Hair Remover Mitt Tool for Couch, Furniture, Bed, Clothing, Carpet, Car Seat (Yellow).
- •Use sticky rollers for smooth cotton and “polishing” (example: Lint Rollers for Pet Hair, Sticky, Remover for Couch, Clothes Furniture and Carpet. Dog Hair Remover Cat Hair, Animal Fur, Fuzz. 5 Large Lint Rollers).
- •Use a reusable bulk remover for hoodies/sweats to reduce wasted sheets (example: ChomChom Roller Pet Hair Remover – Original Size Reusable Lint Roller for Cat & Dog Hair on Furniture, Couch, Carpet, Car, Rugs & Bedding – Portable, Eco-Friendly (White)).
- •Wash heavy donor items separately; consider adding a wash hair catcher (example: Pet Hair Removal Tool: 6 Pcs Dog Cat Hair Remover - Reusable Pet Hair Remover with Laundry Pet Hair Catcher - Portable Carpet Rake Scraper Fur Removal Tool for Rugs Car Mats Couch Furniture).
- •If hair keeps redepositing, reduce load size and keep donors away from magnets.
Hair Removal Cluster
More in this topic
guide
How to Remove Pet Hair from Furniture and Clothes Fast

guide
Best robot vacuum for pet hair: what to look for in 2026

guide
How to remove pet hair from car seats fast (no stress)
guide
How to Remove Pet Hair from Couch and Car Seats Without Damaging Fabric (A Comparison-Led Guide)
guide
Best Pet Hair Remover for Rugs and Carpet: What Actually Works (Real-World Guide)
guide
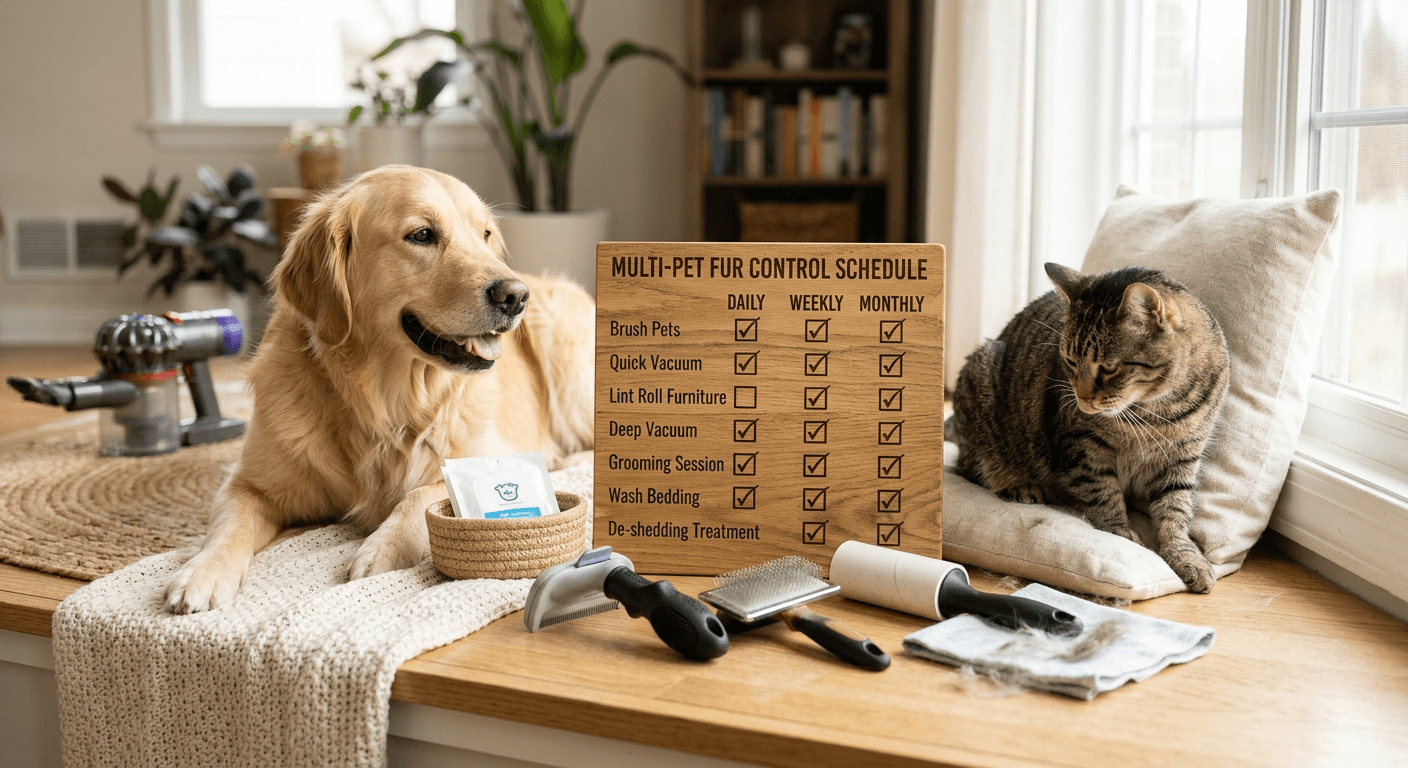
Pet Hair Removal Routine for Multi-Pet Homes: A Comparison-Led Guide That Actually Sticks
Frequently asked questions
Why does pet hair come back after washing clothes?
In most homes, the hair didn’t “come back”—it redistributed. When hair donors (pet blankets, fur-covered hoodies) wash with hair magnets (fleece, leggings, synthetics), loosened hair can redeposit onto other items. Overloading the washer makes this worse because hair stays trapped in the load instead of rinsing away. The fix is pre-removal plus sorting donors away from magnets, and using a catcher tool for heavy-shed loads if needed.
What works best for removing pet hair from fleece before laundry?
Fleece holds embedded hair, so start by gathering hair into clumps (a pet hair mitt/glove can help), then follow with a tool that grips deeper fibers (often a reusable roller) and finish with a sticky lint roller only for touch-ups. If your fleece still comes out hairy, wash fleece separately from donor items and avoid stuffing the drum—embedded hair needs room to move and rinse out.
Should I use a dryer tumble before washing to remove pet hair?
A short tumble can help if your dryer has good airflow and you clean the lint trap thoroughly. Use no heat or low heat for about 10 minutes to loosen hair, then clean the lint trap immediately. If you don’t see much hair in the trap or hair becomes a static cloud, skip this step and focus on manual removal plus better sorting—your bottleneck is likely embedded hair or poor airflow, not a lack of tumbling.
