

guide • Hair Removal (Home)
How to remove pet hair from car seats fast (no stress)
Tired of fur stuck in your seats and carpet? Learn simple, proven methods to lift pet hair fast and keep your car cleaner between rides.
By PetCareLab Editorial • March 5, 2026 • 14 min read
Table of contents
- Why Pet Hair Clings to Cars (And Why It’s Harder Than Your Couch)
- Start With Prevention: The Fastest Way to “Remove” Hair Is to Stop It Getting In
- Choose the Right Seat Protection (And Install It Correctly)
- Add a “Pre-Ride Brush Off” Habit (It’s Shockingly Effective)
- Keep a Pet “Go Bag” in the Trunk
- Your Pet Hair Removal Toolkit: What Actually Works (And What’s Overhyped)
- Core Tools (Worth Having)
- Helpful Add-Ons (Nice to Have)
- What to Skip (Common Time-Wasters)
- Step-by-Step: The Most Efficient Way to Remove Pet Hair From Car Seats and Carpet
- Step 1: Remove Everything and Shake Outside (2–5 minutes)
- Step 2: Dry “Agitate” Embedded Hair With Rubber (5–10 minutes)
- Step 3: Vacuum With the Right Sequence (10–20 minutes)
- Step 4: Finish With a Lint Pass and Detail Touches (3–8 minutes)
- Step 5: Optional—Odor and Dander Control (Without Making It Sticky)
- Breed-Specific Strategies (Because “Pet Hair” Isn’t One Problem)
- Short, Stiff Hair (Labs, Pugs, Beagles): “Needles in Fabric”
- Double Coats (Huskies, Shepherds, Goldens): “Snowdrifts and Undercoat Clouds”
- Long, Fine Hair (Shih Tzu, Collie mixes): “Tangling and Threading”
- Cat Hair (Any cat, especially short-haired): “Static-Glue Everywhere”
- Product Recommendations and Comparisons (What’s Worth Buying)
- Best “One-Two Punch” Combo for Most People
- If You Have Cloth Seats (Most Hair-Prone)
- If You Have Leather or “Leatherette” Seats
- Best Seat Cover Features (So Hair Doesn’t Become a Daily Job)
- Common Mistakes That Make Pet Hair Worse (And How to Fix Them)
- Mistake 1: Vacuuming First Without Agitating
- Mistake 2: Using Too Much Water or Cleaner
- Mistake 3: Ignoring Seat Rails and Buckle Wells
- Mistake 4: Letting Hair Build Up for Months
- Mistake 5: Skipping Pet Grooming
- Maintenance Routine: Keep Your Car “Hair-Free Enough” Without Obsessing
- The 5-Minute Weekly Reset
- The 20-Minute Biweekly Clean
- The Monthly Deep Clean (Seasonal Shedders: Twice Monthly)
- Special Situations: Mud, Wet Coats, and Road Trips
- Wet Dog + Hair = Felted Mess
- Post-Park Sand and Burrs (The Hidden Hair Magnet)
- Road Trip Prep Checklist (So Hair Doesn’t Take Over)
- Quick Reference: Best Method by Surface
- Final Expert Tips for a Car That Stays Clean Longer
Why Pet Hair Clings to Cars (And Why It’s Harder Than Your Couch)
If you’ve ever tried to remove pet hair from car seats and wondered why it feels welded on, you’re not imagining it. Cars are basically a perfect storm for shedding:
- •Static electricity: Upholstery (especially synthetic cloth and carpet) builds static, which makes hair “grab” and resist vacuum suction.
- •Tight weaves + textured surfaces: Automotive fabric is often rugged and grippy, so hair threads into the fibers.
- •Heat + humidity cycles: Hot days, cold nights, and moisture from wet paws cause hair to settle deeper over time.
- •Hair type differences: A Labrador’s short, stiff hairs act like tiny needles. A Husky’s undercoat is fluffy and migrates everywhere. A Poodle’s curls shed less but can still leave dander and occasional hair.
Breed examples you’ll notice immediately:
- •Short, pokey coat (Labrador Retriever, German Shorthaired Pointer): Hair spears into seat fabric and floor mats.
- •Double coat (Siberian Husky, Golden Retriever): Undercoat forms tumbleweeds that drift into vents and seat rails.
- •Long, silky coat (Shih Tzu, Maltese): Hair tangles into carpet and around seat tracks.
- •Cat hair (Domestic Shorthair, Maine Coon): Ultra-fine hairs cling via static and hide in corners; often tougher than dog hair on cloth seats.
The good news: you can keep your car noticeably cleaner with the right setup and a repeatable routine—without spending your whole weekend detailing.
Start With Prevention: The Fastest Way to “Remove” Hair Is to Stop It Getting In
Prevention isn’t glamorous, but it’s the difference between a 10-minute tidy and a two-hour deep clean.
Choose the Right Seat Protection (And Install It Correctly)
Best options (from most effective to most budget-friendly):
- •Hammock-style seat cover (rear seat): Creates a barrier over the entire bench and blocks hair from falling into seat cracks. Great for dogs who pace or look out the window.
- •Bench cover + door protectors: Useful if your dog rides calmly but leans on doors (hello, slobber + hair combo).
- •Cargo liner (SUV/hatchback): Best for large breeds like a German Shepherd or Bernese Mountain Dog riding in the back.
- •Single-seat cover: For one pet passenger, reduces surface area to clean.
Installation mistake to avoid: Leaving gaps. Hair funnels into:
- •the seat-belt buckle wells
- •the seat-back hinge line
- •the space between seat bottom and seat back
- •seat rails and under-seat vents
Look for covers with:
- •Anchors (tuck-in tubes) to reduce sliding
- •Side flaps to protect door panels
- •Non-slip backing (especially if you brake hard or have leather seats)
Pro-tip: Choose a cover with a smooth, tightly woven surface. Quilted, fuzzy, or waffle textures trap hair like Velcro.
Add a “Pre-Ride Brush Off” Habit (It’s Shockingly Effective)
Before your pet gets in the car:
- Do a 30–60 second brush outside (or in the garage).
- Wipe paws and coat with a slightly damp microfiber towel (especially after parks).
- Use a de-shedding tool weekly for double-coated breeds.
Real-world scenario: You take your Golden Retriever to the lake. Even if they look “dry,” their undercoat holds moisture and loosens fur. A quick towel-off and brush-out before they hop in prevents hair + dampness from getting pressed deep into the upholstery.
Keep a Pet “Go Bag” in the Trunk
Stock a small bin with:
- •Rubber grooming glove (for quick wipe-downs and hair lift)
- •Microfiber towels
- •Lint roller
- •Travel blanket (extra layer over the cover)
- •Small trash bags (shake-out hair and seal it)
This is how you stay ahead of hair without making every cleanup a full detail.
Your Pet Hair Removal Toolkit: What Actually Works (And What’s Overhyped)
To consistently remove pet hair from car, you need tools that address three problems: hair embedded in fabric, hair stuck by static, and hair trapped in seams.
Core Tools (Worth Having)
1) Rubber hair remover (brush, block, or glove) Why it works: Rubber creates friction and slight static that pulls hair into clumps you can pick up.
Best for:
- •cloth seats
- •carpeted floors
- •trunk liners
- •floor mats
2) Vacuum with strong suction + good attachments Look for:
- •crevice tool (seat seams, rails, buckles)
- •stiff upholstery brush (agitates hair)
- •mini motorized brush (if you have one—great for cloth)
Options:
- •Portable car vacuum (12V or rechargeable): Convenient, but not always strong enough for embedded hair.
- •Shop vac: Strongest value for deep cleaning, especially for families with multiple pets.
- •Home vacuum with hose + car kit: Excellent if it’s powerful and you can park near an outlet.
3) Detailing brushes (soft + stiff) Great for:
- •around seat rails
- •between console edges
- •vents (hair + dander can collect here)
4) Static reducers
- •Light mist of fabric-safe anti-static spray
- •Slightly damp microfiber towel (often enough and cheaper)
Helpful Add-Ons (Nice to Have)
- •Pumice stone (for carpet only): Works well on trunk carpet, but can snag delicate fabric. Use gently.
- •Lint roller: Great for quick touch-ups, less efficient for full seats.
- •Compressed air / blower: Useful to lift hair from tight crevices before vacuuming (especially seat rails).
What to Skip (Common Time-Wasters)
- •Overly soft brushes that don’t agitate fibers
- •Tiny handheld vacuums without real suction (they just rearrange hair)
- •Wet wipes alone (they smear oils and leave residue; use microfiber instead)
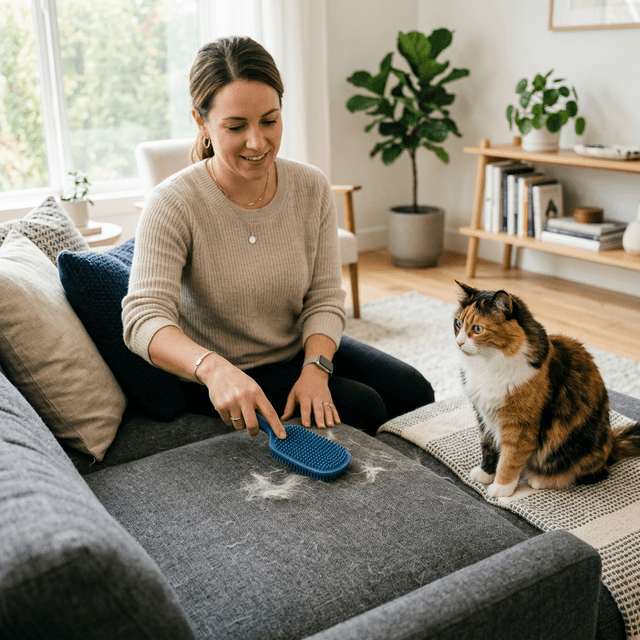
Step-by-Step: The Most Efficient Way to Remove Pet Hair From Car Seats and Carpet
This method is designed like a pro detail workflow: loosen → lift → vacuum → finish.
[IMAGE_PLACEHOLDER_1]
Step 1: Remove Everything and Shake Outside (2–5 minutes)
- Take out floor mats, blankets, toys, and covers (if removable).
- Shake them outside.
- If you have rubber mats, smack them against the ground—hair pops off faster than vacuuming.
Why this matters: If you start vacuuming without clearing loose hair, you’ll spend twice as long chasing tumbleweeds.
Step 2: Dry “Agitate” Embedded Hair With Rubber (5–10 minutes)
Use a rubber brush/block/glove:
- •Work in short strokes in one direction.
- •Focus on seat bottoms and seat backs where hair presses in.
- •For carpet, use a crosshatch pattern (left-right, then up-down).
You should see hair collect into clumps. Pick up by hand or vacuum as you go.
Pro-tip: If hair isn’t clumping, lightly mist a microfiber towel with water and wipe the area once. Slight dampness reduces static and helps hair release.
Step 3: Vacuum With the Right Sequence (10–20 minutes)
Vacuum in this order:
- Crevices first: Seat seams, buckle wells, seat rails, between console and seats.
- Seat surfaces second: Use upholstery brush attachment; go slow.
- Carpet and trunk last: Longer passes, overlapping like mowing a lawn.
Technique that works:
- •Hold the upholstery tool flat.
- •Use moderate pressure to slightly compress fibers.
- •Make slow passes so suction can pull hair up.
If you’re dealing with a “needle coat” (e.g., Labrador or Boxer hair), alternate:
- •rubber agitation → vacuum → rubber agitation → vacuum
This breaks the grip in layers.
Step 4: Finish With a Lint Pass and Detail Touches (3–8 minutes)
- •Use a lint roller on high-contact spots: armrests, seat shoulders, headrests.
- •Use a detailing brush to sweep hair out of:
- •air vent slats
- •door pocket corners
- •cup holder edges
- •stitching channels
Step 5: Optional—Odor and Dander Control (Without Making It Sticky)
If your pet rides often, hair isn’t the only issue—dander and oils build up and make hair stick more.
- •Lightly spray an enzyme-safe fabric refresher or use a diluted upholstery-safe cleaner (follow label).
- •Wipe with microfiber, then allow to dry fully.
Avoid over-wetting seats; moisture can pull dirt deeper and may cause odors.
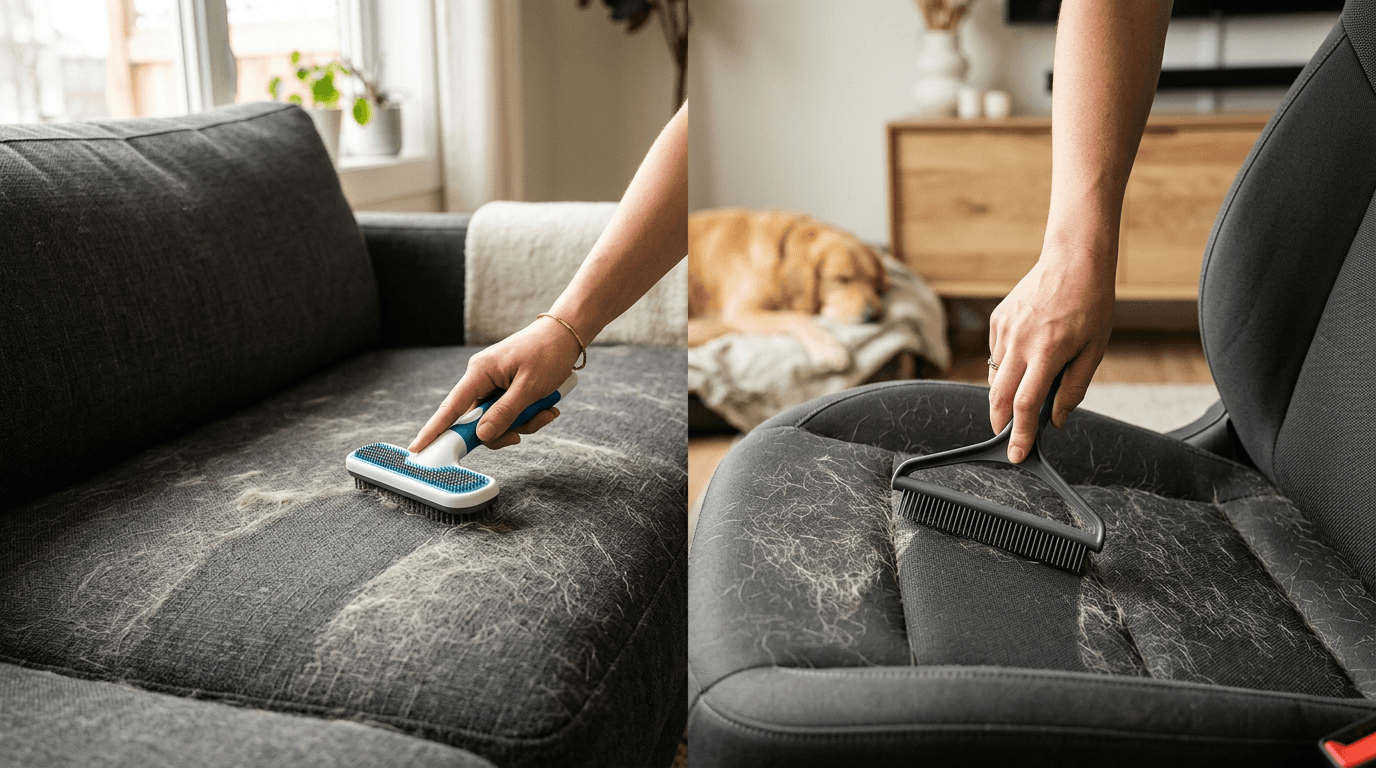
Breed-Specific Strategies (Because “Pet Hair” Isn’t One Problem)
Different coats leave different messes. Adjust your approach and you’ll clean faster.
[IMAGE_PLACEHOLDER_2]
Short, Stiff Hair (Labs, Pugs, Beagles): “Needles in Fabric”
What you’ll see:
- •Hair embedded in cloth seats like splinters
- •Vacuum alone leaves a “shadow” of hair
Best approach:
- Rubber brush/block first (aggressive but controlled)
- Vacuum with upholstery tool
- Repeat once
- Anti-static mist + final vacuum pass
Product-type recommendation:
- •A rubber curry-style remover + a vacuum with a stiff brush attachment
Common mistake:
- •Going straight to lint rollers. You’ll burn through sheets and still leave embedded hairs behind.
Double Coats (Huskies, Shepherds, Goldens): “Snowdrifts and Undercoat Clouds”
What you’ll see:
- •Fluffy hair accumulations under seats and in trunk
- •Seasonal blowouts that fill an entire vacuum canister
Best approach:
- •Focus on containment (covers + cargo liners)
- •Weekly quick clean: rubber tool + fast vacuum
- •Monthly deep clean: remove covers, vacuum rails, under-seat areas
Expert tip:
- •During seasonal shedding, brush outside every ride day. It’s faster than cleaning the car later.
Long, Fine Hair (Shih Tzu, Collie mixes): “Tangling and Threading”
What you’ll see:
- •Hair wrapped around seat rails
- •Hair collecting along stitching
Best approach:
- •Use detailing brush around rails first
- •Crevice tool second
- •Rubber tool on carpets to clump strands
Cat Hair (Any cat, especially short-haired): “Static-Glue Everywhere”
What you’ll see:
- •Hair clinging to seat backs and headrests
- •Hair that seems to reappear after vacuuming
Best approach:
- •Slightly damp microfiber wipe first to reduce static
- •Rubber tool second
- •Vacuum third
If your cat rides in a carrier:
- •Place the carrier on a washable blanket and clip it in, so hair stays on the blanket.
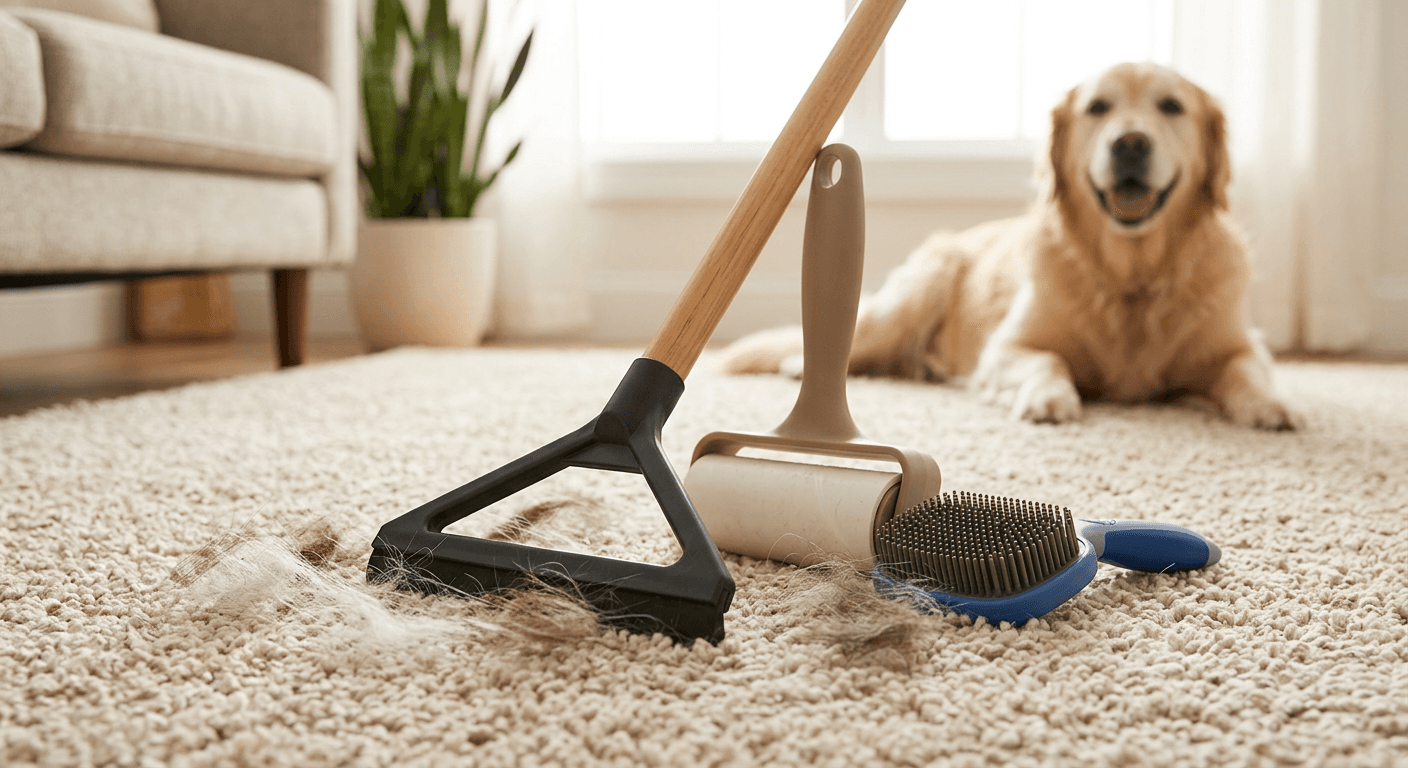
Product Recommendations and Comparisons (What’s Worth Buying)
You don’t need a garage full of tools. You need the right combination for your car interior material and your pet’s coat.
[IMAGE_PLACEHOLDER_3]
Best “One-Two Punch” Combo for Most People
- •Rubber hair remover (brush or block)
- •Strong vacuum with crevice + upholstery tools
Why this combo wins:
- •Rubber loosens embedded hair; vacuum removes it efficiently.
- •Works across cloth seats, carpets, and trunk liners.
- •Cuts cleaning time dramatically versus vacuum alone.
If You Have Cloth Seats (Most Hair-Prone)
Look for:
- •Rubber tool with a comfortable grip (you’ll use it a lot)
- •Vacuum with a stiff upholstery brush or mini motorized head
- •Portable car vacuum: convenient for quick maintenance, may struggle with embedded hair
- •Shop vac: best for deep cleans, less convenient to store/haul
- •Home canister vacuum: often a sweet spot if suction is strong and you have attachments
If You Have Leather or “Leatherette” Seats
Good news: hair is easier to remove from smooth surfaces.
Best tools:
- •microfiber towel (dry or slightly damp)
- •soft brush for seams
- •vacuum crevice tool for cracks
Mistake to avoid:
- •Scrubbing leather with pumice stone or abrasive rubber edges. Use gentle tools; let seams and cracks be handled by vacuum + brush.
Best Seat Cover Features (So Hair Doesn’t Become a Daily Job)
Choose a cover with:
- •water-resistant coating (wet dog + shedding = matted hair)
- •machine washable fabric
- •non-slip backing
- •full coverage with anchors and side flaps
Real-world scenario: Your Corgi sheds year-round and loves rolling mid-ride. A hammock cover prevents hair from dropping into the seat gap and makes cleanup as simple as removing the cover and shaking it out.
Common Mistakes That Make Pet Hair Worse (And How to Fix Them)
These are the “why is this not working?” traps I see all the time.
Mistake 1: Vacuuming First Without Agitating
Vacuuming alone often can’t lift embedded hair. Fix:
- •Rubber tool first, then vacuum.
Mistake 2: Using Too Much Water or Cleaner
Over-wetting fabric can:
- •push hair and dirt deeper
- •cause musty odors
- •leave sticky residues that attract more hair
Fix:
- •Use light mist only or a barely damp microfiber towel.
- •If you clean, follow with a dry towel and allow airflow.
Mistake 3: Ignoring Seat Rails and Buckle Wells
Hair collects where you can’t see it, then migrates out later.
Fix:
- •Crevice tool as step #1 in your vacuum sequence.
- •Slide seats fully forward/back to expose rails.
Mistake 4: Letting Hair Build Up for Months
Old hair compresses and becomes harder to remove.
Fix:
- •Adopt a maintenance schedule (next section) so deep cleans are rare.
Mistake 5: Skipping Pet Grooming
Your car isn’t the core problem—shedding is.
Fix:
- •Regular brushing, especially during coat blows.
- •Consider a de-shedding routine for double coats (but don’t overdo it; coat health matters).
Pro-tip: If your dog sheds heavily and has itchy skin or excessive dandruff, talk to your vet. Sometimes skin issues, diet imbalances, or parasites increase shedding and dander—making car hair much harder to manage.
Maintenance Routine: Keep Your Car “Hair-Free Enough” Without Obsessing
A realistic goal isn’t a sterile showroom. It’s a car that doesn’t leave you wearing your pet on your clothes.
The 5-Minute Weekly Reset
Once a week (or every 2–3 rides for heavy shedders):
- Rubber glove/brush over seat cover and visible carpet areas
- Quick vacuum of seams and floor mats
- Lint roll driver/passenger seat if you share the car
The 20-Minute Biweekly Clean
Every two weeks:
- Remove mats and shake out
- Rubber tool on carpets + seats
- Vacuum thoroughly with crevice tool and upholstery brush
The Monthly Deep Clean (Seasonal Shedders: Twice Monthly)
Once a month:
- •Remove and wash seat covers/blankets
- •Vacuum under seats and along rails
- •Detail vents and door pockets
- •Light fabric refresh (optional)
Real-world schedule example:
- •Husky in spring/fall: weekly reset + twice-monthly deep clean during coat blow
- •Lab year-round: weekly reset + monthly deep clean
- •Low-shedding Poodle mix: biweekly clean, focus more on dirt and dander than hair
Special Situations: Mud, Wet Coats, and Road Trips
Hair gets harder when it mixes with moisture, oils, and dirt. Here’s how to handle the common “pet car disasters.”
Wet Dog + Hair = Felted Mess
If your dog swims or gets rained on:
- Towel dry thoroughly before loading
- Use a water-resistant cover or add a dry blanket layer
- At home, remove the blanket/cover ASAP and let it dry
- Vacuum once dry—wet hair is harder to lift cleanly
Post-Park Sand and Burrs (The Hidden Hair Magnet)
Sand and plant debris wedge into fibers and trap hair.
Fix:
- •Brush your dog’s legs and belly before the ride (especially for spaniels and retrievers).
- •Vacuum sand first, then do rubber agitation for hair.
Road Trip Prep Checklist (So Hair Doesn’t Take Over)
Before you leave:
- •Brush your pet
- •Install clean seat cover
- •Pack: rubber glove, microfiber towels, lint roller, small vacuum (if you have one)
During the trip:
- •Quick shake-out at rest stops
- •Keep a trash bag for used lint sheets and hair clumps
After the trip:
- •Do a 20-minute clean while the hair is still fresh (don’t wait a week)
Quick Reference: Best Method by Surface
If you want the fastest decision-making:
- •Cloth seats: rubber tool → vacuum (stiff brush) → lint finish
- •Carpeted floors/trunk: rubber tool or pumice (gentle) → vacuum slow passes
- •Leather seats: microfiber wipe → crevice vacuum for seams
- •Seat cracks/rails: detailing brush → crevice tool → repeat with seats moved forward/back
- •Headliner (ceiling fabric): avoid aggressive rubbing; use light vacuum with soft brush and minimal pressure
Pro-tip: For headliners, less is more. Aggressive scrubbing can loosen adhesive and cause sagging—stick to gentle vacuuming and light linting.
Final Expert Tips for a Car That Stays Clean Longer
A few small habits make a huge difference in how often you need to remove pet hair from car interiors:
- •Keep a dedicated pet blanket over your seat cover; wash it weekly.
- •Use rubber mats where possible; hair releases more easily than from carpet mats.
- •Do a quick rubber-glove sweep after each ride for heavy shedders—it takes 60 seconds and prevents buildup.
- •Store a mini kit in the trunk so you can handle hair at the source (right after the ride).
- •Groom strategically: brush before the ride, not after you discover the mess.
If you want, tell me your car type (sedan/SUV), seat material (cloth/leather), and your pet’s breed/coat—and I’ll recommend the most efficient tool combo and a tailored cleanup routine.
Hair Removal Cluster
More in this topic
guide
How to Remove Pet Hair from Furniture and Clothes Fast

guide
Best robot vacuum for pet hair: what to look for in 2026
guide
How to Remove Pet Hair from Couch and Car Seats Without Damaging Fabric (A Comparison-Led Guide)
guide
Best Pet Hair Remover for Rugs and Carpet: What Actually Works (Real-World Guide)
guide
Pet Hair Removal Routine for Multi-Pet Homes: A Comparison-Led Guide That Actually Sticks
guide
Pet Hair Cleanup Routine for Small Apartments: A Fast Daily System That Actually Sticks
Frequently asked questions
What’s the best way to remove pet hair from car seats?
Start by loosening hair with a rubber glove or pet-hair brush, then vacuum slowly with a crevice tool to pull hair from seams. Finish with a lint roller or sticky tape for the remaining fine strands.
Why does pet hair stick so much in car upholstery?
Car fabrics often create static electricity, which makes hair cling tightly and resist normal vacuum suction. The tight weave and textured surfaces also trap hair deep in the fibers, especially in carpet and cloth seats.
How can I prevent pet hair buildup in my car?
Use a washable seat cover or hammock and keep a small brush or roller in the glove box for quick touch-ups. Brushing your pet before rides and doing a short weekly vacuum prevents heavy buildup and makes deep cleaning easier.
