

guide • Coat Care
Mat Prevention Routine for Behind Ears and Armpits (With Tool Tradeoffs)
A practical, comparison-led routine to prevent dog mats behind ears and armpits—plus the tool tradeoffs that matter for your coat type and schedule.
By Lucy Anderson • February 19, 2026 • 7 min read
Table of contents
- What actually matters in this comparison
- Friction + moisture load (the mat accelerators)
- Coat structure (what tangles into what)
- Skin sensitivity and “tug budget”
- Your real-world consistency
- Baseline criteria and scoring method
- Criteria
- The four workflows we’ll compare
- Side-by-side workflow analysis
- 1) Flexible pin brushing + comb check (the “gentle prevention” workflow)
- 2) Slicker-focused “quick-out” brushing (the “fast surface control” workflow)
- 3) Undercoat rake / dematting comb passes (the “power tool” workflow)
- 4) De-shedding tool maintenance (the “reduce the fuel” workflow)
- Cost, effort, and consistency tradeoffs
- Cost vs. precision
- Effort vs. risk
- Consistency beats intensity
- Which option wins by user profile
- If you have a doodle/poodle mix with tight curls
- If your dog is double-coated and the armpits pack with undercoat
- If your dog hates grooming and you’re rebuilding trust
- If you’re busy but consistent (you’ll do it daily if it’s fast)
- If you want fewer sessions and your dog sheds heavily
- Transition strategy if changing tools
- Step-down intensity, not up
- A practical 10-day transition plan
- If you’re switching from slicker-only to line-brushing
- Common decision mistakes
- Brushing the top layer and calling it done
- Overusing power tools in thin-skin zones
- Waiting until bath day
- Ignoring the harness/collar factor
- Trying to “win” against a mat in one sitting
- Final recommendation framework
- 1) What’s your dog’s mat pattern?
- 2) What’s your consistency reality?
- 3) How much discomfort will your dog tolerate?
Dog mats don’t form “everywhere evenly.” They cluster in friction zones—especially behind the ears and in the armpits—where movement, moisture, collar/harness rub, and fine undercoat meet. If your goal is to prevent dog mats behind ears, the winning strategy is not one miracle brush. It’s matching a repeatable micro-routine to your dog’s coat and your tolerance for time, tugging, and tool maintenance.
Below is a comparison-led guide that treats mat prevention like a workflow decision: what you do, with which tool, how often, and what tradeoffs you accept.
What actually matters in this comparison
The “best” mat-prevention routine is the one you can execute consistently without irritating your dog’s skin or patience. Behind ears and armpits are uniquely unforgiving, so focus on these variables:
Friction + moisture load (the mat accelerators)
- •Behind ears: collar rubbing, head shaking, ear wax/oil, damp ear fringe after walks or baths.
- •Armpits: harness strap friction, sweat and humidity, and constant limb motion.
If your dog regularly wears a harness, expect armpit mats to form faster than ear mats even on the same coat.
Coat structure (what tangles into what)
- •Fine, silky hair (e.g., spaniel-type feathering): tangles form from static and friction; gentle pin/flexible brushes often win.
- •Double coat (e.g., shepherd, retriever mixes): loose undercoat compacts at the base; rakes and controlled de-shedding help, but can over-strip if misused.
- •Curly/dense (e.g., doodles, poodles): mats start as tiny knots near skin; you need methodical line-brushing and often a comb check.
Skin sensitivity and “tug budget”
Even if a tool is effective, it fails if your dog starts dodging you. The best prevention plan keeps pulling low:
- •Short sessions
- •Lots of parting the coat (not dragging over it)
- •Stopping before you hit “fight or flight”
Your real-world consistency
A 2-minute daily routine beats a 30-minute session you do twice a month. The comparison below heavily weights repeatability.
Baseline criteria and scoring method
To compare routines fairly, we’ll score each approach 1–5 across the criteria that matter specifically for behind ears and armpits.
Criteria
- Mat prevention effectiveness (friction zones): How reliably it stops knots from becoming mats.
- Comfort (low tug/skin-friendly): Likelihood your dog tolerates it.
- Speed: Time to do both ears + both armpits.
- Learning curve: How easy it is for a normal owner to do correctly.
- Risk of coat/skin damage: Over-brushing, scratching skin, cutting with blades, etc.
- Maintenance burden: Cleaning the tool, replacing parts, keeping it sanitary.
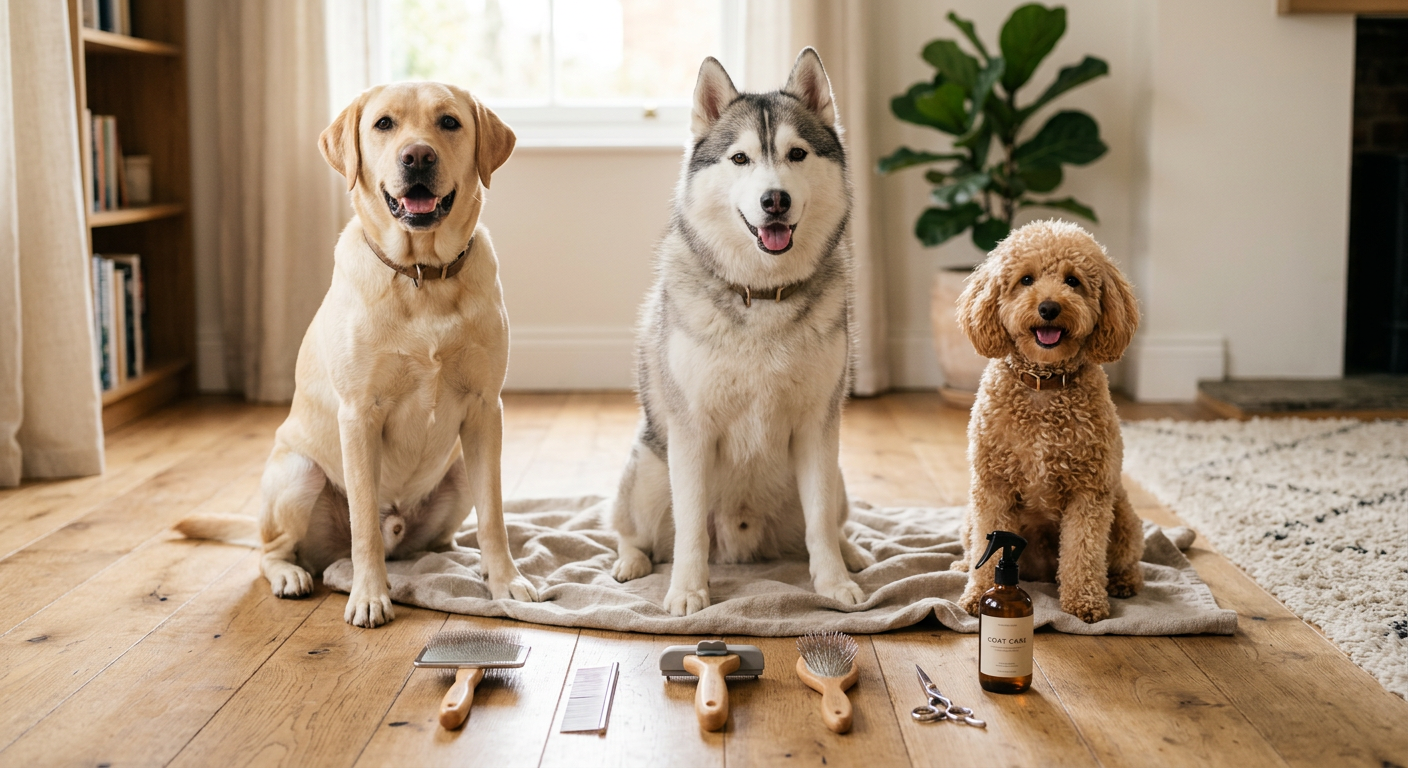
The four workflows we’ll compare
These are common owner patterns (not just tools):
- Flexible pin brushing + comb check (gentle, methodical)
- Slicker-focused “quick-out” brushing (fast surface control)
- Undercoat rake / dematting comb passes (power tool approach)
- De-shedding tool maintenance (undercoat management to prevent compaction)
Where relevant, I’ll reference specific tools so you can picture the tradeoffs, including: the Artero Double Flexible Brush (2 in 1) (S - Nature Collection), the Coastal Pet Safari - Cat Self-Cleaning Slicker Brush, the MalsiPree Dog Brush for Shedding - Large, Blue, 2-in-1, and the FURminator deShedding Tool For Medium/Large Cats, Short Hair.


Note: some listed tools are marketed for cats; owners still use similar designs on small dog friction zones. The tradeoff is size/feel—great control in tight areas, but you must use a light hand.
Side-by-side workflow analysis
Below are the four workflows, how to do them on behind ears and armpits, and where each wins/loses.
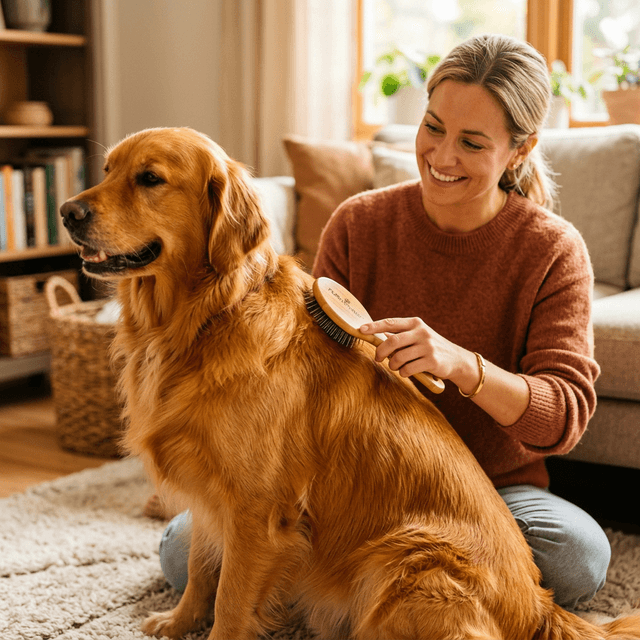
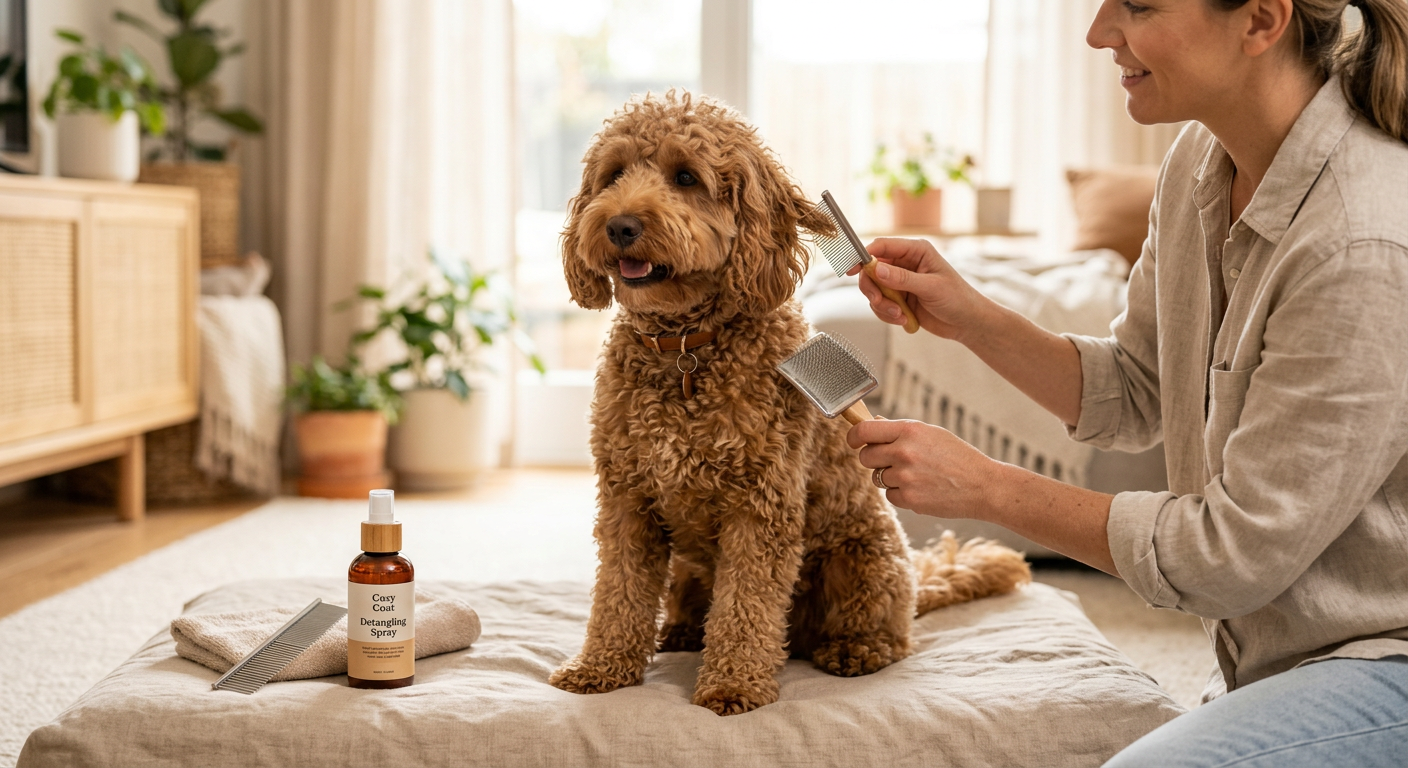
1) Flexible pin brushing + comb check (the “gentle prevention” workflow)
Best for: daily maintenance, sensitive dogs, silky or curly coats, puppies learning grooming.
How it works (behind ears + armpits):
- Part the hair with your fingers (especially behind the ear leather and in the armpit crease). You’re looking for tiny knots at the base.
- Use a flexible pin brush in short strokes, brushing from ends toward the base.
- Line-brush: lift a thin layer, brush that layer, then move up. Don’t sweep over the top.
- Finish with a quick finger check: if it still feels “gritty” at the base, keep working in tiny sections.
A compact flexible brush like the Artero Double Flexible Brush (2 in 1) (S - Nature Collection) is handy here because it bends with body contours—useful around ear edges and the armpit “pocket,” where rigid tools tend to scratch.

Tradeoffs (explicit):
- •Wins: Lowest tug, best for teaching cooperation, very low skin risk.
- •Loses: Slower than “power tools” if you already have tight knots; requires technique (parting/line-brushing).
Score (1–5): Effectiveness 4, Comfort 5, Speed 3, Learning curve 3, Damage risk 5, Maintenance 4.
Concrete scenario:
- •Your doodle’s armpits look fine, but when you pinch and roll the coat you feel tiny pellets near skin. This workflow stops those pellets from becoming a felted pad under the harness strap.
2) Slicker-focused “quick-out” brushing (the “fast surface control” workflow)
Best for: moderate feathering, owners who will actually do 2 minutes daily, dogs that tolerate brushing well.
How it works:
- Behind ears: fold the ear gently forward, support the ear base with your hand, and use quick, light slicker strokes away from the skin.
- Armpits: extend the leg slightly, brush the outer armpit hair first, then carefully reach into the crease with minimal pressure.
- Stop immediately if you see redness or your dog flinches—slickers can irritate thin skin fast.
A small self-cleaning slicker like the Coastal Pet Safari - Cat Self-Cleaning Slicker Brush can be surprisingly useful in tight zones because it’s compact and easy to clear mid-session. The tradeoff is that slicker pins can scratch if you press or brush too long in one spot.

Tradeoffs (explicit):
- •Wins: Fast, satisfying, removes surface tangles and debris quickly.
- •Loses: Easy to overdo; can create brush burn; may miss base-level knots that later become mats.
Score: Effectiveness 3, Comfort 3, Speed 5, Learning curve 4, Damage risk 3, Maintenance 5.
Concrete scenario:
- •Your spaniel mix gets “sticky” behind the ears after daycare. A 60-second slicker session removes the early fuzz-tangles—if you keep pressure light and don’t rely on it as your only tool.
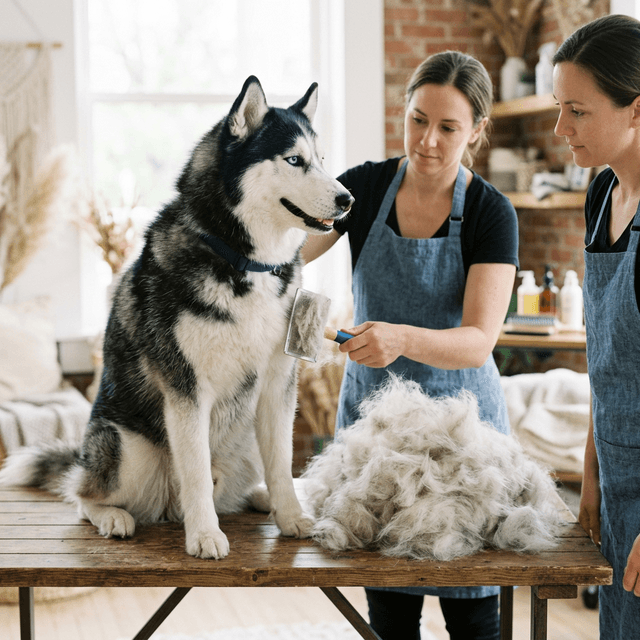
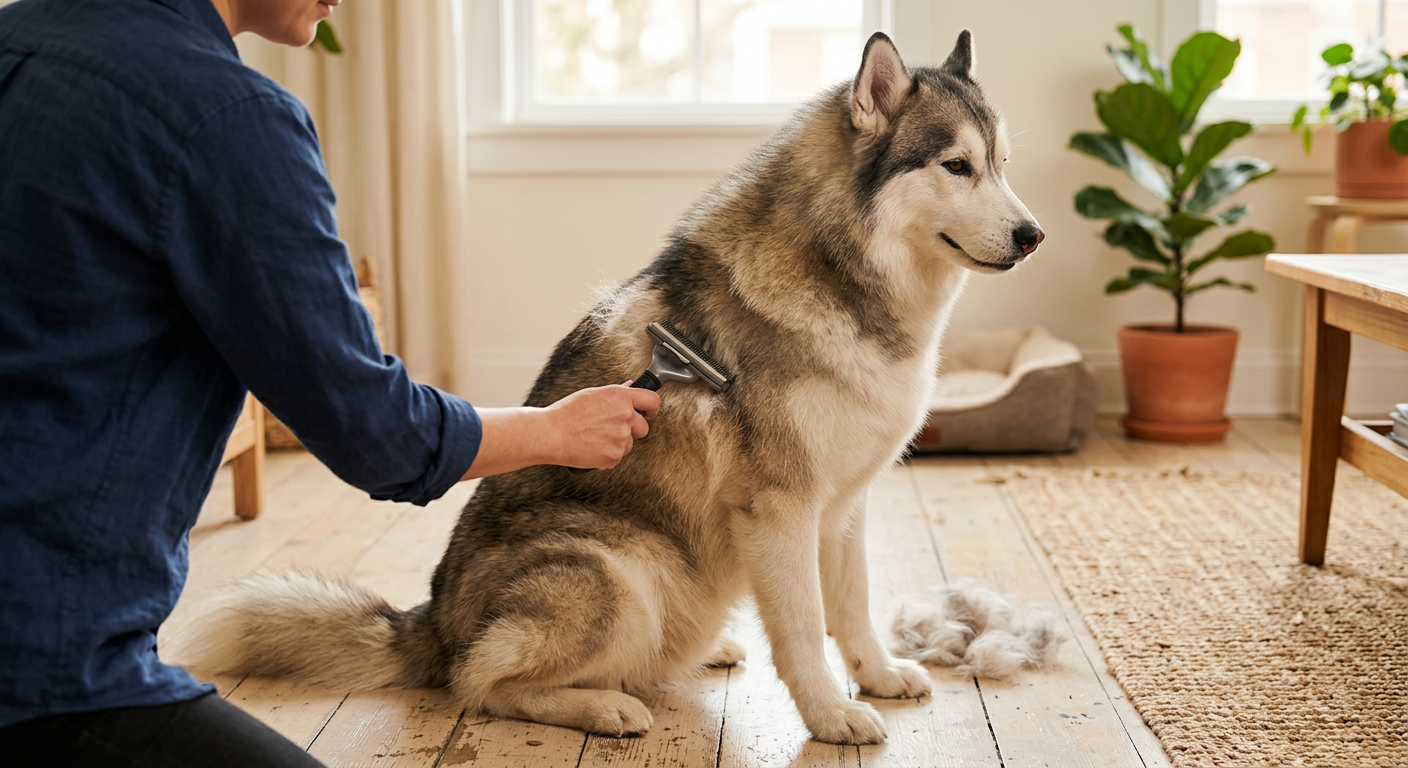
3) Undercoat rake / dematting comb passes (the “power tool” workflow)
Best for: double-coated dogs with compaction in armpits, owners who can use restraint, dogs not prone to skin irritation.
How it works:
- Use the rake side for undercoat lift, then switch to a dematting comb only if you can isolate a small knot.
- Work parallel to the skin, not digging down. Think “lift loose coat out,” not “saw through.”
- In armpits, limit to a few passes—this area is thin-skinned and easy to abrade.
A dual tool like the MalsiPree Dog Brush for Shedding - Large, Blue, 2-in-1 matches this workflow: it’s effective at pulling packed undercoat that fuels mats. The downside is exactly that power—too many passes can thin coat and irritate skin.

Tradeoffs (explicit):
- •Wins: High effectiveness when undercoat compaction is the root cause; can “reset” an area after a missed week.
- •Loses: Highest risk if you rush; can be uncomfortable; not ideal for daily friction zones unless you’re very gentle.
Score: Effectiveness 4, Comfort 2, Speed 4, Learning curve 3, Damage risk 2, Maintenance 4.
Concrete scenario:
- •Your husky mix wears a harness daily and you keep finding dense fluff clumps in the armpits. A controlled undercoat rake session once a week prevents that fluff from felting—then you maintain daily with a softer brush.
4) De-shedding tool maintenance (the “reduce the fuel” workflow)
Best for: heavy shedders where loose hair drives matting, owners who prefer fewer tools and predictable weekly sessions.
How it works:
- Use sparingly: a few passes in the friction zone to remove loose undercoat that compacts.
- Follow with a gentler brush for finish and comfort.
- Avoid repeated passes behind ears/armpits—skin is thin, and over-de-shedding can make coat feel “prickly,” increasing friction.
A de-shedding tool like the FURminator deShedding Tool For Medium/Large Cats, Short Hair illustrates the tradeoff: it can pull a lot of loose hair quickly, but it’s easy to overuse. In tight dog areas, many owners prefer smaller tools for control; the caution is the same—light pressure, low repetitions.
Tradeoffs (explicit):
- •Wins: Reduces loose-hair buildup that turns into compaction; fast weekly “reset.”
- •Loses: Overuse can thin coat and irritate skin; not a stand-alone solution for curly coats that mat at the base.
Score: Effectiveness 3, Comfort 3, Speed 4, Learning curve 4, Damage risk 2, Maintenance 4.
Concrete scenario:
- •Your lab mix doesn’t “mat” like a doodle, but the armpits get packed with shedding undercoat in spring. A light de-shed pass weekly reduces the clumps that later tangle.
Cost, effort, and consistency tradeoffs
Mat prevention succeeds when the routine is cheap enough, fast enough, and comfortable enough that you keep doing it.
Cost vs. precision
- •Lower-cost slickers can work well, especially compact ones for tight areas (like the Coastal Pet Safari - Cat Self-Cleaning Slicker Brush), but the tradeoff is they punish poor technique (too much pressure).
- •More ergonomic flexible brushes (like the Artero Double Flexible Brush (2 in 1) (S - Nature Collection)) can reduce resistance from your dog, which often matters more than the price tag.
Effort vs. risk
- •The more “aggressive” the tool (rake, dematting comb, de-shed blade), the less effort you feel—and the more risk you assume in friction zones.
- •If your dog has ever had red armpits, chronic itching, or thin skin, choose comfort-first tools and accept that you’ll need more frequent, lighter sessions.
Consistency beats intensity
If you can only commit to one thing, commit to a 2-minute friction-zone check after high-risk triggers:
- •After bath/swim (damp coat felts faster)
- •After daycare (rough play + saliva)
- •After long harness walks
That mini-check is the most reliable way to prevent dog mats behind ears because you intercept knots while they’re still “soft.”
Which option wins by user profile
Use these profiles to pick a workflow you’ll actually maintain.
If you have a doodle/poodle mix with tight curls
- •Winner: Flexible pin brushing + comb check (Workflow 1)
- •Why: Curly coats mat at the base; surface brushing misses the problem.
- •Accept this tradeoff: More technique and a few extra minutes.
If your dog is double-coated and the armpits pack with undercoat
- •Winner: Undercoat rake in small doses (Workflow 3) + gentle maintenance
- •Why: Removing the “fuel” (loose undercoat) prevents compaction mats.
- •Accept this tradeoff: Higher skin risk if you rush; keep passes minimal.
If your dog hates grooming and you’re rebuilding trust
- •Winner: Flexible pin brushing (Workflow 1)
- •Why: Lowest discomfort; best for cooperative care.
- •Accept this tradeoff: Slower progress; you may need multiple micro-sessions.
If you’re busy but consistent (you’ll do it daily if it’s fast)
- •Winner: Slicker-focused quick routine (Workflow 2)
- •Why: Speed drives consistency.
- •Accept this tradeoff: You must keep pressure light and still do periodic deeper checks.
If you want fewer sessions and your dog sheds heavily
- •Winner: Light de-shedding maintenance (Workflow 4)
- •Why: Weekly reset prevents clumps.
- •Accept this tradeoff: Not enough alone for curly coats; easy to overuse.
Transition strategy if changing tools
Switching tools is where many dogs decide “grooming is bad.” Transition like you would to a new harness: gradual, predictable, and reward-heavy.
Step-down intensity, not up
If you’re moving from a rake/dematting comb to a gentler brush, you’ll often see fewer dramatic results per session. That’s good. You’re trading intensity for comfort.
A practical 10-day transition plan
- •Days 1–3: Use your new tool for 30–60 seconds on one area only (e.g., just behind ears). Stop before your dog squirms.
- •Days 4–7: Add armpits, still short sessions. Touch/hold the ear and lift the leg briefly even if you don’t brush much—handling practice prevents future fights.
- •Days 8–10: Increase to a full friction-zone routine (both ears + both armpits). Add a “comb check” with your fingers: pinch and slide down the hair; if it catches, keep working.
If you’re switching from slicker-only to line-brushing
Expect a short “skill gap” where it feels slower. The tradeoff pays off when the coat stays mat-free longer between sessions.
Common decision mistakes
These are the repeat offenders that turn small tangles into shaved armpits at the groomer.
Brushing the top layer and calling it done
If the coat looks smooth but you can feel grainy clumps near skin, mats are forming underneath. This is the #1 reason owners think they’re brushing “every day” yet still get mats.
Overusing power tools in thin-skin zones
Armpits and behind ears get irritated easily. If you see redness, dandruff flakes, or your dog starts reacting, your tool choice may be too aggressive for the frequency.
Waiting until bath day
Water tightens tangles. Bathing a coat with early mats is like running hot water over a knotted sweater: it shrinks the problem.
Ignoring the harness/collar factor
If mats keep returning in the same spots, fix the friction:
- •Adjust harness fit
- •Rotate to a different strap layout
- •Take the harness off indoors
Trying to “win” against a mat in one sitting
Mat prevention is not a battle. If you hit a snag, stop and reset with smaller sections. If you pull through pain, you lose your dog’s trust—and future sessions get harder.
Final recommendation framework
Pick a routine by answering three questions, then commit to the matching workflow for 3 weeks before you judge results.
1) What’s your dog’s mat pattern?
- •Tiny base-level knots in friction zones: Choose Workflow 1 (flexible pin + parting).
- •Packed shedding clumps, especially in armpits: Choose Workflow 3 or 4 in moderation.
- •Mostly surface tangles after activity: Choose Workflow 2, but schedule deeper checks.
2) What’s your consistency reality?
- •Daily 2 minutes is realistic: Workflow 2 or 1.
- •Weekly 15 minutes is realistic: Workflow 1 for curly coats; Workflow 4 for shedding-heavy coats; add a 30-second midweek check.
3) How much discomfort will your dog tolerate?
- •Low tolerance / sensitive skin: Workflow 1 with a flexible brush like the Artero Double Flexible Brush (2 in 1) (S - Nature Collection).
- •Moderate tolerance / you need speed: A compact slicker used gently, such as the Coastal Pet Safari - Cat Self-Cleaning Slicker Brush.
- •High shedding driving compaction: Consider a controlled “reset” tool like the MalsiPree Dog Brush for Shedding - Large, Blue, 2-in-1 or a light de-shed approach with a tool like the FURminator deShedding Tool For Medium/Large Cats, Short Hair—with the explicit tradeoff that overuse increases irritation risk.
If you want the simplest “one sentence” framework: choose the gentlest tool you’ll actually use often, then add a stronger tool only when undercoat compaction is the proven cause.
Coat Care Cluster
More in this topic
guide
Best Dog Brush by Coat Type: Pick the Right Tool Fast
guide
Deshedding Double Coated Dogs: The Ultimate Guide
guide
5 Cat Grooming Tips: Signs Your Cat Needs Better Coat Care
guide
Best Grooming Routine by Coat Type: Short, Double, and Curly Coats (Behavior-First Guide)
guide
De-Shedding Routine for Double-Coat Breeds: A Weekly System That Works
guide
Curly Coat Detangling Routine: Prevent Mats Without Over-Brushing
Frequently asked questions
Why do mats form behind my dog’s ears so quickly?
Behind the ears is a high-friction, high-oil area: collars rub, ears move and trap humidity, and natural skin oils/wax make hair clump. Fine undercoat and long fringe twist together with head shaking, so small knots become felted mats fast unless you part the hair and brush near the base regularly.
Should I cut out armpit mats or brush them out?
If the mat is tight to the skin, cutting can be risky because armpit skin is thin and easy to nick—especially if the mat hides skin folds. For small, early tangles, gentle section-by-section brushing is safer. For thick, close mats, a professional groomer (or vet clinic groom-out) is often the safest choice. Prevention is the real win: short, frequent friction-zone sessions and reducing harness rubbing.
How often should I groom behind ears and armpits to prevent matting?
For many dogs, 2 minutes daily (both ears + both armpits) is enough to prevent mats—especially after high-risk events like baths, swimming, daycare, or long harness walks. Curly/dense coats often need daily checks plus a more thorough line-brush session weekly. Double coats may do well with gentle daily checks and a weekly undercoat-focused session during heavy shedding.
