
guide • Coat Care
Best Grooming Routine by Coat Type: Short, Double, and Curly Coats (Behavior-First Guide)
Build a grooming routine by coat type that actually works—short, double, and curly coats—using low-stress sequencing, the right tools, and realistic maintenance plans.
By Lucy Anderson • March 1, 2026 • 7 min read
Table of contents
- Pet behavior signals that shape the routine
- Green-light signals (continue, add a little time)
- Yellow-light signals (reduce intensity, change the plan)
- Red-light signals (stop and reset)
- Behavior changes the “best” routine for each coat type
- Low-stress setup before any tool is used
- Pick the right location by species and personality
- Control friction and movement
- Pre-load reinforcement (make the first minute easy)
- Decide your session goal (one goal only)
- Handling protocol for better compliance
- Consent-based positioning (works for cats and dogs)
- Pressure rules that prevent escalation
- Where to start (and where to avoid early)
- Micro-breaks are not “giving in”
- Tactical workflow by session phase
- Phase 1: Warm-up (30–90 seconds)
- Phase 2: Baseline pass (the easiest strokes)
- Phase 3: Targeted work (high value, higher sensitivity)
- Phase 4: Verification (the “comb test”)
- Phase 5: Cool-down (end the session without drama)
- Product choices by temperament and tolerance
- For short coats: low-friction tools and short sessions
- For double coats: undercoat strategy without skin irritation
- For curly coats: gentleness plus verification
- Error recovery after a bad session
- Step 1: Stop while you can still reinforce
- Step 2: Identify the trigger (be specific)
- Step 3: Rebuild with “no-tool” sessions
- Step 4: Make the next real session easier than you think
- Progress tracking template
- How to score stress (0–5)
- What “progress” looks like in real life
- Practical long-term maintenance plan
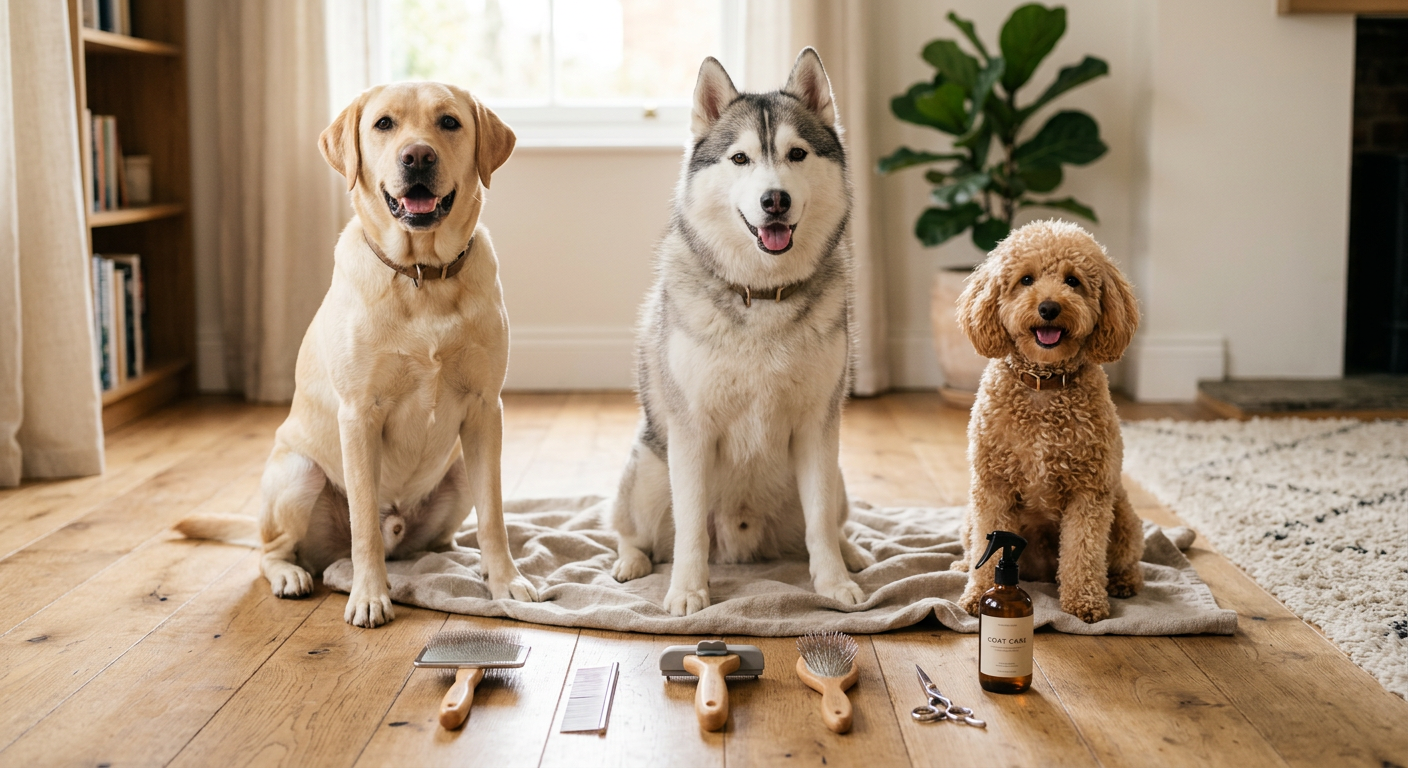
- Short coats (most short-haired cats, many smooth-coated dogs)
- Double coats (heavy shedders with undercoat)
- Curly coats (high mat risk)
- When to bring in a pro (and why it helps behavior)
Grooming isn’t just “removing hair.” For most pets, it’s a handling event—meaning comfort, predictability, and choice matter as much as the brush. This guide walks you through a behavior-first grooming routine by coat type (short, double, and curly) with session sequencing, tradeoffs, and real-world fixes for the pets who don’t love being groomed yet.
Pet behavior signals that shape the routine
Your best grooming routine by coat type starts with a quick read of your pet’s body language. Coat needs tell you what tools you’ll use; behavior tells you how long you can use them.
Green-light signals (continue, add a little time)
- •Loose muscles, soft eyes, normal breathing, leaning into the brush
- •Choosing to stay on the mat/table without restraint
- •Taking treats between strokes, returning to position after a short break
Yellow-light signals (reduce intensity, change the plan)
- •Turning head to watch the tool, mild lip lick, quick shake-off, tense paws
- •Tail thump, ears partially back, pupils larger than normal
- •“Scooting away” but still willing to re-approach if you pause
What to do: shorten stroke length, switch to a gentler tool, move to an easier body zone (shoulders/back), or swap to a “touch-only” minute.
Red-light signals (stop and reset)
- •Growl, hiss, snapping, yowling, swatting, repeated escape attempts
- •Hard stare, freezing, whale eye, rapid panting unrelated to heat/exercise
- •Skin twitching strongly when touched, or pain signs (yelping, sudden guarding)
What to do: end the session cleanly (one treat, tool disappears), note what triggered it, and plan an easier next attempt. If pain is possible (sudden sensitivity, new aggression, skin sores), contact your vet before resuming.
Behavior changes the “best” routine for each coat type
- •Short coats: physically quick to groom, but many cats/dogs dislike repetitive strokes. Behavior-first routine = ultra-short sessions, high predictability.
- •Double coats: tangles/undercoat can create discomfort fast if you hit resistance. Behavior-first routine = frequent micro-sessions and strategic tool choice to avoid “yanking.”
- •Curly coats: matting can be painful; the biggest behavior win is preventing mats so you don’t have to fight them later. Behavior-first routine = consistency over intensity.
Low-stress setup before any tool is used
A calm setup prevents the “I saw the brush” reaction. The goal is to make grooming feel like a predictable pattern, not a surprise event.
Pick the right location by species and personality
- •Many cats do best on a stable surface with traction (yoga mat on a table) so they don’t feel like they’ll slip.
- •Many dogs do best on the floor at first (less intimidating), then graduate to a grooming table later.
- •For pets who startle: choose a quiet room, close the door, and remove visual triggers (vacuum, loud dryer, other pets).
Control friction and movement
Slipping is a common hidden stressor. Put down a non-slip mat. If your pet “pancakes” or spreads their toes, they may be bracing because they feel unstable.
Pre-load reinforcement (make the first minute easy)
Before you touch a tool:
- •Deliver 3–5 tiny treats for simply standing/sitting on the mat.
- •Practice one brief “chin rest” or “hand target” (touch nose to your hand) to create a cooperative start cue.
Decide your session goal (one goal only)
A common mistake is stacking goals: “brush + nails + ears + bath.” For better tolerance, pick one:
- •Short coat: remove loose hair from back and hips only.
- •Double coat: undercoat pass on one side only.
- •Curly coat: line-brush one section (e.g., one front leg) and stop.
Handling protocol for better compliance
Your handling strategy is the foundation. Tools are secondary.
Consent-based positioning (works for cats and dogs)
Use a predictable cue like “ready?” and wait one beat. If your pet stays, you proceed. If they step away, you pause. This builds trust and reduces the need for restraint.
Pressure rules that prevent escalation
- •Use the minimum pressure that still moves hair. If skin pulls or ripples, you’re pressing too hard or hitting a snag.
- •If you feel resistance, stop and change angle or tool—don’t power through.
Where to start (and where to avoid early)
Start with low-conflict zones:
- •Shoulders, upper back, chest (for many dogs)
- •Cheeks and head rubs (for some cats), then back
Avoid early in the session:
- •Belly, armpits, groin, tail base (high sensitivity)
- •Matted spots (pain risk)
Micro-breaks are not “giving in”
A 3-second pause every 20–40 seconds can prevent a full meltdown. Think of breaks as part of the protocol, not a reward for avoidance.
Tactical workflow by session phase
This is the behavior-informed sequencing that makes a grooming routine by coat type feel manageable. Each phase has a purpose, and you can end after any phase while still “winning” the session.
Phase 1: Warm-up (30–90 seconds)
Goal: predictability.
- •Show the tool briefly, then place it behind your back.
- •Touch your pet with your empty hand in the area you plan to groom.
- •Treat after 2–3 calm seconds.
Scenario: Your cat runs when you grab a brush. Start by holding the brush in one hand while feeding with the other, without brushing at all for the first 2–3 sessions.
Phase 2: Baseline pass (the easiest strokes)
Goal: remove hair without hitting snags.
- •Short coats: long, gentle strokes in the direction of hair growth; stop before your pet gets “over it.”
- •Double coats: topcoat smoothing first, then undercoat tool later.
- •Curly coats: section the coat with your hand and start line-brushing from the ends, not the skin.
Example tools to match this phase:
- •For short-haired shedding in cats, the FURminator deShedding Tool For Medium/Large Cats, Short Hair, Removes Loose Hair From Shedding can be effective, but only in brief, low-pressure passes. If your cat’s skin gets pink or they start tail-flicking fast, stop and switch to gentler brushing.

Phase 3: Targeted work (high value, higher sensitivity)
Goal: address the “problem zones” in tiny doses.
Short coats (cats/dogs):
- •Focus zones: hips, lower back, behind shoulders where hair collects.
- •Tradeoff: aggressive deshedding can irritate skin; it’s better to do 2 minutes daily than 15 minutes weekly.
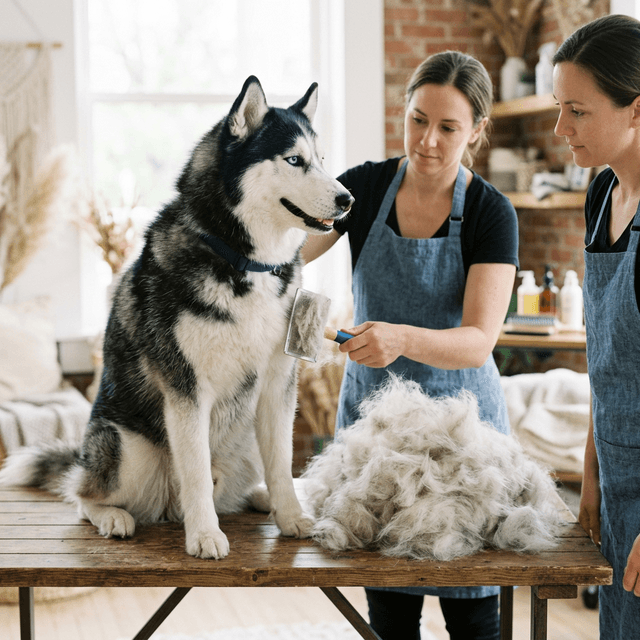
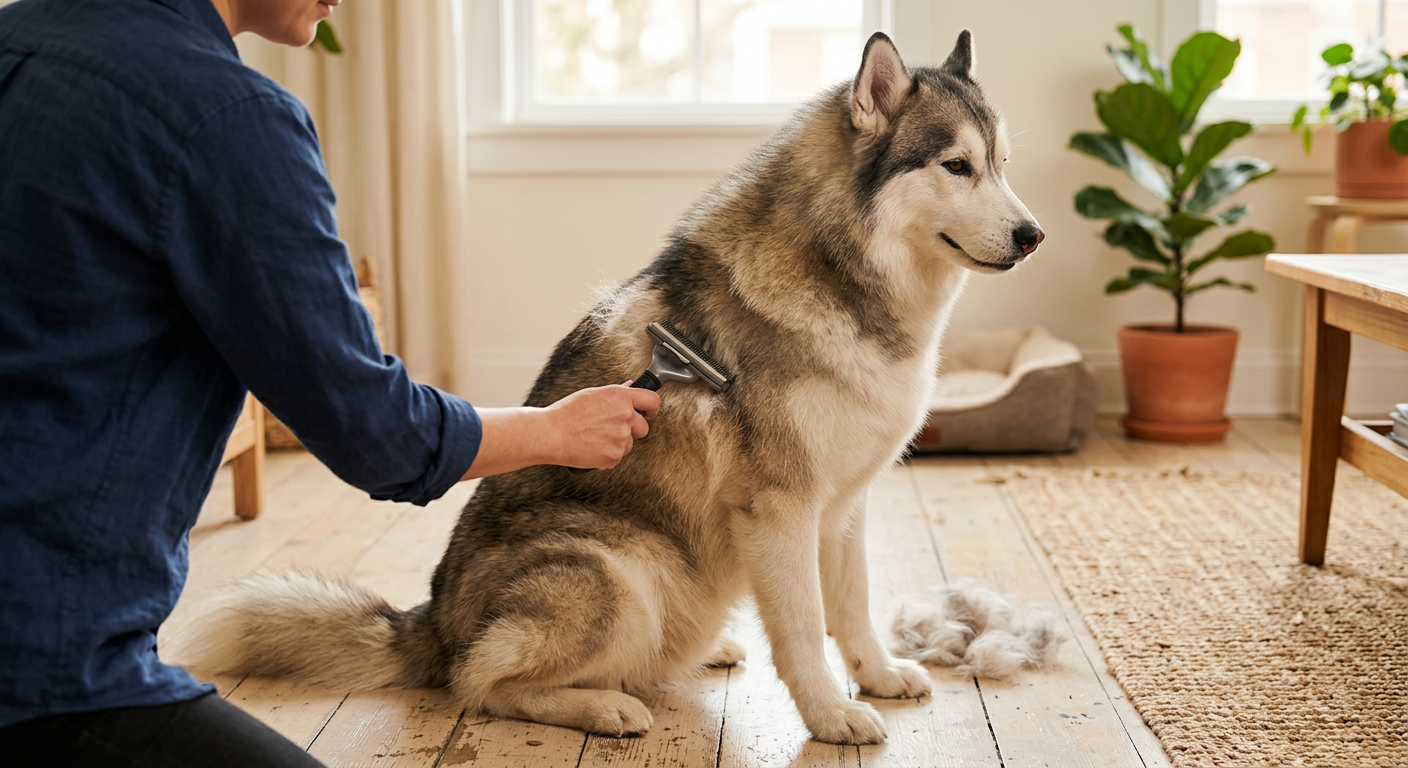
Double coats (dogs like Huskies, Shepherds, many mixes):
- •Focus zones: ruff, behind ears, pants, tail base.
- •Use an undercoat rake carefully; if it catches repeatedly, you may be in a compacted undercoat area that needs shorter strokes and multiple sessions.
- •A versatile option for many double-coated dogs is the MalsiPree Dog Brush for Shedding - Large, Blue, 2-in-1 - Deshedding Dog Grooming Brush & Undercoat Rake with Dematting Comb for medium to Large Double Coated. Use the rake side for undercoat in short, controlled pulls; use the comb side to confirm you’re not leaving tangles behind.

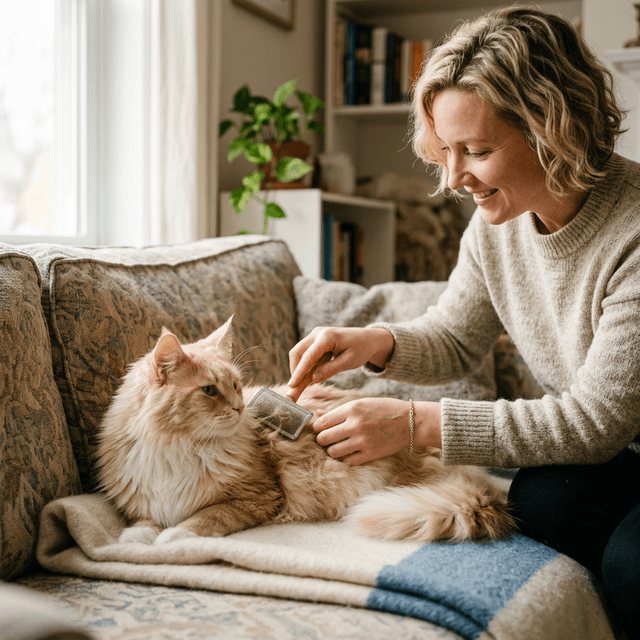
Curly coats (Poodles, Doodles, Bichons, Portuguese Water Dogs):
- •Focus zones: armpits, collar area, behind ears, legs, sanitary areas.
- •Tradeoff: skipping comb checks lets mats hide near the skin. Curly coats can look “fine” on top while matting underneath.
- •For sensitive pets, a flexible brush can reduce harsh pressure; consider the Artero Double Flexible Brush (2 in 1) (S - Nature Collection) for gentler daily maintenance, then follow with a comb check.

Phase 4: Verification (the “comb test”)
Goal: confirm you’re done, not just tired.
- •Short coat: run your hand against the grain; if you get a “snowfall,” you need another short session tomorrow.
- •Double coat: use a comb in high-friction zones; if it snag-stops, that’s a tangle to work gradually.
- •Curly coat: do a section-by-section comb-through to the skin in mat-prone areas.
Phase 5: Cool-down (end the session without drama)
Goal: teach your pet grooming ends predictably.
- •Put the tool away (out of sight), then give a chew or lick treat.
- •Add a consistent “all done” cue.
- •Avoid immediately doing something they hate (like nail trims) right after a grooming win.
Product choices by temperament and tolerance
The “best” tools depend on coat type and on how your pet handles touch, sound, and restraint.
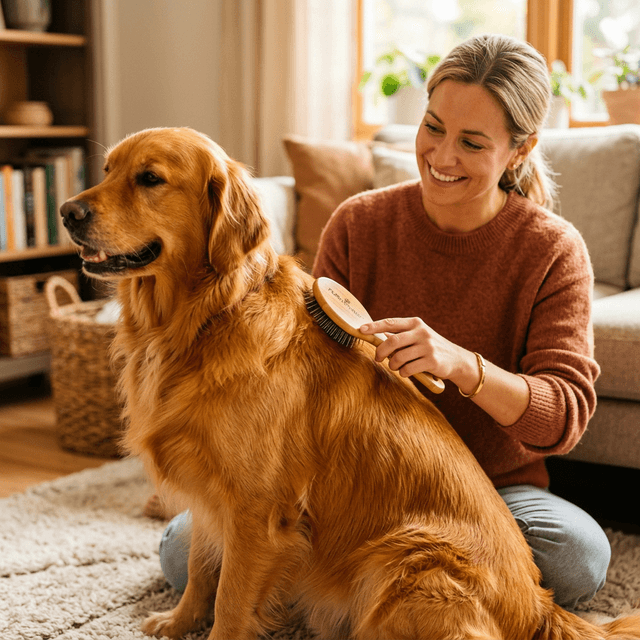
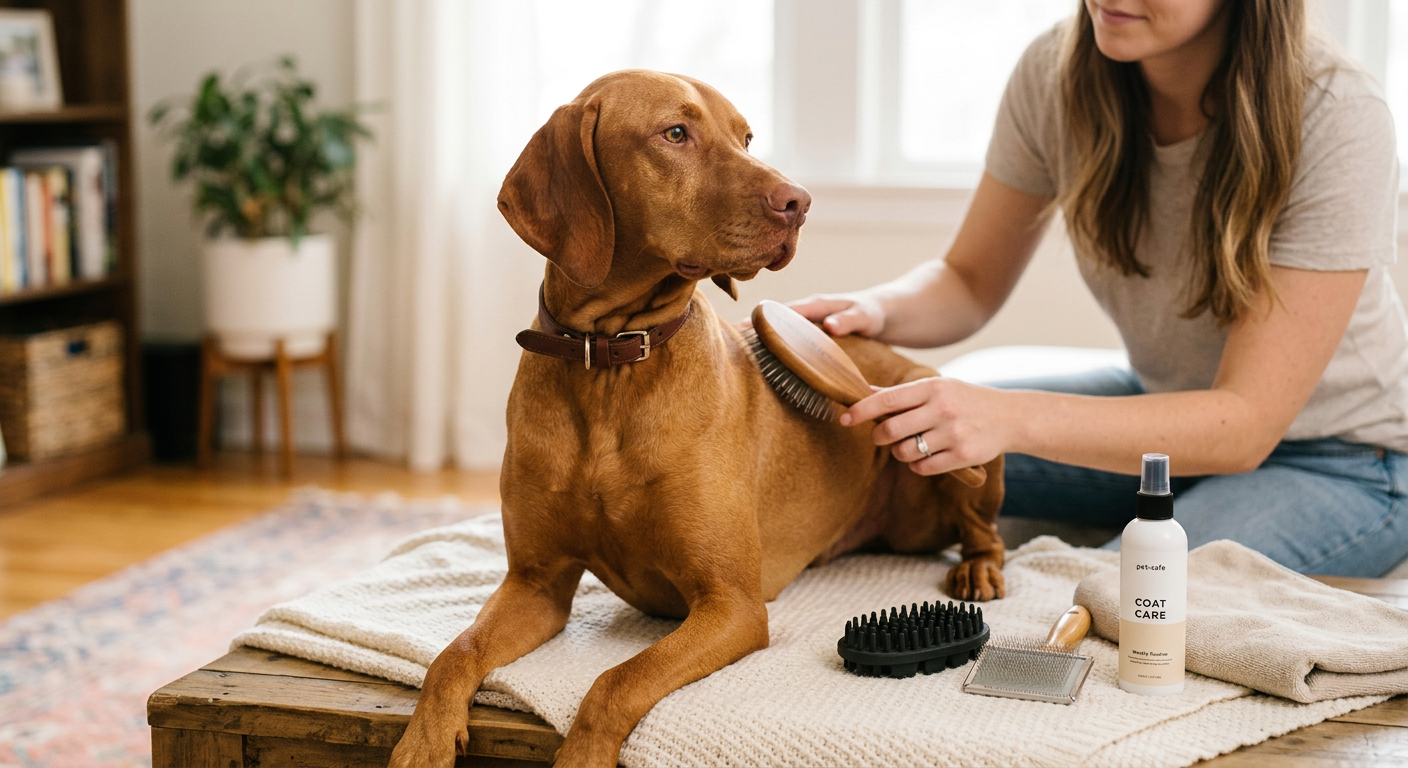
For short coats: low-friction tools and short sessions
- •If your pet tolerates brushing but hates hair pulling, choose a slicker with soft pins and use feather-light pressure.
- •For cats who shed heavily but get overstimulated easily, a self-cleaning slicker can help you keep sessions short because you spend less time removing hair from the brush.
A practical option for many cats is the Coastal Pet Safari - Cat Self-Cleaning Slicker Brush - Cat Grooming Supplies. It’s especially useful if you’re doing 60–90 second sessions a few times per week and want quick reset between passes.


Decision criteria:
- •Choose slicker if: coat is short-to-medium, you’re doing light maintenance, your pet dislikes “raking.”
- •Choose deshedding tool if: shedding is extreme and your pet tolerates it; limit to short durations and watch skin closely.
For double coats: undercoat strategy without skin irritation
Double coats need a tool that can reach loose undercoat without scraping.
Decision criteria:
- •Choose an undercoat rake/2-in-1 tool if: you’re seeing compacted fluff, seasonal blowouts, or “tufts” along the hindquarters.
- •Avoid long, forceful pulls if your pet tenses; use shorter strokes and work in layers.
Temperament matching:
- •Wiggly dogs: use a tool that clears hair quickly so you can end before they get fed up (shorter sessions, more often).
- •Touch-sensitive dogs: prioritize a softer topcoat brush first, then brief undercoat work.
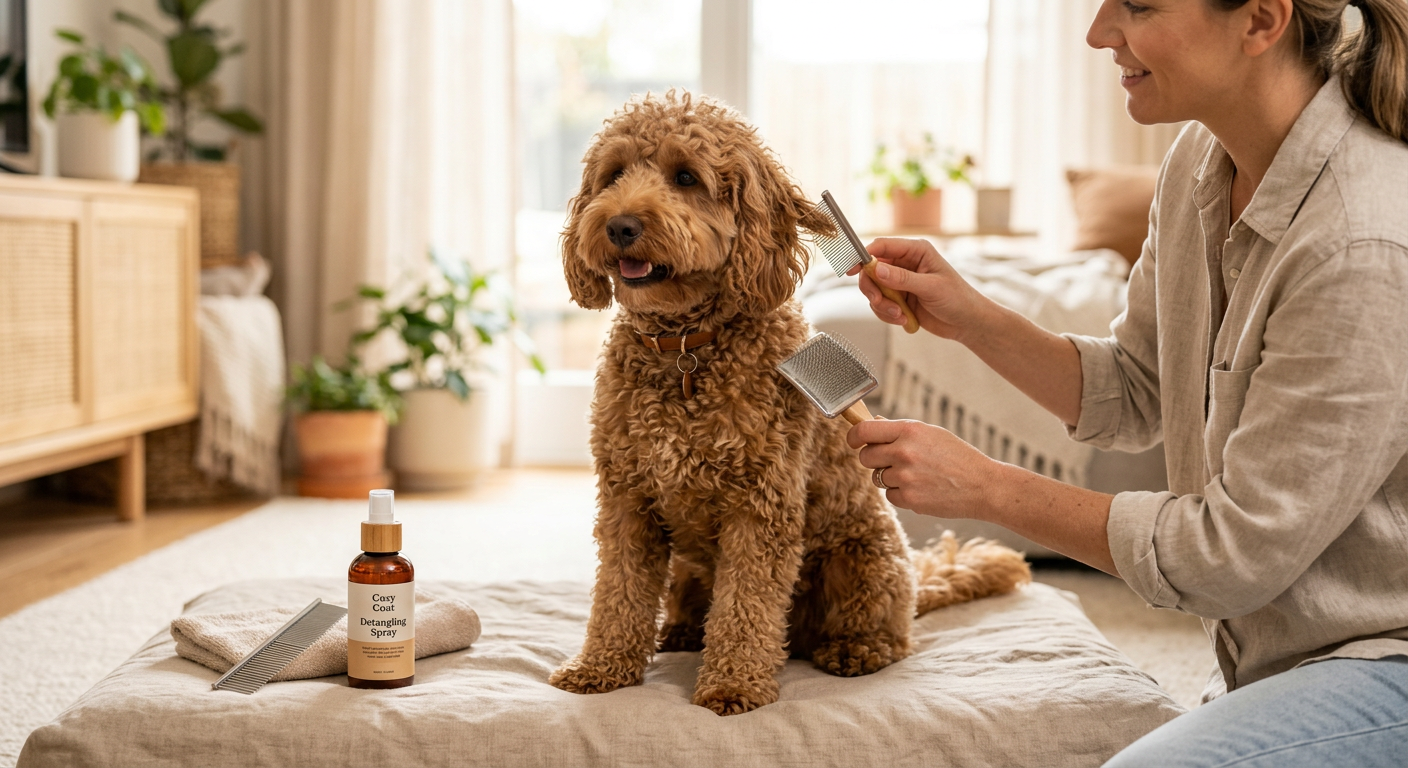
For curly coats: gentleness plus verification
Curly coats often require both brushing and combing. If your dog hates tugging, your routine should prioritize mat prevention rather than “fixing” mats later.
Decision criteria:
- •Choose a flexible brush if: your dog flinches with rigid slickers or you’re doing frequent maintenance.
- •Use a comb check if: you want to avoid surprise mat shaving at the groomer.
A flexible daily brush like the Artero Double Flexible Brush (2 in 1) (S - Nature Collection) pairs well with short, calm line-brushing sessions.
Error recovery after a bad session
Bad sessions happen: you hit a mat, your cat swats, your dog panics at the sound of a tool. Recovery is about protecting trust.
Step 1: Stop while you can still reinforce
Don’t chase “one more stroke.” End with a treat toss away from you so your pet can create distance and decompress.
Step 2: Identify the trigger (be specific)
Write down what happened right before the blow-up:
- •Body zone (tail base? armpit?)
- •Tool type (rake? slicker?)
- •Handling (did you hold the collar? lift a leg?)
- •Duration (was it minute 1 or minute 12?)
This matters because the fix is often simple. Example: If your dog was fine until you lifted the back leg, you may need to train leg handling separately from brushing.
Step 3: Rebuild with “no-tool” sessions
For the next 2–5 sessions:
- •Bring your pet to the grooming spot
- •Do hand touches only (or show the tool but don’t use it)
- •Reward calm behavior
- •End quickly
This resets the pattern so grooming doesn’t predict discomfort.
Step 4: Make the next real session easier than you think
- •Cut your goal in half (or to one body section)
- •Start in the easiest zone
- •Use the gentlest tool you own
If mats are driving the conflict, consider professional grooming to get back to baseline, then maintain at home.
Progress tracking template
Tracking keeps you honest and prevents “we’re failing” feelings. You’re looking for tiny improvements in tolerance and time.
Use this simple log (notes app or paper):
- •Date:
- •Coat type: short / double / curly
- •Session length (seconds):
- •Tools used:
- •Zones touched:
- •Stress level (0–5):
- •Best moment (what worked):
- •Trigger (if any):
- •Next session plan (one sentence):
How to score stress (0–5)
- •0: relaxed, seeks more
- •1: mild fidgeting, easily redirected
- •2: repeated turning to watch tool, needs frequent breaks
- •3: vocalizing/strong avoidance, can’t continue safely
- •4: snapping/swiping/panic
- •5: possible pain response; stop and consult vet/groomer
What “progress” looks like in real life
- •Short coat cat: goes from 20 seconds before tail flicking to 60 seconds with breaks.
- •Double coat dog: allows undercoat rake on one side today, both sides in two weeks.
- •Curly coat dog: armpit comb check goes from impossible to “2 teeth of the comb at a time” without protest.
Practical long-term maintenance plan
The best grooming routine by coat type is the one you can actually repeat. These plans are realistic for busy households and sensitive pets.
Short coats (most short-haired cats, many smooth-coated dogs)
Goal: manage shedding and skin oils without overstimulation.
Baseline plan:
- •3–5 sessions per week
- •1–3 minutes per session
- •Rotate tools to reduce irritation (slicker one day, hand massage/cloth wipe another)
Seasonal upgrade:
- •During heavy shedding, add one extra 2-minute session per week.
Common tradeoff:
- •Going too long in one session often causes swatting or nipping next time. Keep it short and end early.
Tool tip:
- •If you need quick, frequent brushing, the Coastal Pet Safari - Cat Self-Cleaning Slicker Brush - Cat Grooming Supplies helps you maintain momentum without fumbling hair out of the bristles.
Double coats (heavy shedders with undercoat)
Goal: prevent compacted undercoat, reduce hot spots, keep airflow to skin.
Baseline plan:
- •2–4 sessions per week
- •5–10 minutes per session (split into two micro-sessions if needed)
- •Start with topcoat smoothing, then undercoat tool for short, controlled passes
Seasonal “blow coat” plan:
- •Daily 5-minute sessions for 7–14 days
- •Focus on one body side per session if your dog gets impatient
Common tradeoff:
- •Over-raking can irritate skin and create tool aversion. You’re better off doing more frequent, gentle passes.
Tool tip:
- •A 2-in-1 undercoat and dematting tool like the MalsiPree Dog Brush for Shedding - Large, Blue, 2-in-1 - Deshedding Dog Grooming Brush & Undercoat Rake with Dematting Comb for medium to Large Double Coated can shorten sessions because you can switch functions without swapping tools.
Curly coats (high mat risk)
Goal: prevent mats so grooming stays comfortable and cooperative.
Baseline plan:
- •4–6 sessions per week
- •5–15 minutes per session depending on coat length
- •Line-brush + comb check in mat-prone zones (behind ears, collar area, armpits, legs)
Scheduling reality check:
- •If you can only groom twice a week, choose a shorter haircut with your groomer. Longer curly coats demand more frequent maintenance.
Common tradeoff:
- •Skipping comb checks saves time today but often leads to painful dematting later (and a much worse grooming experience).
Tool tip:
- •For touch-sensitive curly-coated dogs, a flexible brush like the Artero Double Flexible Brush (2 in 1) (S - Nature Collection) can help you do more frequent, gentler sessions—then verify with a comb.
When to bring in a pro (and why it helps behavior)
Professional grooming isn’t “giving up.” It can reset the coat to a pain-free baseline so your at-home sessions are easy again.
Consider a groomer if:
- •You can’t get a comb through key zones without snagging
- •Your pet shows red-light signals consistently
- •You suspect matting near the skin (especially curly coats)
A good grooming routine by coat type is a long game: comfort first, small wins, and tools matched to both hair and temperament.
Coat Care Cluster
More in this topic
guide
Best Dog Brush by Coat Type: Pick the Right Tool Fast
guide
Deshedding Double Coated Dogs: The Ultimate Guide
guide
5 Cat Grooming Tips: Signs Your Cat Needs Better Coat Care
guide
De-Shedding Routine for Double-Coat Breeds: A Weekly System That Works
guide
Curly Coat Detangling Routine: Prevent Mats Without Over-Brushing
guide
Short-Coat Maintenance Routine: A Fast Weekly Grooming Plan That Actually Cuts Shedding
Frequently asked questions
How often should I groom my pet based on coat type?
As a baseline: short coats do best with frequent, very short sessions (3–5 times/week, 1–3 minutes). Double coats often need 2–4 sessions/week, with daily 5-minute sessions during seasonal coat blows. Curly coats typically need the most consistency (4–6 times/week) because mats form quickly in friction areas like armpits, behind ears, and collar lines. If your schedule can’t match the coat length, choose a shorter haircut (for curly coats) or split grooming into micro-sessions (for double coats).
My cat/dog hates brushing—should I keep trying or stop?
Stop the session if you see red-light signals (hissing/growling, snapping/swiping, panic escape attempts, freezing with hard stare) and reset your plan. Continuing through strong discomfort often creates long-term aversion. Instead, rebuild tolerance with 2–5 “no-tool” sessions (treats + calm handling only), then reintroduce the gentlest tool for a very small goal (like 10–20 seconds on the back). If the reaction is sudden or localized (one spot causes yelping), rule out pain with your vet.
What’s the biggest mistake people make with double and curly coats?
With double coats, the common mistake is using too much pressure and long pulls when the undercoat is compacted—this causes skin irritation and makes dogs dread grooming. With curly coats, the biggest mistake is brushing only the surface and skipping comb checks; mats can hide near the skin even when the top looks fluffy. In both cases, the fix is behavior-informed sequencing: start easy, work in tiny sections, stop at resistance, and verify progress with a comb in high-risk areas.
