
guide • Nail Care
How to Trim Dark Dog Nails Without Hitting the Quick (Behavior-First Guide)
Learn how to trim dark dog nails safely using low-stress handling, tiny cuts, and clear stop-signs—without guessing and without turning nail day into a fight.
By Lucy Anderson • March 4, 2026 • 7 min read
Table of contents
- Pet behavior signals that shape the routine
- Green-light signals (keep going)
- Yellow-light signals (slow down, reduce difficulty)
- Red-light signals (stop and reset)
- Scenario examples
- Low-stress setup before any tool is used
- Choose your location based on traction and exits
- Lighting matters more with dark nails
- Pre-load calming ingredients
- Tool staging (so you don’t fumble)
- Handling protocol for better compliance
- Use a consent-based “start button”
- The 3-second rule for toe holds
- Positioning options (pick what your dog prefers)
- Muzzle isn’t failure—it’s a seatbelt
- Tactical workflow by session phase
- Phase 1: Warm-up reps (30–90 seconds)
- Phase 2: Decide your tool for today’s emotional state
- Phase 3: The dark-nail cutting method (micro-slice strategy)
- Step-by-step
- What you’re looking for (stop signs)
- Concrete example: “I can’t tell what I’m seeing”
- Phase 4: Grinding workflow (safer for dark nails, but manage heat)
- Phase 5: Scratch-pad sessions (great for noise-sensitive dogs)
- Phase 6: End on a win (even if you did one nail)
- Product choices by temperament and tolerance
- For sound-sensitive dogs
- For pressure-sensitive dogs (react to the “clip” feeling)
- For dogs with handling sensitivity (don’t want paws held)
- For multi-pet homes (cats too)
- Decision criteria you can actually use
- Error recovery after a bad session
- If you hit the quick: first aid steps
- Behavioral repair (the part most people skip)
- When to outsource temporarily
- Progress tracking template
- How to interpret the data
- Practical long-term maintenance plan
- Frequency guidelines (realistic, not perfect)
- A simple rotation that prevents burnout
- What “good length” looks like in daily life
- Tradeoffs to accept (so you don’t get stuck)
Trimming black or dark dog nails can feel like defusing a tiny bomb: you can’t see the quick clearly, your dog may already hate paw handling, and one bad cut can set you back for months. The good news is you don’t need perfect visibility to trim dark dog nails safely—you need a behavior-first routine, the right stopping cues, and session design that keeps your dog under threshold.
This guide focuses on tolerance and comfort first, then precision. You’ll learn how to build a calm routine, how to “read” the nail as you go, and how to choose tools that match your dog’s temperament.
Pet behavior signals that shape the routine
Dogs don’t “act dramatic” about nail trims—most are reacting to one (or more) of these: restraint pressure, vibration/sound, paw sensitivity, previous pain, or feeling trapped. Your trimming plan should be based on what your dog is communicating.
Green-light signals (keep going)
- •Loose body, soft eyes, neutral ears
- •Willingly offers paw, leans in for treats
- •Takes food normally (not snatching, not refusing)
- •Allows brief toe hold without pulling away
Yellow-light signals (slow down, reduce difficulty)
- •Lip licking, turning head away, whale eye
- •Paw gently retracts, mild tremble
- •Treats taken more slowly; sniffing the floor a lot
- •Sudden interest in leaving but not panicked
What to do: switch to easier reps—shorter holds, fewer nails, or just one nail—then end on a win.
Red-light signals (stop and reset)
- •Freezing, hard stare, growling
- •Repeated paw yanking, panting unrelated to heat
- •Refuses treats that are normally high value
- •Scrambling, attempting to escape restraint
What to do: stop the session. The goal is future cooperation, not “getting it done.” If nail length is urgent, plan for professional grooming or a vet visit with a pain-free strategy.
Scenario examples
- •The “thrashes when clipped” dog: Often a restraint problem, not a nail problem. Build consent-based handling and use a grinder or scratch pad to reduce the sudden “snap” sensation.
- •The “fine until the back feet” dog: Many dogs have less tolerance for rear paw handling. Do front paws one day, rear paws another.
- •The “hates the sound” dog: Choose quieter tools, desensitize to sound separately, or use a manual scratch board.
Low-stress setup before any tool is used
A calm trim starts long before you touch a nail. The goal is to make the environment predictable and to reduce the number of “big feelings” triggers at once.
Choose your location based on traction and exits
- •Use a non-slip mat or yoga mat so your dog isn’t bracing on slippery floors.
- •Pick a spot where your dog can step away without being cornered. Counterintuitively, allowing a safe “exit” often reduces struggling.
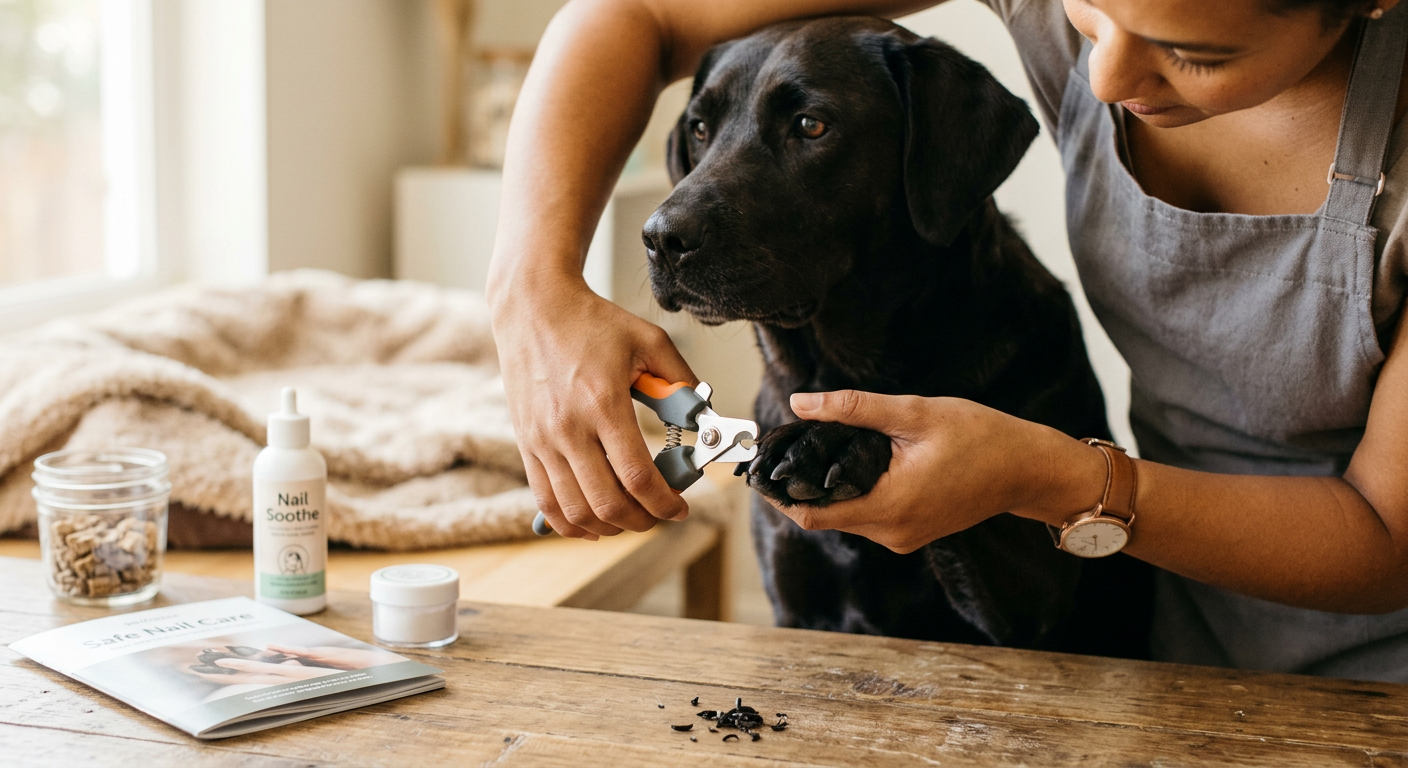
Lighting matters more with dark nails
To trim dark dog nails safely, you need to see the cut surface clearly.
- •Use bright overhead light plus a small directional lamp or headlamp.
- •Keep a white paper towel under the paw—contrast helps you spot color changes in the nail.
Pre-load calming ingredients
- •Use high-value, lickable rewards (peanut butter/xylitol-free, canned food, squeeze cheese) to slow breathing.
- •Keep sessions short enough that your dog stays enthusiastic. Think “micro-sessions,” not marathons.
Tool staging (so you don’t fumble)
Have everything within reach before you invite your dog over:
- •Tool (clipper/grinder/scratch pad)
- •Treats
- •Styptic powder or cornstarch + gauze (for emergencies)
- •A nail file for smoothing sharp edges
If your dog startles when you stand up to grab something, staging prevents a preventable stress spike.
Handling protocol for better compliance
Your handling strategy should minimize restraint and maximize predictability.
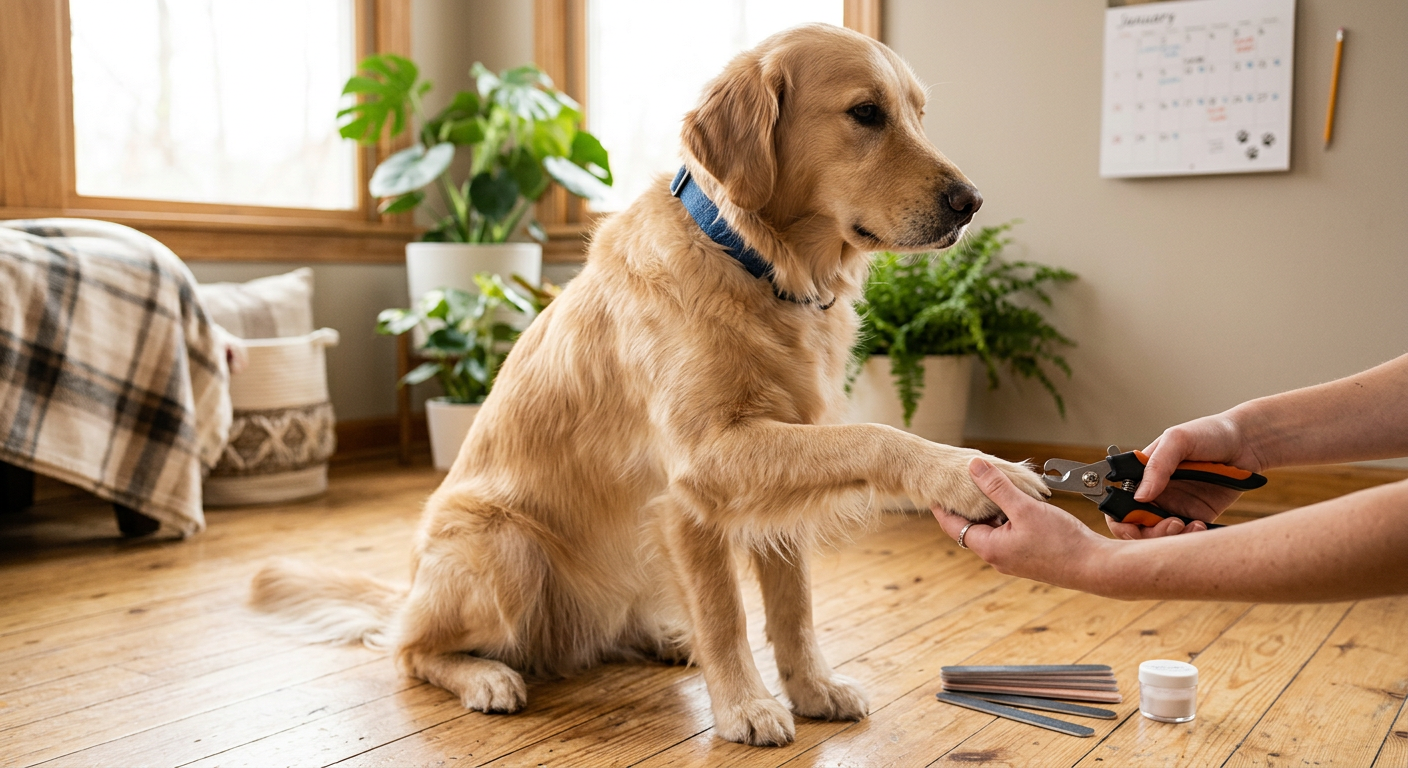
Use a consent-based “start button”
Teach a simple cue that means “we’re starting, and you can opt out.” Examples:
- •Dog places chin in your palm
- •Dog targets (touches) your hand with nose
- •Dog steps onto a mat
If the start behavior disappears, you pause. This reduces the need for force and builds trust.
The 3-second rule for toe holds
Many dogs tolerate paw contact but panic with prolonged toe pressure.
- •Hold a toe for 1–3 seconds, reward, release.
- •Repeat until your dog stays relaxed.
- •Only then add the tool in the other hand.
Positioning options (pick what your dog prefers)
- •Side-lying (“spa day”): Best for dogs who relax on their side and enjoy massage.
- •Standing paw lift: Great for dogs who dislike being laid down. You lift one paw like a farrier.
- •Lap sit (small dogs): Keep the spine supported; avoid squeezing.
Avoid “wrestle holds.” If you need two people to restrain, that’s usually a sign the plan is too hard for the dog today.
Muzzle isn’t failure—it’s a seatbelt
If there’s any bite risk, a well-conditioned basket muzzle can make everyone safer and calmer. Conditioning takes time, but it prevents rushed, risky trims.
Tactical workflow by session phase
This is the practical, step-by-step process to trim dark dog nails without guessing. The key is to trim in tiny increments and read the nail’s internal cues.
Phase 1: Warm-up reps (30–90 seconds)
Goal: get your dog relaxed with paw handling before any cutting.
- •Touch paw → treat
- •Separate toes → treat
- •Brief toe hold → treat
If your dog is already tense, stop here and count that as a successful session.
Phase 2: Decide your tool for today’s emotional state
- •If your dog startles at the “clip” sound/pressure: consider a grinder or scratch board.
- •If your dog panics at vibration: try a scratch pad or brief, quiet clipping with lots of breaks.
A behavior-first plan is flexible. The “best” tool is the one your dog will allow consistently.
Phase 3: The dark-nail cutting method (micro-slice strategy)
When nails are dark, you’re not looking for a visible pink quick—you’re looking for stop signs on the cut surface.
Step-by-step
- Start with the tiniest sliver off the tip (1–2 mm). Reward.
- Look straight at the cut surface (use the lamp/headlamp).
- Repeat tiny cuts, checking after each cut.
What you’re looking for (stop signs)
- •Early cuts often show a solid, uniform dark center.
- •As you get closer to the quick, you may see a small darker “dot” in the center surrounded by lighter, chalky material.
- •The strongest cue to stop: a gray/whitish oval area or a moist/shiny center. That shine can mean you’re very close.
If you’re not sure, stop and switch to filing/grinding for smoothing rather than taking another chunk.
Concrete example: “I can’t tell what I’m seeing”
If your dog’s nail looks like a dark bullseye after a cut:
- •Take one more micro-slice only if your dog is calm.
- •If the center begins looking glossy or the dog flinches, stop and round the edge with a file.
Phase 4: Grinding workflow (safer for dark nails, but manage heat)
Grinding reduces the chance of a sudden deep cut and lets you “sneak up” on length.
Tips that matter:
- •Use short bursts (1–2 seconds), then lift off.
- •Touch the nail after a few bursts. If it’s warm, pause.
- •Aim to round the nail tip, not flatten it.
A quiet multi-speed grinder helps you match intensity to tolerance. For dogs who can handle vibration but not loud noise, a quieter unit like the Electric Dog Nail Grinder: Upgraded 5-Speed Quiet Dog Nail Trimmer can make sessions shorter and less startling.

If you prefer a grinder with a built-in light to better see the nail surface and your progress, consider the Dog Nail Grinder Electric Powerful 3 Speeds with Lights.

Phase 5: Scratch-pad sessions (great for noise-sensitive dogs)
Some dogs will happily “file” their own nails with pawing behavior—especially front nails.
- •Teach “paw” or “scratch” on cue.
- •Reward after 2–4 scratches.
- •Stop before your dog gets over-aroused.
A board-style option like the Dog Nail File, Grinder Board Scratch Pad with 4-Pack Replaceable Sandpaper Discs is useful when your dog refuses clippers or grinders, or when you’re rebuilding trust after a quicking incident.

Tradeoff: scratch pads mainly shorten front nails. Rear nails often need clipping or grinding.
Phase 6: End on a win (even if you did one nail)
Stop while your dog is still comfortable. This is how you build a dog who cooperates next time.
- •Do 1–3 nails per session at first.
- •Celebrate with a jackpot reward and a break.
Product choices by temperament and tolerance
Your dog’s emotional profile should drive product selection more than your personal preference.
For sound-sensitive dogs
- •Choose quieter grinders and condition the sound separately (turn on across the room → treat).
- •Consider scratch boards to avoid motor noise altogether.
Good match: the Dog Nail File, Grinder Board Scratch Pad for cooperative scratchers; the quieter Upgraded 5-Speed Quiet Dog Nail Trimmer for dogs who can tolerate gentle vibration.
For pressure-sensitive dogs (react to the “clip” feeling)
- •Grinders often feel less “snappy” than clippers.
- •Use short bursts and lots of reinforcement.
Good match: a grinder with speed control so you can start slow and build comfort, like the 3-Speed Grinder with Lights.
For dogs with handling sensitivity (don’t want paws held)
- •Prioritize training: start-button behaviors, short toe holds, and frequent releases.
- •Scratch pads can reduce how much you need to hold paws, especially for front feet.
For multi-pet homes (cats too)
If you’re trimming cat nails in the same household, use species-appropriate tools and don’t assume one clipper fits all. A small, sharp clipper like the NecoIchi Purrcision Feline Nail Clippers can be easier to control for tiny claws—separate from your dog setup to keep sessions calm and predictable.

Decision criteria you can actually use
- •If your dog tolerates 5–10 seconds of toe holding: clipping can work with micro-slices.
- •If your dog tolerates sound but not restraint: scratch board + minimal handling.
- •If your dog tolerates restraint but not sudden pressure: grinder in short bursts.
- •If your dog refuses treats during trims: your sessions are too hard—reduce difficulty before changing tools.
Error recovery after a bad session
Sooner or later, many owners quick a nail—especially when they trim dark dog nails. What you do next determines whether your dog develops a lasting fear.
If you hit the quick: first aid steps
- Stay calm; your dog will read your reaction.
- Apply styptic powder with firm pressure for 30–60 seconds.
- If you don’t have styptic, cornstarch or flour can help in a pinch.
- Keep the dog quiet for a bit (no zoomies) so clotting holds.
If bleeding won’t stop within about 10 minutes, or the nail is cracked/split, call your vet.
Behavioral repair (the part most people skip)
In the next 24–72 hours, do easy wins only:
- •Touch paw → treat → done
- •Show tool → treat → done
- •One gentle scratch-board rep → jackpot → done
Avoid “getting back on the horse” by forcing a full trim immediately. Your dog’s memory of that pain can generalize to the entire routine.
When to outsource temporarily
If nails are overgrown and your dog is panicking, a pro groomer or vet team can help while you rebuild tolerance. Ask about:
- •One paw per visit
- •Muzzle conditioning support
- •Pre-visit calming plans for highly anxious dogs
Progress tracking template
Consistency beats intensity. Use this simple tracker to spot trends, identify triggers, and measure tolerance gains.
Copy/paste and fill in:
| Date | Location | Tool used | Paws done | Nails trimmed | Dog’s body language (G/Y/R) | What was the hardest part? | What reward worked? | Next session goal |
|---|
How to interpret the data
- •If you keep hitting “Yellow” at the same step (e.g., toe hold), train that step separately.
- •If “Red” happens when the tool turns on, do sound-only sessions away from the paws.
- •If progress stalls, reduce criteria: fewer nails, higher rewards, shorter holds.
Practical long-term maintenance plan
Once you can trim without drama, maintenance becomes easy—because you’re trimming less each time.
Frequency guidelines (realistic, not perfect)
Most dogs do well with:
- •Grind or micro-trim every 1–2 weeks for steady quick recession
- •Or touch-ups twice weekly if nails are long and you’re trying to bring the quick back gradually
Overgrown nails often have longer quicks. The safest way to shorten them is many tiny sessions, not one big cut.
A simple rotation that prevents burnout
- •Day 1: front left paw (1–3 nails)
- •Day 3: front right paw (1–3 nails)
- •Day 5: rear left paw (1–2 nails)
- •Day 7: rear right paw (1–2 nails)
This keeps sessions short and keeps your dog’s cooperation high.
What “good length” looks like in daily life
- •Nails don’t click loudly on hard floors (a little clicking can be normal for some dogs)
- •Dog isn’t slipping on smooth surfaces
- •No snagging on blankets
- •Paws look relaxed when standing; toes aren’t being pushed sideways by long nails
Tradeoffs to accept (so you don’t get stuck)
- •You don’t need to finish all nails in one sitting.
- •You don’t need a perfectly rounded salon finish.
- •You do need your dog to feel safe enough to come back tomorrow.
If your main goal is to trim dark dog nails without hitting the quick, the winning strategy is: tiny increments + clear stop signs + calm, repeatable sessions. That’s what creates both safety and long-term cooperation.
Nail Care Cluster
More in this topic

guide
How to Trim Dog Nails: A Step-by-Step Guide for Beginners

guide
Nail grinder vs clippers for dogs: which is best for your pet?

guide
Dog Nail Trimming at Home: Safe Step-by-Step Routine (Clippers vs Grinders vs Scratch Boards)
guide
Dog Nail Bleeding How to Stop: Fast First Aid That Works
guide
How Often Should You Trim Dog Nails? A Practical Schedule by Activity Level
guide
Dog Nail Grinder Training Plan for Nervous Dogs (Diagnostic-First Guide)
Frequently asked questions
How do I know when to stop trimming a black dog nail?
Use the cut surface as your guide. Take 1–2 mm micro-slices and check after every cut. Early on, the center is usually uniformly dark. As you approach the quick, you may notice a clearer ring of chalky material with a darker center “dot,” and the center can start looking moist or shiny. When you see a shiny/moist center or you’re unsure, stop cutting and switch to gentle filing/grinding to round the edge. When in doubt, stop early—consistency over multiple sessions shortens nails safely without risking a painful quicking.
Is a nail grinder safer than clippers for dark dog nails?
Often, yes—grinders let you remove tiny amounts gradually, which is helpful when you can’t see the quick. They can still cause problems if used too long in one spot (heat) or if your dog is terrified of vibration/sound. Use 1–2 second bursts, pause frequently, and reward heavily. If your dog hates grinders, a scratch pad can be a lower-stress alternative for front nails, and micro-slice clipping can work for dogs who tolerate brief toe holds.
What should I do if I accidentally cut the quick?
Apply styptic powder with firm pressure for 30–60 seconds (cornstarch can help if you don’t have styptic). Keep your dog calm and limit running for a bit so the clot holds. Then focus on behavioral recovery: for the next couple days, do easy “confidence reps” (paw touch → treat, show tool → treat) rather than forcing another full trim. If bleeding doesn’t stop within about 10 minutes, the nail is split, or your dog seems unusually painful, contact your vet.
