

guide • Nail Care
Dog Nail Trimming at Home: Safe Step-by-Step Routine (Clippers vs Grinders vs Scratch Boards)
A practical, safety-first routine for dog nail trimming at home—plus clear tradeoffs between clippers, electric grinders, and scratch boards so you can pick the right method.
By Lucy Anderson • March 4, 2026 • 7 min read
Table of contents
- What actually matters in this comparison
- 1) How reliably you avoid the quick
- 2) The dog’s tolerance: restraint vs sensation
- 3) Nail shape and finish
- 4) Real-world consistency (the hidden winner)
- Baseline criteria and scoring method
- Scoring criteria (0–10 each)
- Typical scores (starting point, adjust for your dog)
- Side-by-side workflow analysis
- Workflow A: Clippers (fastest length removal, highest oops risk)
- Workflow B: Electric grinder (best finish and safety margin, but noise/vibration)
- Workflow C: Scratch-board filing (lowest cutting risk, limited reach)
- A note for multi-pet households (cats included)
- Cost, effort, and consistency tradeoffs
- Upfront cost vs ongoing cost
- Time per week (realistic)
- Consistency (the deciding tradeoff)
- Which option wins by user profile
- Profile 1: “My dog has dark nails and I’m scared of quicking”
- Profile 2: “My dog is chill, I just want it done fast”
- Profile 3: “My dog hates paw handling (rescues, fearful dogs)”
- Profile 4: “My dog tolerates handling but panics at buzzing sounds”
- Profile 5: “Large dog, thick nails, and nails click loudly”
- Transition strategy if changing tools
- If you’re moving from clippers to a grinder
- If you’re moving from grinder to clippers (noise-sensitive dogs)
- If you’re adding a scratch board
- Common decision mistakes
- Mistake 1: Waiting until nails are long, then trying to “fix it” in one session
- Mistake 2: Picking a tool based on what feels easiest for you, not what your dog tolerates
- Mistake 3: Holding the paw in an unnatural position
- Mistake 4: Grinding too long and overheating the nail
- Mistake 5: Ignoring dewclaws
- Final recommendation framework
- Step 1: Choose your “base method” (what you’ll do most weeks)
- Step 2: Add a “backup method” for gaps
- Step 3: Set a consistency target that’s hard to fail
- Step 4: Define “success” by your dog’s behavior
Dog nail trimming at home is one of those skills that feels intimidating until you have a repeatable routine. The goal isn’t “short nails at any cost.” The goal is comfort, safety, and consistency—because that’s what actually keeps nails shorter over time (and keeps your dog willing to participate).
This guide compares three realistic at-home options—clippers, electric grinders, and scratch-board filing—and then gives you a step-by-step routine you can follow tonight.
What actually matters in this comparison
Dog nails aren’t just cosmetic. Long nails can change how your dog’s toes spread on the floor, affect traction, and make walks (or even standing) less comfortable. But the real challenge with dog nail trimming at home is that each method solves one problem while creating another.
Here are the factors that truly move the needle:
1) How reliably you avoid the quick
The “quick” is the blood vessel inside the nail. Cutting into it hurts and bleeds—one bad experience can set training back for months.
- •Clippers remove length fast, but have the highest “oops” risk, especially on dark nails or wiggly dogs.
- •Grinders remove length gradually, giving you more chances to stop before you hit the quick, but they add noise/vibration.
- •Scratch boards avoid cutting entirely, but only work well on front nails and require your dog to “buy in” to the behavior.
2) The dog’s tolerance: restraint vs sensation
Many dogs hate being held still more than they hate the tool.
- •Clippers are quiet and quick, but require a firm hold and close handling.
- •Grinders can be done with lighter restraint, but the sensation (buzz + heat) is the tradeoff.
- •Scratch boards feel like play for some dogs, but frustrating for others if motivation is low.
3) Nail shape and finish
The “best” nail isn’t just shorter—it’s rounded so it doesn’t snag on carpets or scratch skin.
- •Clippers often leave a sharper edge unless you follow up with filing.
- •Grinders excel at rounding.
- •Scratch boards can smooth the tip, but may flatten it if overused without angle changes.
4) Real-world consistency (the hidden winner)
The method you’ll actually do weekly beats the method you do perfectly twice a year.
If your dog panics at clippers, the “fast” method becomes slow because you avoid it. If your dog hates the grinder noise, you’ll keep postponing. For dog nail trimming at home, low-friction consistency is the point.
Baseline criteria and scoring method
To keep this comparison practical, here’s a simple 10-point scoring model. Rate each option for your household. Your “winner” is the tool that makes you most consistent without risking the quick.
Scoring criteria (0–10 each)
- Safety margin (how easy it is to avoid the quick)
- Dog comfort (stress level during/after)
- Owner control (precision + ease of handling)
- Speed per paw (not theoretical speed—real speed with your dog)
- Finish quality (rounded, snag-free)
- Consistency likelihood (how likely you’ll keep up weekly)
- Versatility (front/back nails, dewclaws, multi-pet)
- Mess/cleanup (dust, nail shards)
Typical scores (starting point, adjust for your dog)
- •Clippers: Safety 5, Comfort 6, Control 6, Speed 9, Finish 5, Consistency 6, Versatility 8, Mess 9
- •Electric grinder: Safety 8, Comfort 6, Control 7, Speed 7, Finish 9, Consistency 7, Versatility 9, Mess 6
- •Scratch board: Safety 9, Comfort 8, Control 5, Speed 6, Finish 7, Consistency 8, Versatility 4, Mess 8
The important part: the “best” option changes based on dark nails vs clear nails, noise sensitivity, and whether your dog tolerates paw handling.
Side-by-side workflow analysis
This section is the heart of dog nail trimming at home: what you do, in what order, and what to watch for. Use the workflow that matches your tool.
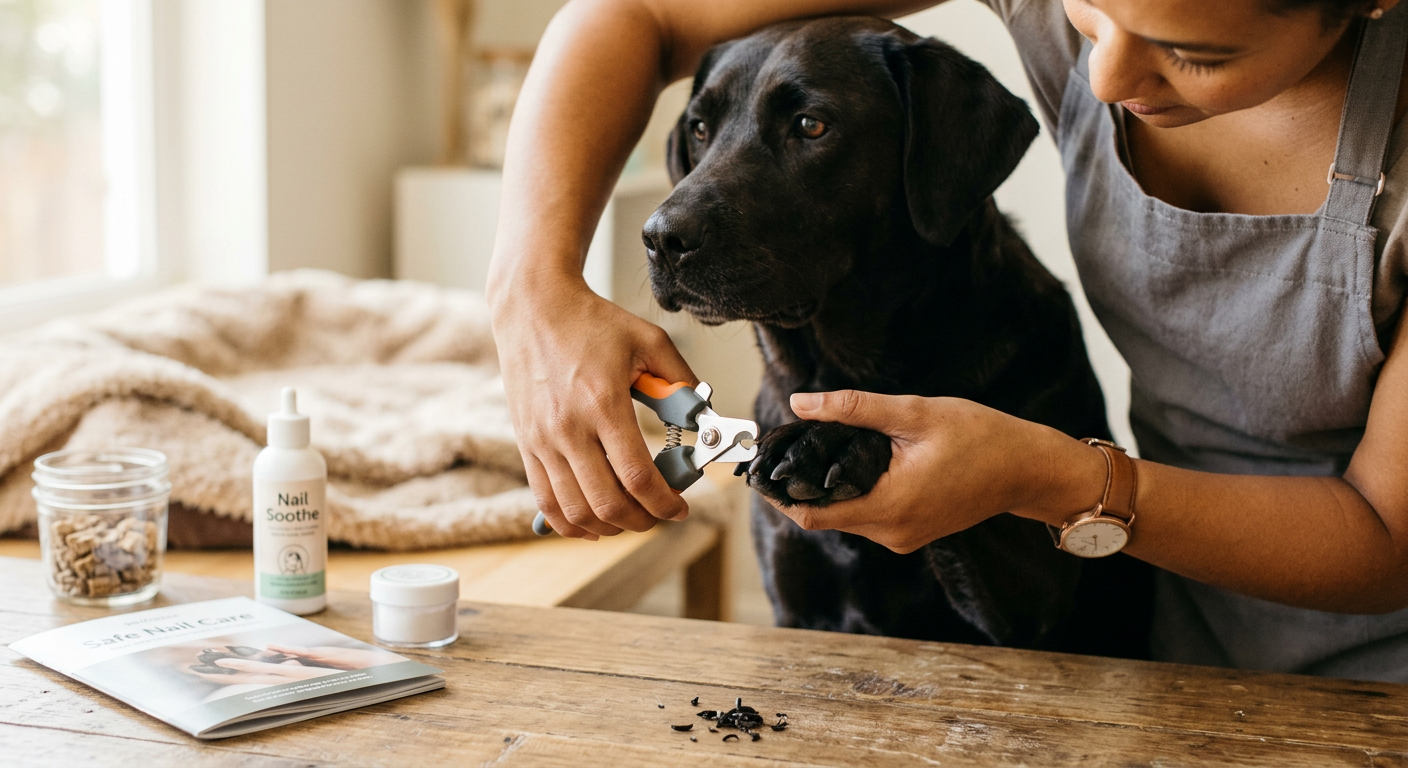
Workflow A: Clippers (fastest length removal, highest oops risk)
Best for: calm dogs, light/clear nails, owners who want speed.
Step-by-step routine 1) Pick your position: Small dogs often do best on a table with a non-slip mat. Medium/large dogs often do best on the floor with their side against your leg. 2) Choose a single paw to start: Don’t aim for all four paws on day one if your dog is anxious. “Two nails and done” is a win. 3) Find the safe cut point:
- •Clear nails: you can usually see the quick (pink). Cut 2–3 mm in front of it.
- •Dark nails: use thin “slices.” Make a tiny cut, look at the cut surface, repeat. Stop when you see a dark/gray center becoming lighter with a small oval—that’s your warning you’re getting close.
- Angle matters: Aim for a cut that follows the natural curve, not a flat chop straight across. A slightly angled cut reduces sharp edges.
- Stop early and file if needed: If you’re unsure, stop. Consistency beats bravery.
Concrete example: If your 45-lb mixed breed pulls their paw away after 2 seconds, plan micro-sessions: cut 1 nail, treat; cut 1 nail, treat; end at 3 nails. Repeat tomorrow. You’ll get all nails done faster across 2–3 days than fighting in one stressful session.
Tradeoff callout: Clippers win on speed but lose on safety margin for dark nails. If you’ve ever quicked your dog, you’ll often regain trust faster by switching to a grinder or scratch-board approach for a few weeks.
Workflow B: Electric grinder (best finish and safety margin, but noise/vibration)
Best for: dark nails, dogs who tolerate new sensations, owners who want precision.
Two solid options to consider:
- •A multi-speed grinder like the Electric Dog Nail Grinder: Upgraded 5-Speed Quiet Dog Nail Trimmer-Safe Painless Nail File for Claw Trimming & Grooming Care At Home for Dogs & Cats(Light Black)
- •A simpler 3-speed grinder with a light like the Dog Nail Grinder Electric Powerful 3 Speeds Dog Nail Clippers with Lights Quiet Cat Nail Clipper Painless Care Trimmers Tools for Small Medium Large Dogs and Cats (Black)

Dog Nail Grinder Electric Powerful 3 Speeds Dog Nail Clippers with Lights Quiet Cat Nail Clipper Painless Care Trimmers Tools for Small Medium Large Dogs and Cats (Black)
Brand: Javtoku

Electric Dog Nail Grinder: Upgraded 5-Speed Quiet Dog Nail Trimmer-Safe Painless Nail File for Claw Trimming & Grooming Care At Home for Dogs & Cats(Light Black)
Brand: Juveximzy
Step-by-step routine 1) Desensitize for 60 seconds before you grind:
- •Show the grinder, treat.
- •Turn it on 3–6 feet away, treat.
- •Turn it off, treat.
This is not fluff—this is how you prevent the “I hate that noise” association. 2) Stabilize the toe: Hold the paw gently but firmly. Use your thumb to separate fur from nail to avoid snagging. 3) Use short touches: Grind 1–2 seconds, lift, check. This controls heat and prevents taking off too much. 4) Shape, don’t chase length: Your first goal is a rounded tip. Length reduction happens gradually over sessions. 5) Watch for heat: If the nail feels warm to your fingertip, pause and move to another nail. 6) Finish with a soft edge: A grinder can smooth the cut line so nails don’t feel like needles on your skin.
Concrete example: For a noise-sensitive dog (common in herding breeds), start with grinder sessions that don’t touch nails at all—just “on = treats.” On day 3–5, touch one nail for half a second, treat, done. Many dogs accept grinding once they realize the sound predicts snacks.
Tradeoff callout: Grinders reduce quicking risk because they remove nail slowly, but they add the training step of accepting sound/vibration. If your dog startles easily, you’ll spend more time upfront and less time later.
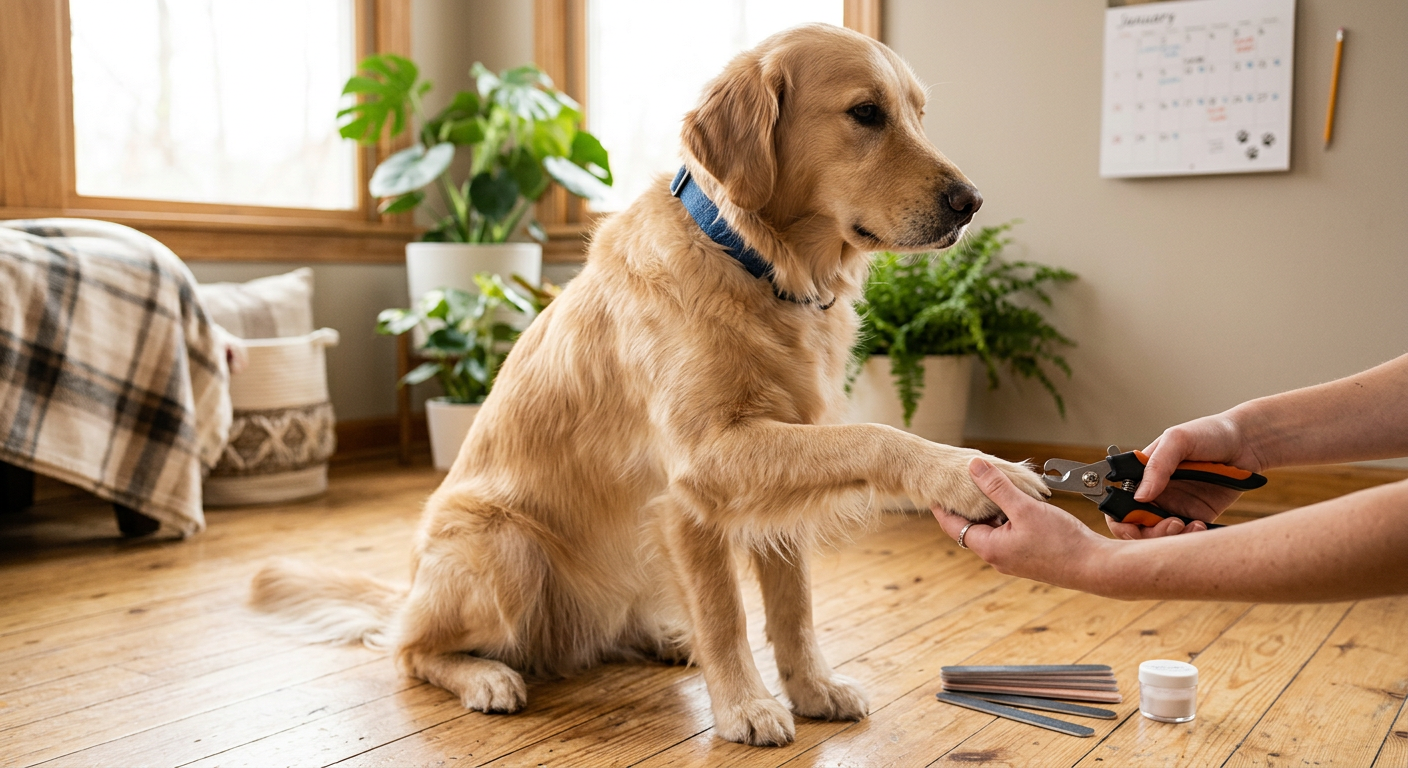
Workflow C: Scratch-board filing (lowest cutting risk, limited reach)
Best for: dogs who hate paw restraint, front nails that click on floors, owners who prefer “training over wrestling.”
A practical product example is a replaceable-disc scratch board like the Dog Nail File, Grinder Board Scratch Pad with 4-Pack Replaceable Sandpaper Discs, Gentle Pet Nail Care Tool for Dogs and Cats.

Step-by-step routine 1) Teach “paw target”: Put the board flat. When your dog touches it with a paw, mark (yes/click) and treat. 2) Build to a scratch: Reward only when there’s a light scrape motion. 3) Do 5–10 scratches, then stop: Short sessions prevent nail soreness and keep motivation high. 4) Control nail shape: Change the board angle slightly to avoid flattening the nail tip. 5) Plan for back nails and dewclaws: Most dogs won’t naturally file those on a board. You’ll still need clippers or a grinder for a complete routine.
Concrete example: If your dog is a “no-touch” rescue who flinches when you reach for paws, scratch-board training can be your entry point. You might get front nails under control within 1–2 weeks, then introduce the grinder for back nails once handling tolerance improves.
Tradeoff callout: Scratch boards win on cooperation and safety margin, but lose on full coverage. If you choose this method, accept that it’s often a front-nails-first strategy, not a complete solution.
A note for multi-pet households (cats included)
If you also maintain cat nails, use a dedicated cat clipper designed for small, thin nails (dog clippers are often bulky). For example: NecoIchi - Purrcision Feline Nail Clippers | Ultra-Sharp Cat Nail Clipper for Safe & Precise Trimming | Stainless Steel Blades, Cat Nail Trimmer, Ideal for Indoor Cats (White). It’s not for dogs—but it’s a quality-of-life pick if you’re doing both.

Cost, effort, and consistency tradeoffs
Dog nail trimming at home has three “currencies”: money, time, and emotional effort.
Upfront cost vs ongoing cost
- •Clippers: usually the lowest upfront cost and nearly no ongoing cost. The hidden cost is a higher chance of a quicking incident if you rush.
- •Electric grinders: moderate upfront cost, low ongoing cost. The hidden cost is noise desensitization time.
- •Scratch boards: moderate upfront cost; ongoing cost depends on sandpaper replacements (more if you have a heavy scratcher or large dog).
Time per week (realistic)
- •Clippers: 5–10 minutes if your dog cooperates; 30 minutes if you’re negotiating every nail.
- •Grinder: 10–20 minutes including breaks; can be shorter once your dog is comfortable.
- •Scratch board: 2–5 minutes for front nails; still requires another method periodically.
Consistency (the deciding tradeoff)
If one method feels stressful, you’ll delay. Delays mean longer nails. Longer nails mean you have to remove more length. Removing more length increases the chance you hit the quick. That’s the loop you’re trying to break.
A consistent “little and often” approach (even 2–3 nails per session) almost always beats occasional marathon trims.
Which option wins by user profile
Use these profiles to pick a default approach, then adjust after 2–3 sessions.
Profile 1: “My dog has dark nails and I’m scared of quicking”
Winner: Electric grinder
- •Why: Higher safety margin; you remove nail slowly and can stop earlier.
- •Start strategy: 3-day sound desensitization, then 1–2 nails per session.
- •Product fit: A multi-speed option like the Electric Dog Nail Grinder: Upgraded 5-Speed Quiet Dog Nail Trimmer-Safe Painless Nail File for Claw Trimming & Grooming Care At Home for Dogs & Cats(Light Black) gives you flexibility to start low and build up.
Profile 2: “My dog is chill, I just want it done fast”
Winner: Clippers + optional quick file
- •Why: Fastest length removal.
- •Safety tradeoff: You must commit to small cuts, especially if you’re trimming less frequently.
- •Tip: If the nails feel sharp afterward, do 1–2 seconds of grinder smoothing or a manual file.
Profile 3: “My dog hates paw handling (rescues, fearful dogs)”
Winner: Scratch board for fronts, grinder later
- •Why: You can build cooperation without restraint.
- •Limitation: You’ll still need a plan for back nails and dewclaws.
- •Product fit: A replaceable sandpaper setup like the Dog Nail File, Grinder Board Scratch Pad with 4-Pack Replaceable Sandpaper Discs, Gentle Pet Nail Care Tool for Dogs and Cats makes maintenance straightforward.
Profile 4: “My dog tolerates handling but panics at buzzing sounds”
Winner: Clippers, then slow desensitization to grinder
- •Why: Clippers are silent.
- •Transition plan: Pair the grinder sound with treats for a week without touching nails. You’re buying future flexibility.
Profile 5: “Large dog, thick nails, and nails click loudly”
Winner: Grinder (or grinder + occasional clip)
- •Why: Thick nails often benefit from gradual reduction and rounding.
- •Product fit: A grinder with a light can help visibility, like the Dog Nail Grinder Electric Powerful 3 Speeds Dog Nail Clippers with Lights Quiet Cat Nail Clipper Painless Care Trimmers Tools for Small Medium Large Dogs and Cats (Black).
Transition strategy if changing tools
Switching tools is often the fastest way to fix a history of stressful trims—if you transition correctly.
If you’re moving from clippers to a grinder
- Separate sound from sensation for 3–7 days: grinder on = treats, no nail contact.
- Touch-and-treat: tap the nail with the grinder off, treat.
- Micro-grind: 0.5 seconds on one nail, treat, done.
- Scale slowly: add one nail per day rather than lengthening each session.
If you’re moving from grinder to clippers (noise-sensitive dogs)
- Start after a walk when your dog is tired.
- Commit to “tiny snips only.” Your job is to rebuild trust.
- Immediately reward after each nail. Not after the whole paw.
If you’re adding a scratch board
- Make it a game first—no nail goals for the first 2–3 sessions.
- Reward paw contact heavily.
- When scratches begin, cap sessions at 10–15 scratches.
Common decision mistakes
These are the problems that make dog nail trimming at home feel impossible—none of them are about your dog being “bad.”
Mistake 1: Waiting until nails are long, then trying to “fix it” in one session
If nails are long, the quick is often longer too. Trying to take off a lot in one go increases quicking risk.
Better: trim a little every week (or even every 3–4 days for a short period) to encourage the quick to recede gradually.
Mistake 2: Picking a tool based on what feels easiest for you, not what your dog tolerates
Clippers can be “simple” but still be the wrong choice if your dog hates restraint. A grinder can be “safe” but still fail if the noise causes panic.
Better: choose the tool that you can use without a fight.
Mistake 3: Holding the paw in an unnatural position
Twisting joints makes dogs pull away. That pulling increases the chance of a bad cut.
Better: keep the leg aligned in a natural stance. Support the toe you’re working on rather than yanking the whole paw.
Mistake 4: Grinding too long and overheating the nail
Heat can make the session unpleasant even if you never hit the quick.
Better: 1–2 second touches, then rotate to another nail.
Mistake 5: Ignoring dewclaws
Dewclaws don’t always wear down naturally and can curl toward the pad.
Better: check dewclaws every trim session, even if you skip some other nails.
Final recommendation framework
If you want one decision system you can reuse, use this:
Step 1: Choose your “base method” (what you’ll do most weeks)
- •Choose grinder if your top priority is safety margin and rounded finish.
- •Choose clippers if your dog is calm and your top priority is speed.
- •Choose scratch board if paw handling is the primary obstacle (and accept you’ll need a second tool sometimes).
Step 2: Add a “backup method” for gaps
- •If you use clippers: add occasional grinding for rounding and for dark nails you don’t want to risk.
- •If you use a grinder: keep clippers as a backup for a broken grinder or to remove a tiny shard.
- •If you use a scratch board: plan a grinder or clip session for back nails/dewclaws every 2–4 weeks.
Step 3: Set a consistency target that’s hard to fail
A good starting target:
- •Week 1–2: 2–5 nails per session, 2–3 sessions per week.
- •Week 3+: 10–20 nails total per week (depending on dog size), split however your dog tolerates.
Step 4: Define “success” by your dog’s behavior
The best dog nail trimming at home routine is the one where your dog is neutral or relaxed the next time you bring the tool out.
If your dog is getting more avoidant, you’re moving too fast—switch to shorter sessions, higher rewards, or a different tool category.
If you want the most broadly successful setup for many households, a quiet electric grinder plus short-touch technique tends to offer the best balance of safety margin, finish, and long-term consistency. But if your dog’s biggest issue is restraint, start with a scratch board to build cooperation first—then graduate to a grinder for the nails the board can’t cover.
Nail Care Cluster
More in this topic

guide
How to Trim Dog Nails: A Step-by-Step Guide for Beginners

guide
Nail grinder vs clippers for dogs: which is best for your pet?
guide
Dog Nail Bleeding How to Stop: Fast First Aid That Works
guide
How to Trim Dark Dog Nails Without Hitting the Quick (Behavior-First Guide)
guide
How Often Should You Trim Dog Nails? A Practical Schedule by Activity Level
guide
Dog Nail Grinder Training Plan for Nervous Dogs (Diagnostic-First Guide)
Frequently asked questions
How often should I do dog nail trimming at home?
Most dogs do best with small, frequent sessions: every 1–2 weeks for maintenance, or every 3–4 days temporarily if nails are long and you’re trying to let the quick recede. If nails click on hard floors, that’s usually a sign you’re overdue.
What’s the safest method for dark nails?
An electric grinder is usually the safest for dark nails because it removes nail gradually, giving you more chances to stop before you reach the quick. Use short 1–2 second touches, check frequently, and stop early—consistency over time will get nails shorter without scary moments.
Can a scratch board replace trimming completely?
Sometimes for front nails, but rarely for a full set. Scratch boards typically don’t address back nails or dewclaws well, and they can change nail shape if used at a single angle only. Many owners use a scratch board as the main weekly method, then use a grinder or clippers for back nails and dewclaws every few weeks.
