

guide • Nail Care
How to Trim Dog Nails: A Step-by-Step Guide for Beginners
Nervous about nail trims? This beginner-friendly guide shows how to trim dog nails safely, avoid the quick, and keep paws healthy with a simple routine.
By PetCareLab Editorial • March 5, 2026 • 14 min read
Table of contents
- Why Nail Trimming Matters (And How to Tell It’s Time)
- Quick “Do I Need to Trim?” Checklist
- Know the Nail: Quick, Style, and Why Black Nails Feel Harder
- Clear/White vs. Black Nails
- The “Pulp Dot” Clue (Especially for Black Nails)
- Choose Your Tools (Clippers vs. Grinders) + What We Recommend
- Option 1: Nail Clippers (Fast, Affordable)
- Option 2: Nail Grinder (Controlled, Smooth Finish)
- Product Recommendations (Beginner-Friendly Picks)
- Prep Like a Vet Tech: Set Up, Handling, and Getting Your Dog Comfortable
- Pick the Right Time and Place
- Handling Positions That Work
- Desensitization: 5 Minutes a Day Beats One Big Session
- How to Trim Dog Nails with Clippers (Step-by-Step)
- Step 1: Identify the Safe Cutting Zone
- Step 2: Hold the Paw Correctly
- Step 3: Choose the Right Angle
- Step 4: Trim in Small Increments
- Step 5: Round Off Sharp Edges (Optional but Helpful)
- How Short Should You Go?
- How to Trim Dog Nails with a Grinder (Step-by-Step)
- Step 1: Get Your Dog Used to the Sound and Vibration
- Step 2: Use Short Bursts to Avoid Heat
- Step 3: Shape Matters
- Step 4: Watch for the “Stop Signs”
- Special Cases: Puppies, Seniors, Dewclaws, and Breeds with Unique Needs
- Puppies (Start Early, Keep It Positive)
- Seniors and Arthritic Dogs (Comfort First)
- Dewclaws (The “Forgotten” Nail)
- Sighthounds and Thin Skin (Greyhounds, Whippets)
- Dogs with Thick Nails (Bulldogs, Large Breeds)
- Common Mistakes Beginners Make (And How to Avoid Them)
- Mistake 1: Cutting Too Much Too Fast
- Mistake 2: Poor Lighting
- Mistake 3: Dull Clippers
- Mistake 4: Wrestling and Restraint Escalation
- Mistake 5: Forgetting the Back Nails and Dewclaws
- Mistake 6: Stopping Nail Trims After One Bad Experience
- If You Hit the Quick: Exactly What to Do (No Panic Plan)
- Step-by-Step: Stop the Bleeding
- When to Call a Vet
- Maintenance Schedule: How Often to Trim (and How to Shorten Long Quicks)
- A Practical Schedule
- How to Help the Quick Recede (Safely)
- Pro Handling Tricks: Making Nail Trims Easier on Real Dogs
- Use a Lick Mat or Food Puzzle
- Try “Two-Person Trims” (Especially for Wiggly Dogs)
- Teach a Cooperative Care Cue
- Know When to Outsource
- Quick Buying Guide: What to Look for in Nail Tools (and What to Skip)
- Clippers: Features That Matter
- Grinders: Features That Matter
- Wrap-Up: Your Beginner Game Plan (Simple and Safe)
Why Nail Trimming Matters (And How to Tell It’s Time)
If you can hear your dog’s nails clicking on hard floors, it’s usually time for a trim. Overgrown nails don’t just look messy—they can change how your dog stands and walks. That shift in posture can contribute to sore paws, strained joints, and even long-term orthopedic issues.
Here’s what long nails can cause:
- •Painful pressure on the nail bed as the nail contacts the ground
- •Splayed toes as the foot tries to compensate
- •Broken or split nails (often bloody and stressful)
- •Dewclaw injuries (those “thumb” nails can curl and stab the skin)
- •Reduced traction on slippery floors, increasing the risk of falls
Quick “Do I Need to Trim?” Checklist
Look at your dog from the side while they’re standing:
- •Nails touch the floor when standing normally
- •Nails extend past the paw pad noticeably
- •The dog shifts weight backward or looks uncomfortable on hard surfaces
- •Nails curve downward or sideways
- •Dewclaws are hooking or growing in a circle
Real-world scenario: A senior Labrador Retriever who used to love long walks starts hesitating on tile and wood floors. Owners often blame “aging,” but long nails can be a major (fixable) contributor to that stiff, careful gait.
Know the Nail: Quick, Style, and Why Black Nails Feel Harder
To confidently learn how to trim dog nails, you need a mental map of what’s inside the nail.
- •The quick is the living tissue inside the nail that contains blood vessels and nerves.
- •The outer shell is keratin (like our fingernails) and can be safely trimmed.
- •If you cut into the quick, it bleeds and hurts—this is why beginners get nervous.
Clear/White vs. Black Nails
- •Clear/white nails: You can often see the quick as a pink triangle inside the nail. Beginner-friendly.
- •Black nails: The quick is hidden, so you rely on technique and tiny trims.
Breed examples you’ll commonly see:
- •Black nails: Many Labradors, Rottweilers, Dobermans, and mixed breeds.
- •Lighter nails: Many Golden Retrievers, some Shih Tzus, and many dogs with pale claws (varies widely).
The “Pulp Dot” Clue (Especially for Black Nails)
When you trim a little at a time, you’ll eventually see a dark, moist-looking center (often described as a small dot or oval). That’s your warning sign you’re close to the quick. Stop there.
Pro-tip: On black nails, aim for multiple “micro-trims” rather than one big cut. It’s slower, but it’s the safest way to build confidence.
Choose Your Tools (Clippers vs. Grinders) + What We Recommend
There are two main ways to trim nails: clippers (cut) and grinders (file down). Many beginners do best using one method primarily and keeping the other as a backup.
Option 1: Nail Clippers (Fast, Affordable)
Two common types:
- •Scissor-style clippers: Great for small dogs and puppies (e.g., Yorkies, Toy Poodles).
- •Guillotine-style clippers: Can work well, but some owners find them harder to position correctly.
Pros
- •Quick once you get the hang of it
- •No battery needed
- •Easy to see what you’re doing
Cons
- •Can crush/splinter nails if dull or if you cut too much at once
- •More intimidating for nervous dogs
Option 2: Nail Grinder (Controlled, Smooth Finish)
A grinder sands the nail down gradually.
Pros
- •Excellent control (great for black nails)
- •Leaves smoother edges (less scratching)
- •Often easier to “sneak up” on the right length
Cons
- •Noise/vibration can scare some dogs
- •Can heat the nail if held too long in one spot
- •Takes longer than clipping
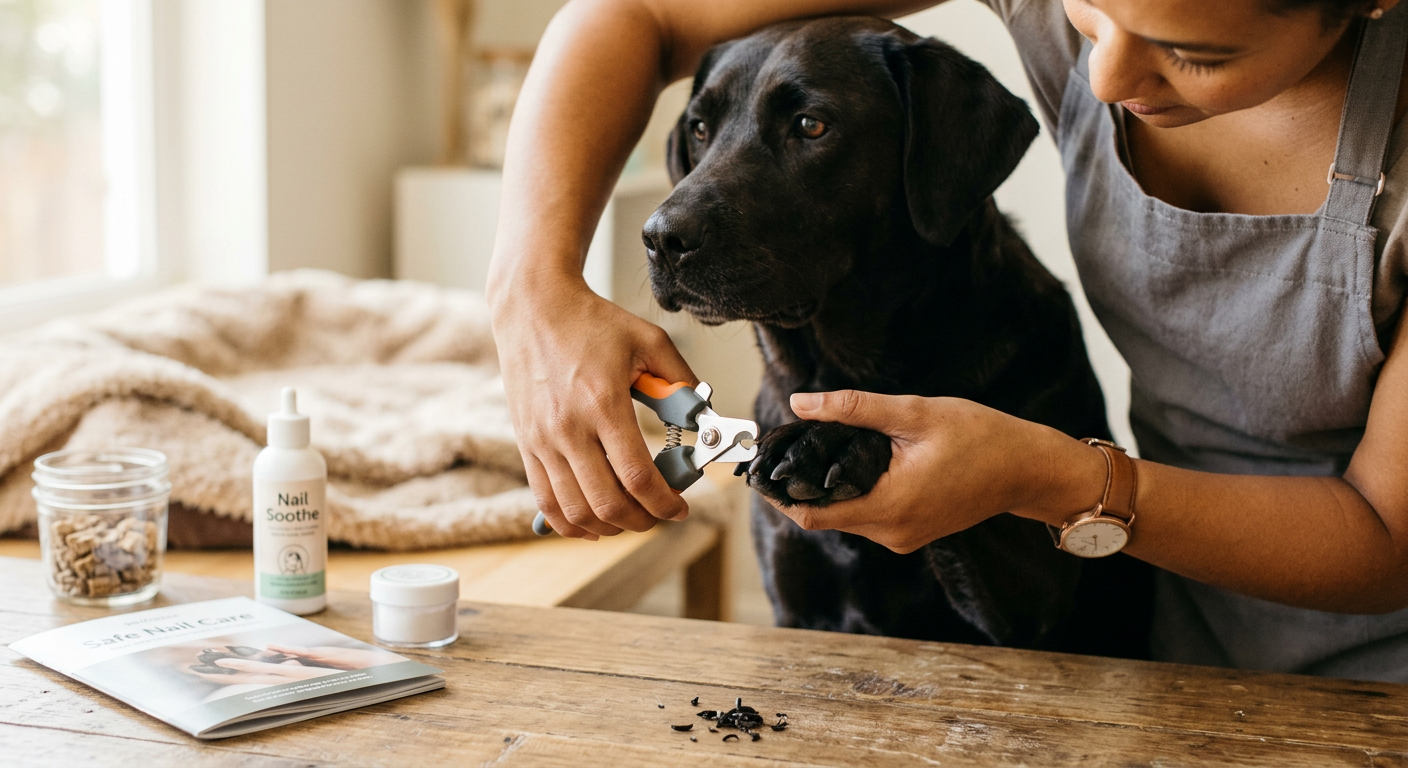
Product Recommendations (Beginner-Friendly Picks)
These are widely trusted, consistently reviewed options—choose based on your dog’s size and temperament:
Clippers
- •Miller’s Forge Nail Clippers (durable, sharp, widely used by groomers)
- •Safari Professional Nail Trimmer (good grip; solid all-around choice)
Grinders
- •Dremel 7350-PET (reliable, good control; a common pro recommendation)
- •Casfuy Dog Nail Grinder (popular budget-friendly option with multiple speeds)
Must-haves for safety
- •Styptic powder (e.g., Kwik Stop) for stopping bleeding fast
- •A bright flashlight or headlamp to improve visibility
- •High-value treats (tiny and soft—think chicken or freeze-dried liver)
Pro-tip: If your dog hates clippers, don’t force it. Switching to a grinder (or doing one nail per day) can turn nail care from a battle into a routine.
[IMAGE_PLACEHOLDER_1]
Prep Like a Vet Tech: Set Up, Handling, and Getting Your Dog Comfortable
Most “bad nail trims” aren’t caused by the trim—they’re caused by the setup. Your goal is a calm dog, good lighting, and a position that keeps everyone safe.
Pick the Right Time and Place
Choose:
- •After exercise (a tired dog is a cooperative dog)
- •A quiet room with minimal distractions
- •A non-slip surface (yoga mat or towel on tile)
Avoid:
- •Right before guests arrive
- •When your dog is already stressed (thunderstorms, vacuuming, etc.)
Handling Positions That Work
Different bodies need different strategies:
- •Small dogs (e.g., Shih Tzu, Chihuahua): Sit them on your lap or a table with a non-slip mat.
- •Medium/large dogs (e.g., Border Collie, Lab): Have them lie on their side (“lateral”) or sit with their hip against your leg.
- •Deep-chested dogs (e.g., Greyhound): Often do best standing, with you gently lifting each paw briefly.
Real-world scenario: An energetic Border Collie keeps pulling paws away. Instead of grabbing tighter (which increases panic), switch to “touch-pairing”: touch paw → treat, touch nail → treat, clipper near nail → treat. You’re teaching the dog the steps without the trim at first.
Desensitization: 5 Minutes a Day Beats One Big Session
If your dog is nervous, start here for 3–7 days:
- Show the tool → treat
- Turn on grinder briefly (or open/close clippers) → treat
- Touch paw → treat
- Touch nail with tool (no cutting) → treat
- Trim/grind one nail → jackpot treat and done
Pro-tip: Stop while your dog is still doing well. Ending on a “win” is the fastest way to build long-term cooperation.
How to Trim Dog Nails with Clippers (Step-by-Step)
This is the classic beginner method. The keys are angle, tiny cuts, and knowing when to stop.
Step 1: Identify the Safe Cutting Zone
- •For white nails, locate the pink quick and stay a few millimeters away.
- •For black nails, assume the quick is closer than you think and trim in thin slices.
Step 2: Hold the Paw Correctly
Gently but firmly:
- •Support the toe you’re trimming with your fingers
- •Avoid twisting the leg awkwardly
- •Press lightly on the pad to extend the nail if needed
Step 3: Choose the Right Angle
Cut at a slight angle, not straight across:
- •Aim to follow the natural curve of the nail
- •Generally, you’ll cut from underneath upward (especially for curved nails)
Step 4: Trim in Small Increments
For beginners, think “shavings,” not chunks.
- Take the tiniest slice off the tip.
- Check the cut surface.
- Repeat until you see:
- •White/chalky center (still safe)
- •Then a darker center starting to appear (close—stop soon)
- •A small dark, moist dot (very close—stop)
Step 5: Round Off Sharp Edges (Optional but Helpful)
If your dog scratches you or your floors:
- •Do one tiny “corner snip” on each side
- •Or finish with a grinder for a smooth edge
How Short Should You Go?
A practical goal:
- •Nails should not touch the floor when standing
- •But don’t chase perfection on day one—especially with long quicks
If your dog’s nails are very long, the quick may be extended. In that case, you’ll gradually shorten over multiple sessions so the quick can recede.
Common beginner win: On a Dachshund with long nails, trim just enough to stop the clicking, then revisit in 7–10 days. Small, frequent trims are safer than one aggressive session.
How to Trim Dog Nails with a Grinder (Step-by-Step)
Grinding is often the easiest way to gain confidence—especially for black nails and squirmy dogs.
Step 1: Get Your Dog Used to the Sound and Vibration
Before you grind:
- •Turn it on for 1 second → treat
- •Touch the handle to their shoulder lightly (not the nail) → treat
- •Then try a nail for 1–2 seconds max
Step 2: Use Short Bursts to Avoid Heat
Grinding generates friction heat.
- •Touch nail to grinder for 1–2 seconds
- •Lift off and check
- •Repeat
If the nail feels warm, pause.
Step 3: Shape Matters
Aim for:
- •A gently rounded tip
- •Avoid grinding the nail into a needle point
Step 4: Watch for the “Stop Signs”
- •You’re close when the center looks darker and slightly soft
- •Stop before you reach the quick; smooth edges are more important than super short nails
Pro-tip: If your dog startles at the grinder, try doing one nail per day for a week. Consistency beats wrestling, and most dogs adapt faster than you’d expect.
[IMAGE_PLACEHOLDER_2]
Special Cases: Puppies, Seniors, Dewclaws, and Breeds with Unique Needs
Puppies (Start Early, Keep It Positive)
Puppies don’t need perfect trims—they need good associations.
- •Trim one or two nails at a time
- •Pair every step with a treat
- •Keep sessions under 2 minutes
Breed scenario: A wiggly Golden Retriever puppy is teething and mouthy. Do nail handling after a chew session when they’re calmer, and keep your hands close to the body to reduce flailing.
Seniors and Arthritic Dogs (Comfort First)
Older dogs may have stiff joints and less patience.
- •Choose a comfortable position (often lying on a padded surface)
- •Support joints; don’t pull limbs outward
- •Consider shorter sessions more frequently
If your senior dog yelps when you lift a paw, it might be pain, not drama. Adjust positioning and ask your vet about arthritis management if needed.
Dewclaws (The “Forgotten” Nail)
Dewclaws often don’t wear down naturally.
- •Check them weekly
- •They can curl and pierce the skin if ignored
Some breeds (like Great Pyrenees) can have double dewclaws on the back legs—those need attention too.
Sighthounds and Thin Skin (Greyhounds, Whippets)
Sighthounds can be sensitive and have thinner skin:
- •Go slow, use a soft grip
- •Avoid quicking (they can bleed more noticeably)
- •A grinder can be gentler than clippers for nervous individuals
Dogs with Thick Nails (Bulldogs, Large Breeds)
Thicker nails can splinter if your clippers are dull.
- •Use a heavy-duty clipper (Miller’s Forge is a common choice)
- •Trim smaller slices
- •Consider finishing with a grinder for smoothness
Common Mistakes Beginners Make (And How to Avoid Them)
Mistakes are normal. The goal is to prevent the ones that cause pain or create long-term fear.
Mistake 1: Cutting Too Much Too Fast
Avoid:
- •One big confident chop
Do:
- •Multiple tiny trims, especially on black nails
Mistake 2: Poor Lighting
A dim room leads to guesswork. Do:
- •Use a headlamp or bright lamp
- •Sit near a window during daytime
Mistake 3: Dull Clippers
Dull blades can crush nails and cause splits. Do:
- •Replace or sharpen clippers regularly
- •If you hear a “crunch,” reassess your tool
Mistake 4: Wrestling and Restraint Escalation
The tighter you hold, the more your dog panics. Do:
- •Use short sessions
- •Train cooperative handling (touch paw → treat)
Mistake 5: Forgetting the Back Nails and Dewclaws
Front nails often get attention because they’re more visible. Do:
- •Follow a consistent order (e.g., front left → front right → back left → back right → dewclaws)
Mistake 6: Stopping Nail Trims After One Bad Experience
One quicked nail can create a long fear memory if handled poorly. Do:
- •Calmly stop bleeding, soothe, and end on a positive note
- •Resume with easy wins later (even if it’s just tool desensitization)
[IMAGE_PLACEHOLDER_3]
If You Hit the Quick: Exactly What to Do (No Panic Plan)
Even pros occasionally quick a nail—especially with black nails or wiggly dogs. What matters is how you respond.
Step-by-Step: Stop the Bleeding
- Stay calm and keep your dog still (gentle hold).
- Apply styptic powder to the bleeding tip.
- Hold light pressure for 30–60 seconds.
- If you don’t have styptic powder:
- •Cornstarch or flour can help in a pinch (not as effective, but better than nothing).
- Once bleeding stops, give your dog a break and a treat.
When to Call a Vet
Call your vet if:
- •Bleeding continues after 10 minutes of repeated pressure/styptic attempts
- •The nail is cracked up into the base
- •Your dog is limping or intensely painful afterward
- •There are signs of infection later (redness, swelling, discharge)
Pro-tip: If you quick a nail, don’t immediately try to “make it even” by cutting more. Stop, stabilize, and end the session. Confidence and trust matter more than symmetry.
Maintenance Schedule: How Often to Trim (and How to Shorten Long Quicks)
Frequency depends on lifestyle, surface exposure, and nail growth rate. Most dogs do well with trims every 2–4 weeks, but many beginners get better results with more frequent mini-sessions.
A Practical Schedule
- •New to nail care: 1–2 nails per day (or every other day) for 1–2 weeks
- •Maintenance: full trim every 2–4 weeks
- •Dogs with long quicks: small trims every 5–7 days to encourage quick recession
How to Help the Quick Recede (Safely)
If nails are very long, the quick may be extended. You can’t safely cut to “ideal” length in one go.
Plan:
- Trim a tiny amount (just to reduce length).
- Repeat weekly.
- Over several weeks, the quick usually retreats gradually.
Real-world scenario: A rescued Beagle with long nails and long quicks needs a gradual plan. Owners often feel discouraged because they “can’t get them short,” but consistency wins here.
Pro Handling Tricks: Making Nail Trims Easier on Real Dogs
Use a Lick Mat or Food Puzzle
Smear peanut butter (xylitol-free), canned food, or yogurt on a lick mat:
- •Keeps the head busy
- •Creates a positive association
- •Buys you time for 1–3 nails
Try “Two-Person Trims” (Especially for Wiggly Dogs)
One person handles treats and calm positioning; the other trims.
- •Great for Corgis who like to “sit-dodge”
- •Helpful for giant breeds where stability matters
Teach a Cooperative Care Cue
Train a simple behavior like:
- •“Paw” for front nails
- •Chin rest on a towel for calmness
- •Standing still on a mat
Pay generously at first. You’re teaching a life skill.
Know When to Outsource
If your dog is:
- •Extremely fearful
- •Aggressive with handling
- •Has painful joints
- •Has severely overgrown or twisted nails
A professional groomer or vet team can help safely—and they can often show you handling techniques specific to your dog.
Quick Buying Guide: What to Look for in Nail Tools (and What to Skip)
Clippers: Features That Matter
Look for:
- •Sharp stainless blades
- •Comfortable, non-slip handles
- •Size appropriate for your dog (too small = crushing; too large = clumsy)
Skip:
- •Ultra-cheap clippers that bend or misalign
- •“Safety guards” that give false confidence (they can help some people, but they’re not foolproof)
Grinders: Features That Matter
Look for:
- •Multiple speeds
- •Quiet motor (or at least low-vibration)
- •Replaceable sanding bands or a quality grinding bit
Tip: If you have a large breed with thick nails (like a Boxer or German Shepherd), choose a grinder with enough power to avoid prolonged contact time.
Wrap-Up: Your Beginner Game Plan (Simple and Safe)
If you’re learning how to trim dog nails, your best path is controlled, repeatable success:
- •Start with the right tools (sharp clippers or a gentle grinder) and styptic powder on hand
- •Set up great lighting and a calm environment
- •Trim in tiny increments, especially for black nails
- •Prioritize your dog’s comfort and trust over “perfect” nail length
- •Use frequent mini-sessions to shorten long quicks safely
Nail care is one of those skills that gets dramatically easier after a handful of calm sessions. Go slow, stay consistent, and don’t hesitate to bring in a groomer or vet team if your dog needs extra support.
Nail Care Cluster
More in this topic

guide
Nail grinder vs clippers for dogs: which is best for your pet?

guide
Dog Nail Trimming at Home: Safe Step-by-Step Routine (Clippers vs Grinders vs Scratch Boards)
guide
Dog Nail Bleeding How to Stop: Fast First Aid That Works
guide
How to Trim Dark Dog Nails Without Hitting the Quick (Behavior-First Guide)
guide
How Often Should You Trim Dog Nails? A Practical Schedule by Activity Level
guide
Dog Nail Grinder Training Plan for Nervous Dogs (Diagnostic-First Guide)
Frequently asked questions
How often should I trim my dog's nails?
Most dogs need a trim every 2-4 weeks, but it depends on how fast the nails grow and how much they wear down on walks. If you hear clicking on hard floors or see nails touching the ground while standing, it's time to trim.
How do I avoid cutting the quick when trimming dog nails?
Trim small amounts at a time and stop when you see a pale oval center with a darker dot (a sign you're close to the quick). Use good lighting, consider a nail grinder for gradual removal, and reward calm behavior so you don't rush the cut.
What should I do if I accidentally cut my dog's quick?
Stay calm, apply styptic powder (or cornstarch in a pinch) with firm pressure, and keep your dog still for a few minutes. If bleeding doesn't stop within 10-15 minutes or your dog seems very painful, contact your vet for advice.
