

guide • Nail Care
Dog Nail Grinder Training Plan for Nervous Dogs (Diagnostic-First Guide)
A calm, measurable dog nail grinder training plan for nervous dogs—plus fixes for noise fear, paw sensitivity, and sudden setbacks.
By Lucy Anderson • February 26, 2026 • 7 min read
Table of contents
- Core problem and hidden bottlenecks
- Reality check: what most owners misread
- Misread #1: “If I can hold them, I can do it faster.”
- Misread #2: “They’ll get used to the noise.”
- Misread #3: “One long session a week is efficient.”
- Misread #4: “If they pull away, they’re being stubborn.”
- Practical setup and baseline metrics
- Environment: make “nail time” physically easy
- Tool choice: match the tool to the bottleneck
- Baseline metrics: track progress like a trainer
- Treat strategy: pay well, pay fast
- Step-by-step operating workflow
- Stage 1: Tool neutrality (no sound, no contact)
- Stage 2: Sound at a distance (sound only)
- Stage 3: Sound nearby + consent cue
- Stage 4: Vibration without grinding (contact on non-sensitive area)
- Stage 5: Paw handling + toe isolation
- Stage 6: First nail touches (tap, don’t grind)
- Stage 7: Shaping actual grinding (1 nail per session)
- Stage 8: Building a sustainable routine
- Alternative workflow: scratch board bridge plan
- Decision table: when to keep, switch, or escalate
- Failure modes and fixes
- Failure mode: “They tolerate it until the last nail, then explode.”
- Failure mode: “My dog is fine with me, not with other family members.”
- Failure mode: “The grinder catches fur or makes a scary snag.”
- Failure mode: “The nail looks frayed or splits.”
- Failure mode: “I accidentally quicked my dog—now training is ruined.”
- Weekly optimization playbook
- Week 1: Calm exposure + consent
- Week 2: Vibration + paw micro-holds
- Week 3: Tap nails, 1 nail at a time
- Week 4: Maintenance rhythm
- Final action checklist
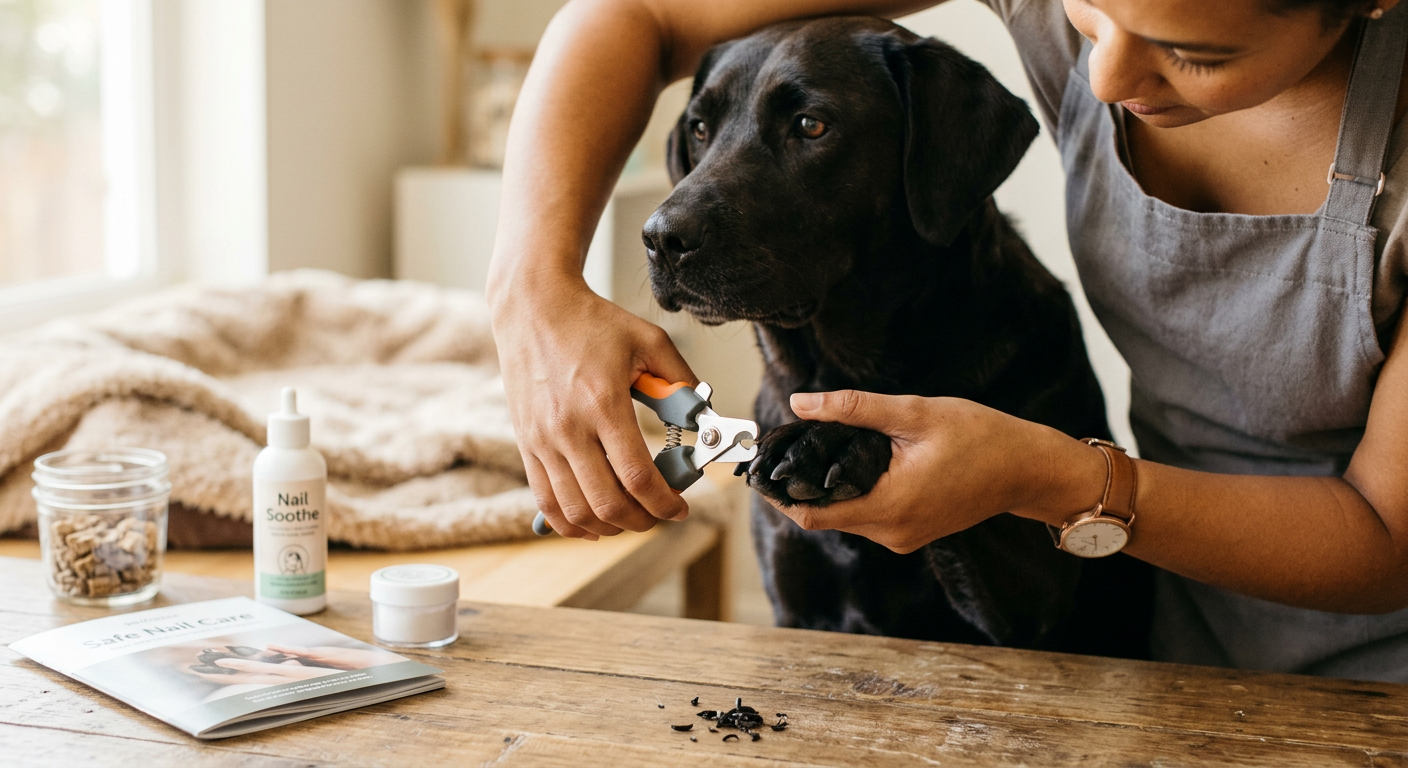
Core problem and hidden bottlenecks
Most “my dog hates the nail grinder” situations aren’t about the grinder itself—they’re about one (or more) hidden bottlenecks that make the experience feel unsafe.
Here are the bottlenecks to diagnose first, because they change the training plan:
- •Noise sensitivity (sound aversion): Your dog startles at the motor, leaves the room, trembles, or refuses treats when it turns on.
- •Vibration sensitivity: The sound is fine at a distance, but they panic when the grinder touches the nail—even for a second.
- •Handling/paw restraint stress: Your dog is okay with the tool but not okay with you holding their paw, spreading toes, or keeping them still.
- •Heat/friction discomfort: Too much pressure or time on the nail can warm the keratin. Some dogs react to the sensation before you see obvious heat.
- •“Flashback” learning: One quicking incident with clippers, a slip on the floor, or a forced wrestling session can generalize into “nail time = danger.”
- •Owner pacing issues: Many owners move from “dog sees grinder” to “grinding multiple nails” in one session. Nervous dogs need smaller reps than you think.
The goal of dog nail grinder training isn’t bravery. It’s predictability: your dog learns exactly what happens, for how long, and how they can opt out safely.
Reality check: what most owners misread
Misread #1: “If I can hold them, I can do it faster.”
Physical restraint can work once, but it often raises the baseline fear for the next session. For nervous dogs, the training win is when your dog chooses to stay.
Concrete threshold: if your dog needs a firm hold to prevent escape for more than 2–3 seconds, you’re not “getting it done”—you’re creating a stronger avoidance memory.
Misread #2: “They’ll get used to the noise.”
Some dogs do habituate, but many don’t—especially if the noise always predicts being restrained. Training should separate:
- sound,
- vibration,
- paw handling,
- grinding.
Misread #3: “One long session a week is efficient.”
Long, infrequent sessions usually backfire for nervous dogs. You want micro-sessions that end before your dog hits their limit.
Practical rule: stop the session while your dog still looks “a little bored,” not when they look brave.
Misread #4: “If they pull away, they’re being stubborn.”
Pulling away is information. It may mean: you’re too close to the quick, the vibration is startling, the toe spread hurts (arthritis), or the floor is slippery.
If you treat pull-aways as defiance, you’ll miss fixable physical causes.
Practical setup and baseline metrics
This guide is diagnostic-first: we set up the environment, measure what your dog can tolerate, and only then build duration.
Environment: make “nail time” physically easy
- •Surface: Use a yoga mat, bath mat, or rug so paws don’t slip. Slipping increases panic and struggling.
- •Lighting: Bright, even light helps you see the quick (especially important for dark nails). If your grinder has a light, use it—but don’t point it directly into your dog’s eyes.
- •Position: Start side-by-side rather than face-to-face. Many nervous dogs handle grooming better when they’re not being “loomed over.”
- •Sound control: Start with the grinder in another room or inside a towel to muffle it. Your goal is “notice but not panic.”
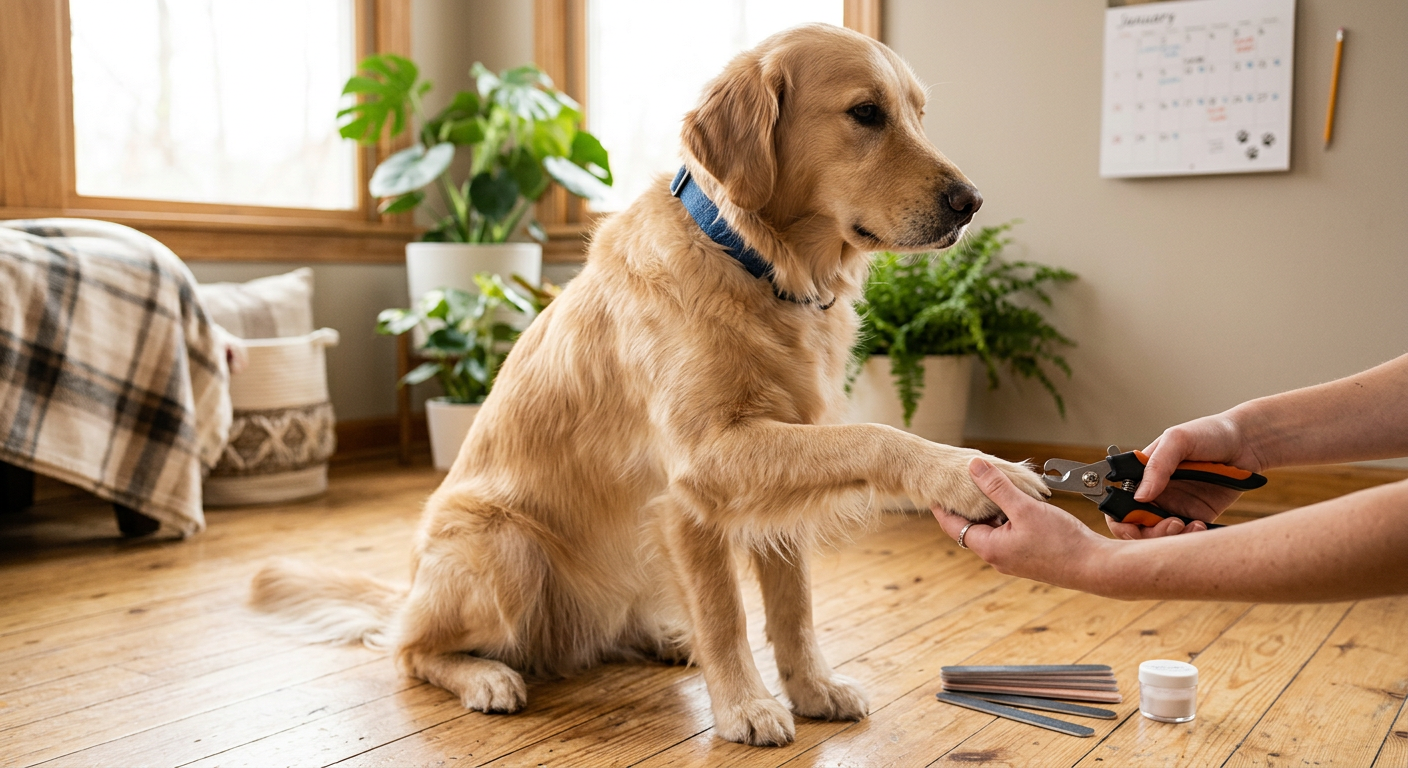
Tool choice: match the tool to the bottleneck
- •If noise is the bottleneck, start with a scratch board style tool that removes sound and vibration while still shortening nails. A board like the Dog Nail File, Grinder Board Scratch Pad with 4-Pack Replaceable Sandpaper Discs can be a bridge step for dogs who will “dig” for treats but hate motors.
- •If you need a grinder, prioritize low noise + multiple speeds so you can start gentle and only increase power when your dog is ready. Options like the Electric Dog Nail Grinder: Upgraded 5-Speed Quiet Dog Nail Trimmer or the Dog Nail Grinder Electric Powerful 3 Speeds with Lights let you scale intensity.
- •If you’re switching between pets and have cats too, keep species-appropriate tools on hand. Many owners accidentally try to “make do” with one tool. For cats, sharp, controlled clippers like NecoIchi - Purrcision Feline Nail Clippers can reduce crushing pressure (which cats often hate).

Dog Nail File, Grinder Board Scratch Pad with 4-Pack Replaceable Sandpaper Discs, Gentle Pet Nail Care Tool for Dogs and Cats
Brand: PASDUCHAS

NecoIchi - Purrcision Feline Nail Clippers | Ultra-Sharp Cat Nail Clipper for Safe & Precise Trimming | Stainless Steel Blades, Cat Nail Trimmer, Ideal for Indoor Cats (White)
NecoIchi
Baseline metrics: track progress like a trainer
Create three scores (0–5) and log them per session:
1) Sound score (0–5):
- •0 = refuses food, tries to flee
- •1 = tense, lip-licking, ears pinned, takes food hard/slow
- •2 = notices, takes treats, body stiff
- •3 = relaxed but alert
- •4 = mostly uninterested
- •5 = fully relaxed
2) Handling score (0–5): how your dog responds to you touching paw, lifting it, spreading toes.
3) Contact score (0–5): response to grinder touching nail (even for 0.5 sec).
Training rule: progress only when you consistently hit 3+ on the relevant score for two sessions.
Treat strategy: pay well, pay fast
For nervous dogs, use high-value, low-chew rewards (tiny bits) so you can deliver quickly without long chewing pauses.
Examples:
- •pea-sized chicken, cheese crumbs, freeze-dried liver
- •lickable rewards (peanut butter, meat baby food) on a spoon or lick mat for dogs who get mouthy when stressed
If your dog stops taking treats, treat that as a red flag: you’re over threshold.
Step-by-step operating workflow
This is a staged plan. The timeline depends on the dog. Some dogs move in days; others need weeks. The win is steady, not fast.
Stage 1: Tool neutrality (no sound, no contact)
Goal: Your dog sees the grinder and stays relaxed.
- •Put the grinder on the floor 6–10 feet away.
- •Feed 5–10 treats for calm looks/sniffs.
- •End the session before your dog gets wary.
Progress marker: dog approaches, sniffs, and disengages casually (no freeze, no whale eye).
Stage 2: Sound at a distance (sound only)
Goal: Sound predicts good things and doesn’t trap the dog.
- •Turn the grinder on for 1 second in another room, then off.
- •Immediately toss a treat away from you (so your dog can retreat and still win).
- •Repeat 5–8 times.
If your dog startles: increase distance and shorten the “on” time.
Progress marker: Sound score reaches 3+ (dog notices, takes treat normally).
Stage 3: Sound nearby + consent cue
Goal: Dog learns a predictable start and a way to opt out.
Teach a simple consent behavior:
- •Chin rest on a towel (dog places chin down) or
- •Paw target (dog places paw on your open hand) or
- •Station (dog stands on a mat)
Operating rule: grinder only turns on when the dog offers the consent behavior. If they lift chin or step off the mat, you stop.
This single change prevents wrestling dynamics and builds trust fast.
Stage 4: Vibration without grinding (contact on non-sensitive area)
Goal: vibration becomes normal before nails are involved.
- •With grinder OFF, touch the handle to your dog’s shoulder for 1 second, treat.
- •Then grinder ON at lowest speed, touch shoulder for 0.5 seconds, treat.
- •Move gradually toward the leg, then paw.
If your dog is paw-sensitive, don’t jump straight to toes. Work down the limb.
Progress marker: Contact score is 3+ with grinder touching fur/leg.
Stage 5: Paw handling + toe isolation
Goal: dog tolerates gentle paw positioning.
Micro-skills:
- •Lift paw 1 inch → treat → set down.
- •Hold paw for 1 second → treat → release.
- •Touch a single toe → treat.
Key tradeoff: you can either build duration (hold longer) or complexity (spread toes). Don’t increase both at once.
Red flag: if your dog pulls away sharply when you spread toes, consider arthritis, interdigital soreness, or nail bed sensitivity.
Stage 6: First nail touches (tap, don’t grind)
Goal: nails feel the tool briefly with no heat.
- •Grinder ON (lowest speed)
- •Tap the side of one nail for less than 0.5 seconds
- •Treat immediately
- •Stop after 3–5 taps total
If your dog is okay, do one more nail. If they’re unsure, end on a win.
Stage 7: Shaping actual grinding (1 nail per session)
Goal: remove tiny amounts, avoid heat, and keep sessions short.
Technique that reduces discomfort:
- •Use brief touches: 0.5–1 second on, then off
- •Avoid heavy pressure; let the grit do the work
- •Rotate around the nail edge rather than holding one spot
Concrete guideline: For nervous dogs, aim for one nail per session until they’re consistently relaxed. That sounds slow, but it’s how you prevent setbacks.
Stage 8: Building a sustainable routine
Once you can do multiple nails calmly, shift from “big trims” to “maintenance.”
Most dogs do best with:
- •2–4 nails per session, 2–4 sessions per week, rather than all nails in one day
Maintenance keeps nails short without pushing close to the quick, which is where many dogs get worried.
Alternative workflow: scratch board bridge plan
If your dog won’t tolerate motor sound yet, you can still shorten nails.
Using a scratch pad like the Dog Nail File, Grinder Board Scratch Pad:
- •Teach “scratch” by hiding a treat under the board so your dog paws at it.
- •Do 3–5 scratches, then reward.
- •Use it mainly for front nails; rear nails often need different positioning.
Tradeoff: scratch boards can be great for fear reduction, but they don’t shape the nail as neatly and may not address dewclaws.
Decision table: when to keep, switch, or escalate
Use this table after 3–5 training sessions.
| What you see | Likely cause | Keep plan? | Switch tool? | Escalate? |
|---|---|---|---|---|
| Dog won’t take treats when grinder turns on | Over threshold noise fear | Keep, but reduce intensity (distance/time) | Consider quieter multi-speed grinder like 5-speed | If panic persists after 2 weeks, consult trainer/vet |
| Dog tolerates sound but jerks away on nail contact | Vibration/handling sensitivity or heat | Keep, slow down to tap-only | Consider different grinder head/speed; avoid high speed early | Vet check if pain suspected |
| Dog fights paw holding but is fine with touch elsewhere | Handling restraint stress | Keep, add consent cue and micro-holds | Scratch board bridge can help | Trainer help for cooperative care |
| Nails are very long, quick is grown out | You need gradual reduction | Keep, do tiny amounts more often | Any grinder can work; prioritize comfort | Vet groom if nails curl/impact gait |
| One bad session caused major regression | Fear memory | Keep, go back 2 stages | Not necessarily | If regression lasts >1–2 weeks, get help |
Escalate sooner if you see: limping, licking paws persistently, broken nails, bleeding, or sudden aggression around handling.
Failure modes and fixes
Failure mode: “They tolerate it until the last nail, then explode.”
Cause: session too long; stress accumulates. Fix:
- •cap sessions at 2–5 minutes
- •stop after a success, not after “just one more”
- •alternate nails across days
Failure mode: “My dog is fine with me, not with other family members.”
Cause: different handling pressure, different timing, inconsistent release. Fix:
- •have one person feed while the other handles
- •standardize the consent cue (chin rest/mat)
- •keep the same sequence every time (predictability lowers fear)
Failure mode: “The grinder catches fur or makes a scary snag.”
Cause: long paw fur near pads; awkward angle. Fix:
- •trim paw fur with scissors cautiously (or have a groomer do it)
- •keep the grinder perpendicular to the nail edge, not angled into fur
Failure mode: “The nail looks frayed or splits.”
Cause: low-quality abrasive, too much pressure, or grinding in one spot. Fix:
- •use lighter touches; rotate around the edge
- •replace sanding bands/discs when worn
- •consider a different tool style if your dog’s nails are brittle
Failure mode: “I accidentally quicked my dog—now training is ruined.”
Not ruined, but you must rebuild trust. Fix for the next 1–2 weeks:
- •go back to sound-only and paw handling games
- •do scratch board sessions for nail reduction without direct grinding
- •when you restart grinding, do tap-only for several sessions
If the quicking was severe or your dog is limping, involve your vet.
Weekly optimization playbook
Here’s a practical week structure that works for many nervous dogs. Adjust based on your scores.
Week 1: Calm exposure + consent
- •4–6 micro-sessions (1–3 minutes)
- •Sound at distance, then nearby
- •Build chin rest or mat station
- •Goal: Sound score 3+ consistently
Week 2: Vibration + paw micro-holds
- •4 micro-sessions
- •Touch grinder (on low) to shoulder/leg, then near paw
- •Lift paw briefly, release, reward
- •Goal: Handling score 3+, Contact score 3+ on fur/leg
Week 3: Tap nails, 1 nail at a time
- •3–5 micro-sessions
- •Tap one nail 3–5 times per session
- •Optional: use scratch board on off-days to keep nails moving shorter
- •Goal: Contact score 3+ on nail taps
Week 4: Maintenance rhythm
- •2–4 sessions/week
- •2 nails per session, then 3–4 as tolerated
- •Keep sessions short and predictable
Optimization levers when progress stalls:
- •Lower speed (or increase distance)
- •Increase treat value
- •Shorten sessions
- •Train when your dog is naturally calmer (after a walk, not during zoomies)
Final action checklist
- •Identify the bottleneck: noise, vibration, handling, heat, or fear memory.
- •Set a non-slip surface and side-by-side position; improve lighting.
- •Choose the right starting tool: consider a scratch pad like this grinder board for noise-sensitive dogs, or a quiet multi-speed grinder like the 5-speed option or the 3-speed with light.
- •Track Sound/Handling/Contact scores (0–5) and only progress when you hit 3+ twice.
- •Install a consent cue (chin rest, mat station, or paw target) and honor opt-outs.
- •Start with 1-second sound bursts, then vibration on shoulder, then paw, then nail taps.
- •Grind in 0.5–1 second touches with light pressure; avoid heat and long holds.
- •Prefer short, frequent maintenance sessions over one long “get it done” day.
- •Escalate to vet/trainer if pain is suspected, panic persists, or aggression appears.
Nail Care Cluster
More in this topic

guide
How to Trim Dog Nails: A Step-by-Step Guide for Beginners
guide
Nail grinder vs clippers for dogs: which is best for your pet?

guide
Dog Nail Trimming at Home: Safe Step-by-Step Routine (Clippers vs Grinders vs Scratch Boards)
guide
Dog Nail Bleeding How to Stop: Fast First Aid That Works
guide
How to Trim Dark Dog Nails Without Hitting the Quick (Behavior-First Guide)
guide
How Often Should You Trim Dog Nails? A Practical Schedule by Activity Level
Frequently asked questions
How long does dog nail grinder training take for a nervous dog?
Most nervous dogs need days to weeks, depending on the bottleneck. If the issue is mainly unfamiliarity, you may reach nail taps within a week using micro-sessions. If the issue is sound fear or a past bad experience, plan for 2–4 weeks of staged work. Track progress with simple scores (sound/handling/contact). If your dog won’t take treats when the grinder turns on after two weeks of distance-and-duration reductions, involve a trainer or your vet to rule out pain and build a safer plan.
What speed should I use on a dog nail grinder for training?
Start at the lowest speed your grinder offers. Low speed is usually less startling and creates less heat when you use brief touches. Once your dog stays relaxed through multiple nail taps (contact score 3+), you can test a slightly higher speed for efficiency—only if your dog remains comfortable. The biggest comfort factors are light pressure and short contact time (0.5–1 second), not raw power.
Is a scratch board better than a nail grinder for fearful dogs?
A scratch board can be a great bridge tool for noise-sensitive dogs because it removes motor sound and vibration. It’s especially useful for front nails and for rebuilding confidence after a setback. The tradeoffs: it may not shape nails as neatly, it may not address dewclaws, and some dogs will over-scratch if you chase fast results. Many owners use a scratch board to get nails shorter while training tolerance for a quiet grinder in parallel.
