
guide • Nail Care
How to Handle Overgrown Dog Nails at Home Without Panic (With Real Tradeoffs)
A calm, step-by-step guide to fixing overgrown dog nails at home using clippers, grinders, or combo methods—plus how to avoid bleeding and build long-term routines.
By Lucy Anderson • February 22, 2026 • 7 min read
Table of contents
- What actually matters in this comparison
- 1) Quick position (the hidden limiting factor)
- 2) Your dog’s stress threshold
- 3) Nail thickness and color
- 4) Surface-level comfort and long-term traction
- 5) Your consistency, not your courage
- Baseline criteria and scoring method
- The workflows we are comparing
- Side-by-side workflow analysis
- Workflow 1: Clipper-only micro-trims
- Workflow 2: Grinder-only shaping
- Workflow 3: Combo method (clip length, grind finish)
- Workflow 4: Scratchboard/filing maintenance
- Workflow 5: Outsource the reset, maintain at home
- The overlooked step: clean nails before you trim
- Cost, effort, and consistency tradeoffs
- Cost (typical ranges)
- Effort (what you feel at home)
- Consistency (the real decider)
- Which option wins by user profile
- If you have a nervous dog who hates restraint
- If your dog has thick, black nails and you fear the quick
- If you have a small dog (or tiny dewclaws) and want control
- If your dog’s nails are extremely overgrown or curling
- If you are calm, consistent, and want the simplest routine
- Transition strategy if changing tools
- Moving from “nothing” to clippers
- Moving from clippers to grinder
- Moving from grinder to combo
- After a professional reset
- Common decision mistakes
- 1) Trying to “fix” overgrown nails in one sitting
- 2) Ignoring dewclaws
- 3) Cutting at the wrong angle
- 4) Not cleaning/inspecting first
- 5) Pushing past the first signs of stress
- 6) Choosing a method you cannot repeat
- Final recommendation framework
- Step 1: Safety triage (do you need a pro?)
- Step 2: Choose your “default” workflow
- Step 3: Set a realistic schedule that shortens the quick
- Step 4: Define success correctly
Overgrown dog nails at home can feel like a high-stakes project: your dog is wiggly, you are nervous about the quick, and one bad cut can set you back for months.
The good news is you do not need “one perfect trim” to fix the problem. You need a low-drama system that safely shortens nails over time, keeps your dog cooperative, and fits your schedule.
This guide is comparison-led on purpose. Different tools and workflows have real tradeoffs, and the “best” method depends on nail color, nail thickness, your dog’s tolerance, and how overgrown things are today.
What actually matters in this comparison
When you are dealing with overgrown dog nails home, the goal is not a salon-perfect curve. The goal is function: comfortable paws, stable footing, and nails that stop clicking and snagging.
Here is what matters most (and why):
1) Quick position (the hidden limiting factor)
If nails are long, the quick often grows forward with them. That means you cannot safely cut back to “short” in one session, even if the nail looks like it should be shorter.
- •Tradeoff: Fast results vs. low bleeding risk. The more you chase speed, the more you gamble on hitting the quick.
- •Practical reality: Many dogs need 2–6 weeks of gradual trimming to truly reset quick length.
2) Your dog’s stress threshold
Your dog’s tolerance is the real bottleneck. A technically perfect method that makes your dog panic is a bad method.
- •Tradeoff: Precision vs. cooperation. Grinders can be precise but noisy; clippers are quiet but can pinch or crack thick nails.
3) Nail thickness and color
- •Thick nails (often large breeds): Clipping can splinter; grinding is slower but smoother.
- •Black nails: You cannot easily see the quick, so you need a method that supports micro-adjustments and good lighting.
4) Surface-level comfort and long-term traction
Overgrown nails can change posture: toes splay, wrists drop, and some dogs start sliding on floors.
- •Tradeoff: Short-term trim vs. long-term mobility. If your dog already has arthritis or a history of slipping, conservative trimming plus consistency wins.
5) Your consistency, not your courage
Most nail problems come back because trimming is an event instead of a routine.
- •Tradeoff: “Big session” once a month vs. 5-minute micro-sessions weekly. Micro-sessions usually win for anxious dogs.
Baseline criteria and scoring method
To keep this practical, we will compare common at-home workflows using a simple 1–5 scoring method (5 is best). You can adjust weights based on your dog.
Criteria (score 1–5 each):
- •Safety margin: How easy it is to avoid cutting the quick.
- •Stress level: How likely the method is to keep your dog calm over repeated sessions.
- •Speed to functional improvement: How quickly you see less clicking/snagging.
- •Precision: How controllable the trim is, especially with black nails.
- •Learning curve: How hard it is for a typical pet owner to do well.
- •Maintenance friendliness: How easy it is to repeat every 1–2 weeks.
Baseline assumption: Nails are clearly overgrown but not yet embedded into paw pads. If nails are curling into the pad, bleeding, infected, or your dog is limping, skip the DIY comparison and call your vet/groomer.
The workflows we are comparing
- Clipper-only micro-trims (tiny cuts every 3–7 days)
- Grinder-only shaping (short sessions, 1–2 nails at a time)
- Combo: clip to remove length + grind to finish
- Scratchboard/filing maintenance (great for fronts, limited for rears)
- Outsource reset + home maintenance (groomer/vet shortens safely; you maintain)
Side-by-side workflow analysis
Below is how each workflow actually works at home, where it shines, and where it can go sideways.
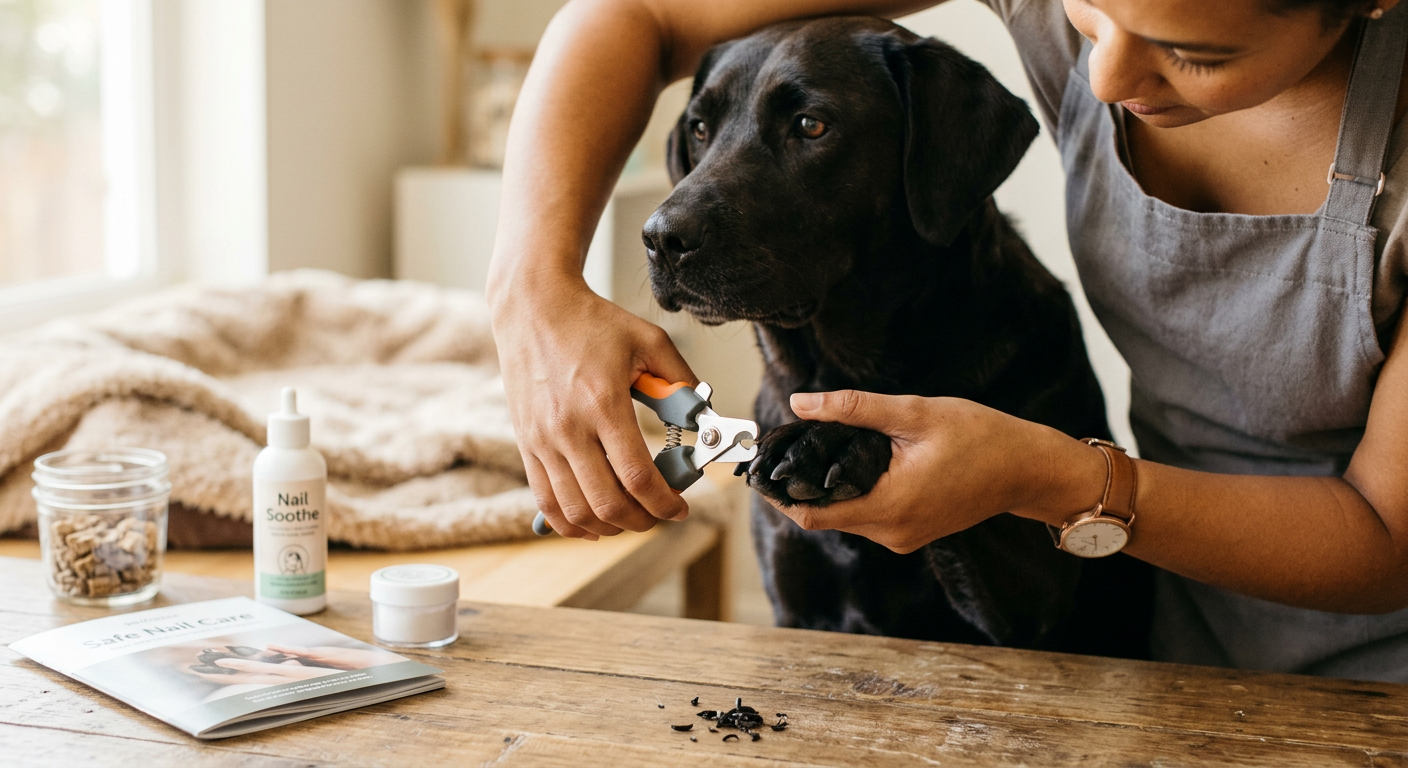
Workflow 1: Clipper-only micro-trims
Best for: quiet dogs, owners who like simple tools, dogs who hate grinder noise.
How it works (low-panic version): 1) Do it when your dog is already relaxed (after a walk, after dinner). 2) Handle one paw, one nail. Stop early. 3) Clip a paper-thin slice off the tip. On black nails, this might be 1 mm. 4) Repeat every 3–7 days. The quick gradually recedes.
Precision tip for black nails: After each tiny cut, look at the cut surface. You may see a darker center “dot” that signals you are getting close to the quick. Stop before it looks moist or pinkish.
Where panic happens:
- •You try to “finish the job” in one session.
- •Clippers are dull and crush the nail.
- •The dog jerks and you clip at an angle.
Tool note: If you are trimming a very small dog or dewclaws and want a compact, sharp tool, the HIBINO Samurai-Grade Cat Nail Clippers | Vet Recommended | Sharper, Quieter & Safer | Precision Blade for Stress-Free Grooming | Non-Slip Grip | Lifetime Durability | Made in Japan can be a good “precision” option.

- •Tradeoff: Great control on small nails vs. less leverage on thick large-breed nails.
Scores (typical): Safety 3, Stress 4, Speed 3, Precision 3, Learning curve 3, Maintenance 4.
Workflow 2: Grinder-only shaping
Best for: black nails, thick nails that splinter when clipped, owners who prefer gradual removal.
How it works: 1) Start with sound desensitization (turn grinder on, treat, turn off) for 2–3 days. 2) Then progress to touch: grinder near paw, treat. 3) Actual grinding: 1–2 seconds on, 2 seconds off (prevents heat buildup). 4) Aim for rounding the tip, not shortening to perfection.
Where panic happens:
- •You hold the grinder on too long (heat = “this is scary”).
- •The dog hates vibration.
- •Hair gets caught near the nail.
Tradeoffs:
- •Safer increments than clippers for many owners (less “one cut too far”).
- •More setup: noise, vibration, and your dog’s patience matter.
Scores (typical): Safety 4, Stress 2–4 (dog-dependent), Speed 3, Precision 5, Learning curve 4, Maintenance 4.
Workflow 3: Combo method (clip length, grind finish)
Best for: nails that are long enough to snag, but you still want a smooth edge and controlled approach.
How it works: 1) Clip off just the “hook” at the end (the part that curls). 2) Grind to round edges and remove tiny amounts safely. 3) Stop early if your dog is still cooperating; success is leaving your dog relaxed.
Why it often wins:
- •Clippers remove bulk quickly.
- •Grinder prevents sharp edges and lets you creep up safely.
Tradeoff: You are managing two tools and two learning curves. If your dog hates the grinder, you might be better with clipper-only micro-trims at first.
Scores (typical): Safety 4, Stress 3, Speed 4, Precision 5, Learning curve 3, Maintenance 4.
Workflow 4: Scratchboard/filing maintenance
Best for: dogs who tolerate “games” better than restraint, front nails that get long fast.
How it works: 1) Teach “paw” and reward. 2) Shape the behavior: touch board = treat; scrape lightly = treat. 3) Do 10–20 reps, then stop.
Limitations (be honest):
- •Most dogs will not reliably file rear nails well.
- •If nails are severely overgrown, scratchboards are slow to create meaningful change.
- •You still need to watch the quick and avoid over-filing.
Scores (typical): Safety 4, Stress 4–5, Speed 2, Precision 3, Learning curve 4, Maintenance 5.
Workflow 5: Outsource the reset, maintain at home
Best for: extremely overgrown nails, owner anxiety, dogs who are reactive, or dogs with medical issues.
How it works:
- •A groomer/vet shortens nails as far as safely possible in one visit (sometimes with better restraint, experience, and tools).
- •You do weekly micro-trims or grinding to keep the quick receding.
Tradeoff: You pay more upfront, but you reduce the chance of a traumatic “first attempt” at home.
Scores (typical): Safety 5, Stress 3–5, Speed 5 (initial), Precision 4, Learning curve 5, Maintenance 3–4.
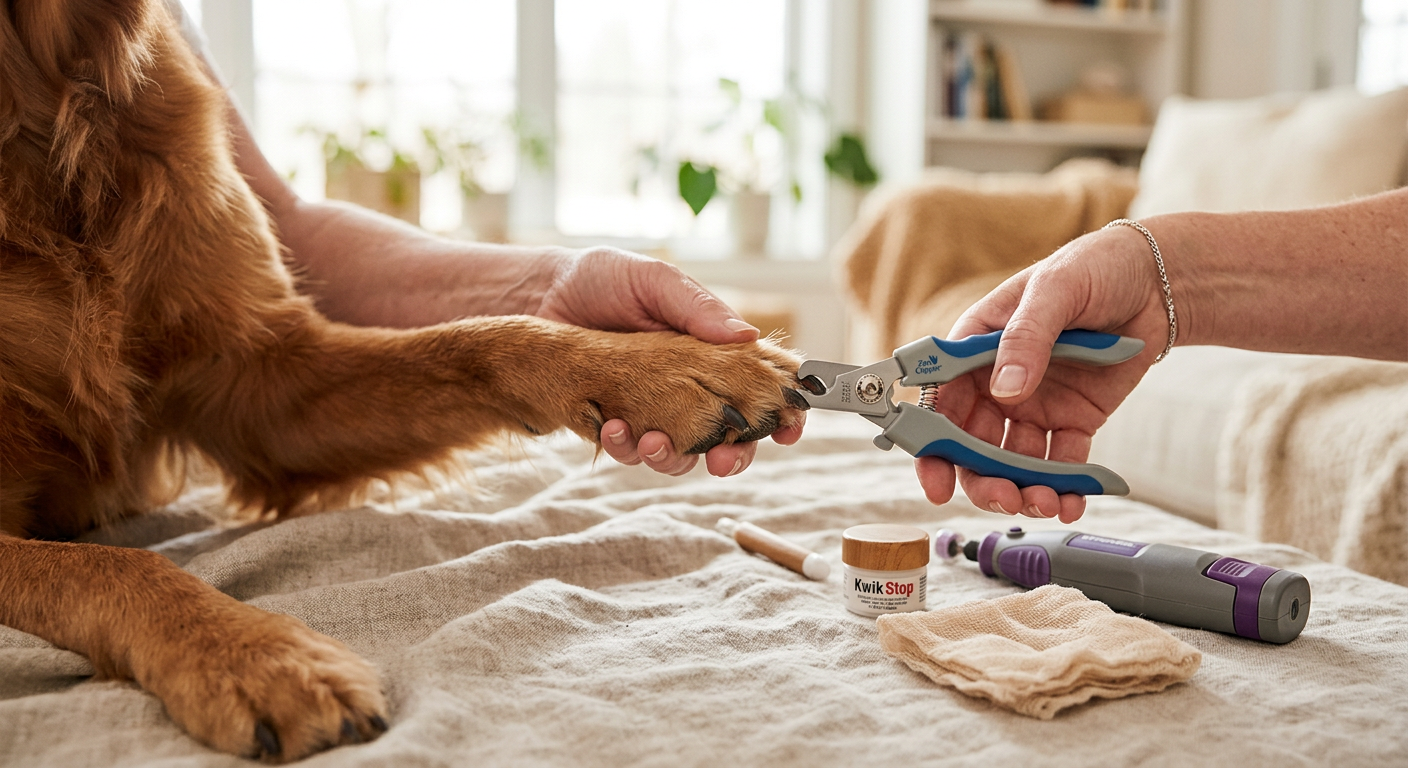
The overlooked step: clean nails before you trim
Dirt packed around nails makes it harder to see what you are doing and can make clippers slip.
If your dog comes in from mud, snow salt, or backyard debris, a small pick/brush can help you clear gunk from paw creases and around the nail base. Horse-style hoof picks are surprisingly handy here because they are built for stubborn packed debris.
Examples:


Tradeoff: Great for cleaning and visibility vs. you must use a gentle hand around sensitive paw pads (you are not scraping a hoof).
Cost, effort, and consistency tradeoffs
Owners usually ask, “Which tool is best?” The better question is, “Which workflow will I actually repeat?”
Cost (typical ranges)
- •Clipper-only: low cost, minimal accessories.
- •Grinder-only: higher upfront cost; occasional replacement bits.
- •Combo: highest upfront cost if you buy both.
- •Scratchboard: low cost DIY or moderate cost retail.
- •Outsource reset: per-visit fee, but may reduce mistakes and stress.
Effort (what you feel at home)
- •Lowest effort per session: clipper micro-trim (one nail, done).
- •Lowest emotional effort (for many): grinder, because you can remove tiny amounts.
- •Highest training effort: scratchboard (but it can feel like play once trained).
Consistency (the real decider)
- •If you can commit to weekly, almost any method works.
- •If you only manage monthly, grinders and scratchboards often under-deliver because they rely on repetition; clipper-only might still work but is more likely to tempt you into “big cuts.”
Concrete example:
- •A busy owner who can do 3 minutes twice a week will get better results with a grinder or combo than someone attempting a 45-minute clipping marathon once a month.
Which option wins by user profile
Use these profiles to pick a winner without overthinking.
If you have a nervous dog who hates restraint
Winner: Scratchboard for fronts + clipper micro-trims for rears/dewclaws
- •Why: You minimize physical control battles.
- •Tradeoff: Slow improvement if nails are very long.
If your dog has thick, black nails and you fear the quick
Winner: Grinder-only or combo
- •Why: Precision and gradual removal.
- •Tradeoff: Noise/vibration may require a week of conditioning.
If you have a small dog (or tiny dewclaws) and want control
Winner: Clipper-only micro-trims with a precision clipper
- •Consider the HIBINO Samurai-Grade Cat Nail Clippers | Vet Recommended | Sharper, Quieter & Safer | Precision Blade for Stress-Free Grooming | Non-Slip Grip | Lifetime Durability | Made in Japan for small nails.
- •Tradeoff: Not ideal for very thick nails.
If your dog’s nails are extremely overgrown or curling
Winner: Outsource reset + home maintenance
- •Why: You get a safe starting point and avoid creating fear at home.
- •Tradeoff: Ongoing costs; you still need a maintenance plan.
If you are calm, consistent, and want the simplest routine
Winner: Clipper-only micro-trims
- •Why: Quiet, fast, repeatable.
- •Tradeoff: You must accept gradual progress.
Transition strategy if changing tools
Switching tools is often where people lose momentum. Do it like a training plan, not a dramatic upgrade.
Moving from “nothing” to clippers
- •Week 1: Touch paws daily, reward.
- •Week 2: Clip 1–2 nails per session, stop while it is still easy.
- •Goal: Your dog learns trimming is boring and predictable.
Moving from clippers to grinder
- •Day 1–3: Grinder sound at a distance + treats.
- •Day 4–7: Grinder closer, then touch the body to the shoulder (not the nail yet).
- •Week 2: Grind one nail for 1 second, treat, done.
Tradeoff language to keep in mind: The grinder is not “better.” It is more precise but more sensory (sound/vibration). If your dog is noise-sensitive, you may need more time.
Moving from grinder to combo
- •Start by clipping only the tiniest hook off the end.
- •Grind the rest like normal.
- •If your dog becomes tense after clipping, keep clipping minimal or abandon it and go back to grinder-only.
After a professional reset
- •Do your first at-home session within 7 days.
- •Keep sessions short so your dog does not associate “new shorter nails” with pain.
Common decision mistakes
These are the mistakes that create bleeding, fear, or wasted effort.
1) Trying to “fix” overgrown nails in one sitting
If the quick is long, one-session perfection is not possible.
- •Better: 1–2 nails every few days.
2) Ignoring dewclaws
Dewclaws do not wear down naturally and can grow into a curve fast.
- •Better: Put dewclaws on your calendar separately.
3) Cutting at the wrong angle
Cutting too flat can bring you closer to the quick than you think.
- •Better: Small cuts that follow the natural slope of the nail.
4) Not cleaning/inspecting first
Mud, hair, and debris hide what you need to see.
- •Use a gentle brush and, if needed, a small pick to clear packed gunk (for example, the brush side of a Tough 1 Great Grip Hoof Pick/Brush).
- •Tradeoff: Better visibility vs. you must be gentle around soft tissue.
5) Pushing past the first signs of stress
Panting, whale eye, stiff legs, pulling away: those are “stop” signals.
- •Better: Stop early and end on a treat. Consistency beats intensity.
6) Choosing a method you cannot repeat
A method that is “optimal” but never happens is not optimal.
- •Better: Pick the method you will do weekly without dread.
Final recommendation framework
Use this framework to pick your plan today and reduce panic immediately.
Step 1: Safety triage (do you need a pro?)
Choose vet/groomer first if any are true:
- •Nail is curling into or puncturing the pad.
- •There is swelling, discharge, odor, or limping.
- •Your dog cannot be handled safely (bite risk).
- •Your dog has medical conditions affecting bleeding or pain tolerance.
Step 2: Choose your “default” workflow
- •If you want lowest drama: clipper micro-trims.
- •If you want highest precision on black/thick nails: grinder-only.
- •If you want fast improvement plus smooth results: combo.
- •If you want cooperation-first training: scratchboard (fronts) + minimal trimming elsewhere.
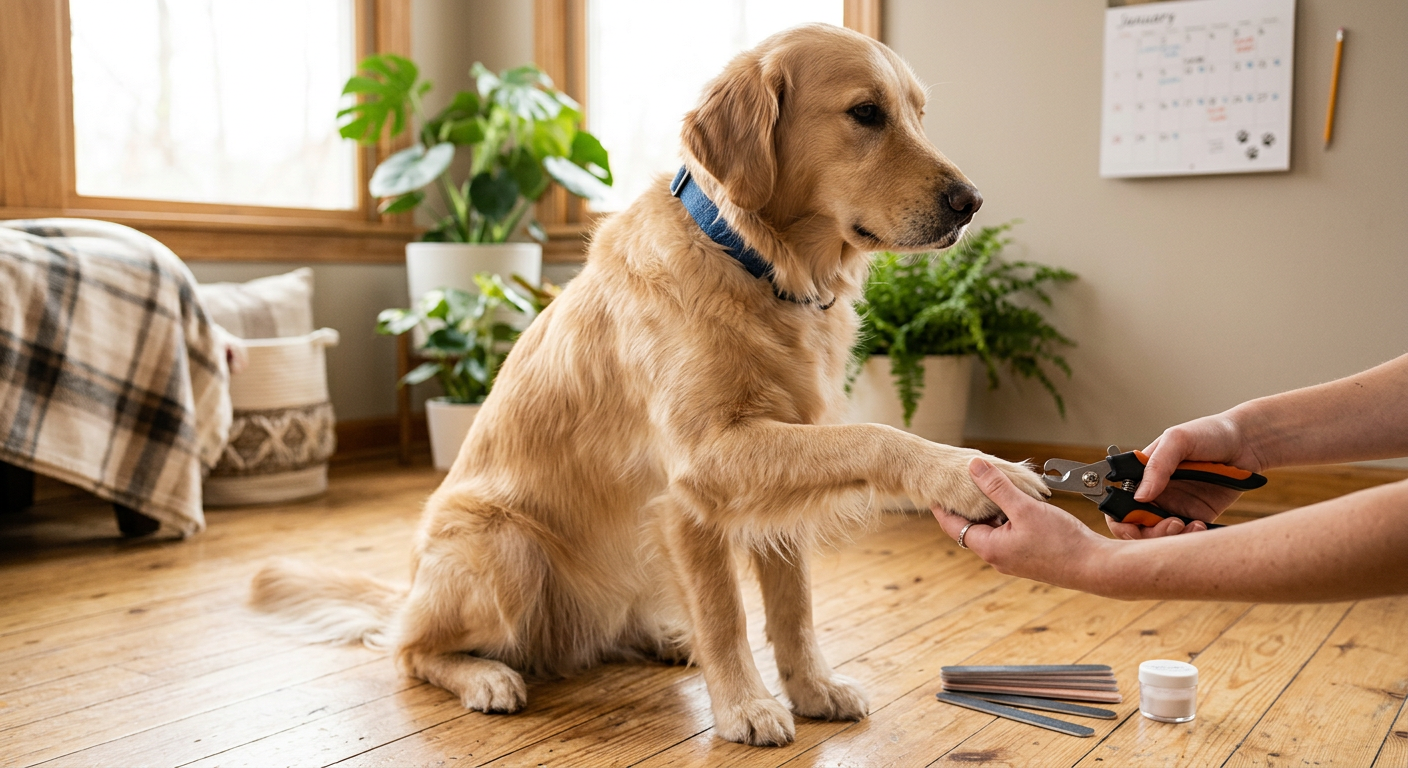
Step 3: Set a realistic schedule that shortens the quick
- •Overgrown nails: plan on weekly sessions (or micro-trims every 3–7 days) for 4–6 weeks.
- •Maintenance: once you are in a good place, many dogs do well with every 2–4 weeks, but only if walks do not keep nails long.
Step 4: Define success correctly
Success is:
- •Less clicking on hard floors.
- •Your dog stands comfortably and does not slip.
- •You can trim without a wrestling match.
If you follow that definition, you will make steady progress handling overgrown dog nails home without panic, even if the first week is slow.
Nail Care Cluster
More in this topic

guide
How to Trim Dog Nails: A Step-by-Step Guide for Beginners

guide
Nail grinder vs clippers for dogs: which is best for your pet?

guide
Dog Nail Trimming at Home: Safe Step-by-Step Routine (Clippers vs Grinders vs Scratch Boards)
guide
Dog Nail Bleeding How to Stop: Fast First Aid That Works
guide
How to Trim Dark Dog Nails Without Hitting the Quick (Behavior-First Guide)
guide
How Often Should You Trim Dog Nails? A Practical Schedule by Activity Level
Frequently asked questions
How do I trim overgrown dog nails at home if the quick is long?
Do not aim for the final length in one session. Clip or grind tiny amounts (often 1 mm) every 3–7 days. This encourages the quick to recede gradually over several weeks. If you see a moist center or your dog reacts sharply, stop and resume later. Consistency is what shortens the quick safely.
What is safer for black nails at home: clippers or a grinder?
A grinder is usually safer for black nails because it removes nail in small increments and lets you stop as soon as you see signs you are getting close to the quick. Clippers can work, but you need paper-thin cuts and careful inspection of the cut surface after each snip. If your dog hates vibration/noise, clipper micro-trims may still be the better overall choice.
When should I stop DIY and go to a vet or groomer for overgrown nails?
Go to a professional if nails are curling into or puncturing the paw pad, there is swelling/discharge/odor, your dog is limping, or you cannot handle your dog safely. Also consider a professional reset if nails are extremely overgrown and you are very anxious—one bad experience can make future nail care much harder.
