

guide • Paw Care
Post-Beach Paw Cleanup Routine: Sand, Salt, and Irritation Control (Budget-Value Guide)
A practical post beach paw cleanup routine that removes sand and salt fast, prevents irritation, and keeps costs low over 90 days.
By Lucy Anderson • February 18, 2026 • 7 min read
Table of contents
- Define value beyond sticker price
- Value metric 1: Minutes per cleanup (and whether you’ll do it every time)
- Value metric 2: Irritation prevented per dollar
- Value metric 3: Total cost of ownership (TCO)
- Real-world scenario: short-haired lab vs. long-coated doodle
- Minimum viable setup for reliable results
- The bare-minimum kit (cheap and effective)
- The minimum viable routine (do this every beach trip)
- When to add balm (and when not to)
- Upgrade paths that actually improve outcomes
- Upgrade 1: A foaming paw cleaner that improves toe-web cleaning
- Upgrade 2: A dedicated paw towel strategy (yes, this matters)
- Upgrade 3: Balm that supports recovery (thin layer, correct timing)
- Upgrade 4: Fur management for “sand magnets”
- Workflow cost over 90 days
- Baseline workflow (water + towels)
- Foam-assisted workflow (foam + wipe + towel dry)
- Balm add-on (2–4x/week, not necessarily every visit)
- Efficiency tip: choose your “non-negotiable” step
- High-value options by use case
- Use case 1: Apartment living + no easy outdoor rinse
- Use case 2: Sensitive skin, frequent paw licking after beach
- Use case 3: Long-coated dogs with sand-packed paws
- Use case 4: Senior dogs or dogs with thin, easily cracked pads
- Waste patterns to avoid
- Mistake 1: Rinsing without drying
- Mistake 2: Applying balm onto sandy or damp paws
- Mistake 3: Overusing scented products on a dog with allergies
- Mistake 4: Skipping nail beds and dewclaws
- Mistake 5: Buying “one more product” instead of fixing your workflow
- Performance audit checklist
- Signs your routine is working
- Signs you need to adjust
- What to change first (highest ROI)
- Final buying decision tree
- Step 1: Do you have reliable water access right after the beach?
- Step 2: Does your dog lick/chew paws after beach trips?
- Step 3: Are pads rough or cracking during beach season?
- Step 4: Is sand packing into long fur between toes?
Beach days are great until your dog tracks sand into the car, licks salty paws all night, or wakes up with red, gritty toe webs. A solid post beach paw cleanup routine isn’t about fancy gear—it’s about removing what causes irritation (sand + salt + microbes), drying the right places, and protecting pads so cracks don’t start.
This guide is built around budget-value: total cost of ownership, time per cleanup, and what actually reduces itching and paw inflammation. You’ll get a minimum setup, upgrades that truly help, and a 90-day workflow cost so you can choose a routine you’ll actually keep.
Define value beyond sticker price
A $12 bottle of paw foam can be “expensive” if you use it wrong—and a $2 towel can become pricey if it never gets the job done and you end up at the vet for interdigital irritation.
Here’s what value looks like for post-beach paw care:
Value metric 1: Minutes per cleanup (and whether you’ll do it every time)
If your routine takes 12 minutes and requires carrying a whole kit, you’ll skip it after the third beach trip. The most cost-effective routine is the one you can repeat reliably.
- •Target time: 3–6 minutes for four paws, even with a wiggly dog.
- •Your “friction point” is usually: toe webs, long fur, and getting paws dry.
Value metric 2: Irritation prevented per dollar
Sand acts like grit in the paw creases; salt dries and stings; wet paws encourage yeast and bacterial overgrowth. Prevention value is highest when you consistently:
- remove abrasive particles,
- rinse away salt,
- dry between toes.
Value metric 3: Total cost of ownership (TCO)
TCO includes:
- •Consumables (wipes, foam, balm)
- •Laundry (towels/blankets from sandy paws)
- •Time (your cleanup minutes)
- •Downstream costs (hot spots, interdigital cyst flare-ups, cracked pads)
A good routine often costs less than repeated car-detailing, carpet cleaning, or treating chronic paw licking.
Real-world scenario: short-haired lab vs. long-coated doodle
- •Short-haired lab: usually needs a salt rinse and toe-web dry. Sand doesn’t cling as much.
- •Doodle/spaniel/sheltie: sand packs into feathering and between pads—your “value” comes from a brush step and better drying to avoid matting + irritation.
Minimum viable setup for reliable results
The minimum setup aims for consistent results with the lowest spend and lowest effort. Think of it as your “always works” baseline.
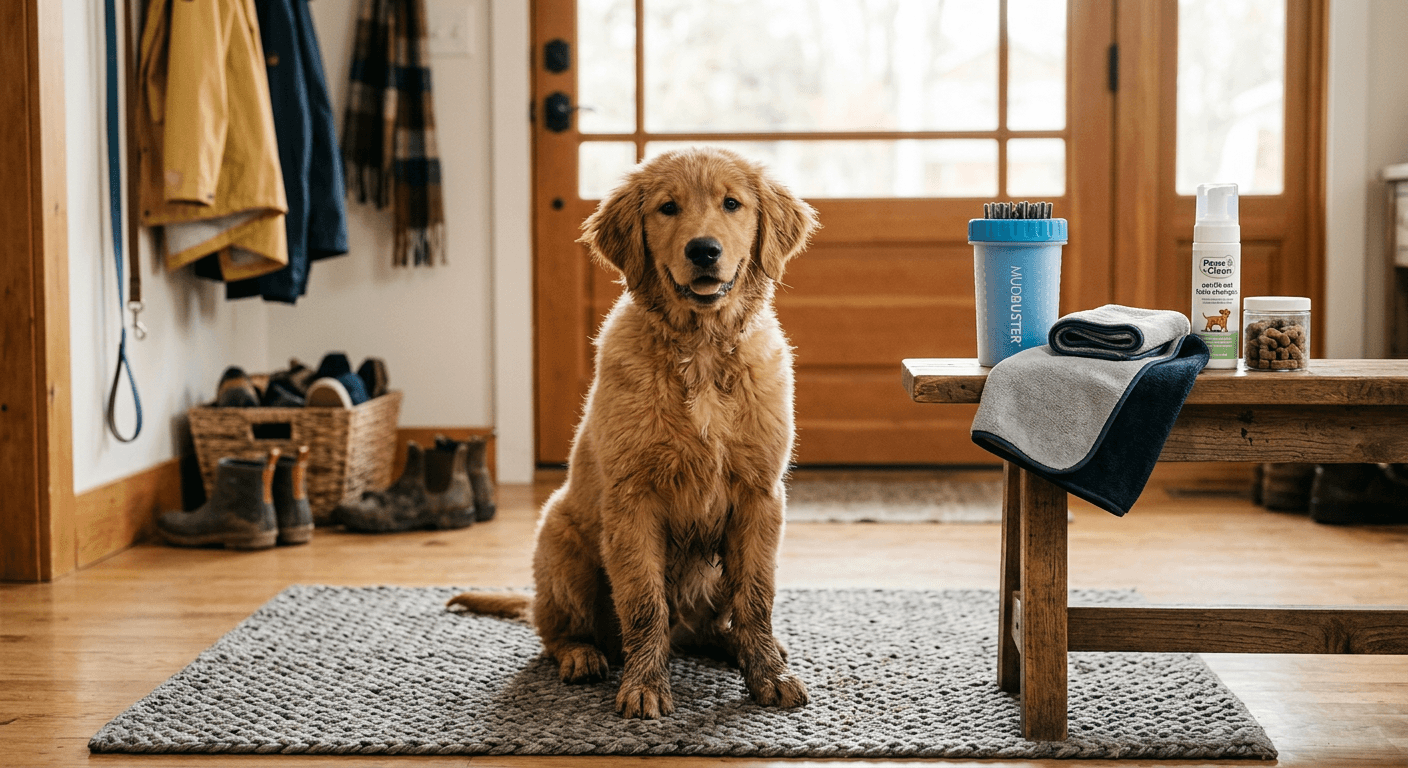
The bare-minimum kit (cheap and effective)
- •1–2 absorbent towels (one for sand knock-off, one for drying)
- •A water source: jug, bottle, or beach shower
- •Optional but high-ROI: a no-rinse paw foam for when rinsing is limited
If you want a dedicated product that’s travel-friendly, an unscented foam is a safe starting point for sensitive dogs. Consider a product like Paw Cleaner for Dogs & Cats | Gentle Dog Paw Washer | No Rinse Foaming | Unscented | Pet Foot Cleaner with Built-in Silicone Brush for Muddy Paws | Puppy & Kitten Paw Wash | 5 fl oz for quick, low-mess cleanups.

Paw Cleaner for Dogs & Cats | Gentle Dog Paw Washer | No Rinse Foaming | Unscented | Pet Foot Cleaner with Built-in Silicone Brush for Muddy Paws | Puppy & Kitten Paw Wash | 5 fl oz
Brand: 7PETS

Paw Cleaner for Dogs & Cats, No-Rinse Foaming Pet Foot Washer with Built-in Scrubber Brush for Dirty, Muddy Paws – Suitable for Small, Medium & Large Dogs, Puppies, Kittens (5 fl oz)
PawSono
The minimum viable routine (do this every beach trip)
Step 1: Knock off loose sand before you add water (30–60 seconds)
- •Shake paws gently and use a dry towel to “squeegee” off sand.
- •If you rinse first, you can turn sand into sludge that sticks in paw creases.
Step 2: Rinse or foam-clean paws (1–2 minutes)
- •If you have water: rinse each paw, aiming at the underside, toe webs, and nail beds.
- •If you don’t have easy water: use a no-rinse foam and massage it in, then wipe dry.
Step 3: Dry between toes (60–90 seconds) This is where most routines fail.
- •Pinch the towel gently between toes and pull through like floss.
- •Pay attention to the “V” between middle toes—sand loves to hide there.
Step 4: Check for “problem sand” (30 seconds) Look for:
- •Redness between toes
- •Limping or repeated paw lifts
- •Excess licking within the first hour after the beach
If you see irritation starting, don’t wait until bedtime—clean again and dry thoroughly.
When to add balm (and when not to)
Balm is not a substitute for cleaning. It’s a protect-and-recover step.
Use balm when:
- •Pads feel rough or look dry after salt exposure
- •Your dog is prone to cracking
- •You’re heading out again tomorrow and want a barrier
A lick-safe option can be helpful for dogs that immediately groom after cleanup. For example, Lick-Safe Dog Paw & Nose Balm | 2.1 oz All Natural Wax with Coconut Oil & Shea Butter | Winter Snow, Road Salt & Hot Pavement Protector | Moisturizer for Dry, Rough Pads & Snouts is the type of balm many owners use as a thin finishing layer.

Lick-Safe Dog Paw & Nose Balm | 2.1 oz All Natural Wax with Coconut Oil & Shea Butter | Winter Snow, Road Salt & Hot Pavement Protector | Moisturizer for Dry, Rough Pads & Snouts
Brand: HUTVRACC

Lick-Safe Dog Paw & Nose Balm with Coconut Oil | Winter Road Salt & Cold Pavement Protector | All-Natural Moisturizer & Soother for Dry, Cracked Pads & Snout, Nose Butter for Bulldogs (60 g /2.1 oz)
Lick-Safe
Skip balm (for now) if:
- •Paw is still damp (you can trap moisture)
- •There’s active redness or weeping skin (clean/dry first; consider vet guidance)
- •Your dog has a history of contact allergies (patch-test new products)
Upgrade paths that actually improve outcomes
Upgrades should reduce either (a) irritation, (b) cleanup time, or (c) mess in your car/house. If an “upgrade” only adds steps, it’s not an upgrade.
Upgrade 1: A foaming paw cleaner that improves toe-web cleaning
If rinsing isn’t consistent (no beach shower, winter beach trips, apartment living), a foaming cleaner helps you lift salt and fine grit without hauling gallons of water.
- •For sensitive dogs: unscented is usually safer.
- •For dogs that tolerate fragrance and you want a more "fresh" finish: a probiotic formula can be appealing.
Example options:
- •Unscented, built-in silicone scrub action: Paw Cleaner for Dogs & Cats | Gentle Dog Paw Washer | No Rinse Foaming | Unscented | Pet Foot Cleaner with Built-in Silicone Brush for Muddy Paws | Puppy & Kitten Paw Wash | 5 fl oz
- •Scented foam with a scrubber brush: Wahl USA Gentle Foaming Dog Paw Cleaner, No-Rinse Probiotic Formula with Soft Silicone Paw Scrubber Brush, Coconut Lime Verbena Scent, 8 fl oz – Model 3028477

Tradeoff: foams cost more than water, but they can save money by preventing recurring paw licking, staining, and secondary skin issues.
Upgrade 2: A dedicated paw towel strategy (yes, this matters)
Two-towel method:
- •Towel A: “dirty towel” for sand knock-off
- •Towel B: “dry towel” reserved for toe-web drying
This keeps sand from being rubbed deeper into skin folds.
Upgrade 3: Balm that supports recovery (thin layer, correct timing)
If your dog gets rough pads after saltwater, balm can reduce micro-cracks that make future beach visits sting.
Two product styles you’ll see:
- •Waxier barrier balms (good before/after exposure in small amounts)
- •Softer moisturizers (good for daily conditioning)
Options to consider:
- •Lick-Safe Dog Paw & Nose Balm | 2.1 oz All Natural Wax with Coconut Oil & Shea Butter | Winter Snow, Road Salt & Hot Pavement Protector | Moisturizer for Dry, Rough Pads & Snouts
- •Dog Paw Balm, Paw Moisturizer for Dogs and Cats, Contains Coconut Oil, Nourishing and Moisturizing, Suitable for Dry, Cracked Paws and Noses, 60g

Dog Paw Balm, Paw Moisturizer for Dogs and Cats, Contains Coconut Oil, Nourishing and Moisturizing, Suitable for Dry, Cracked Paws and Noses, 60g
Brand: Nozerix

Lick-Safe Dog Paw & Nose Balm with Coconut Oil | Winter Snow, Road Salt & Cold Pavement Protector | All-Natural Moisturizer & Soother for Dry, Cracked Pads & Snout | Horse Hoof, Joint Care
Lick-Safe
Tradeoff: any balm can attract sand if applied before the beach. For most dogs, balm is best after cleaning and drying.
Upgrade 4: Fur management for “sand magnets”
If your dog has paw feathering, trimming between pads (a “grinch feet” tidy) can reduce sand packing dramatically. The savings is not just time—it’s fewer skin flare-ups.
If you’re not comfortable trimming, ask a groomer for a sanitary paw trim focused on toe webs and pad edges.
Workflow cost over 90 days
Let’s model a realistic beach season: 12 beach visits over 90 days (about 1–2 trips/week early on, then less).
Baseline workflow (water + towels)
- •Time: ~4 minutes/visit (average dog) = 48 minutes over 90 days
- •Consumables: mostly laundry detergent + water
- •Mess risk: moderate (sand in car if you don’t do a pre-car wipe)
Approximate “hidden costs”:
- •Extra vacuum time or car wash if you skip the knock-off step
- •Higher risk of paw licking at night, especially for dogs with sensitive toe webs
Foam-assisted workflow (foam + wipe + towel dry)
- •Time: ~5 minutes/visit if done thoroughly = 60 minutes over 90 days
- •Consumables: 1–2 bottles of foam depending on dog size and how generous you are
What you often gain:
- •More consistent salt removal (especially nail beds and toe webs)
- •Better control when you don’t have water access
- •Less “wet dog + sand” sludge in the car
Balm add-on (2–4x/week, not necessarily every visit)
- •Time: 30–60 seconds when paws are dry
- •Cost: one tin/jar can last months if you apply thinly
High-value use: dogs that show early cracking, rough pads, or irritation after saltwater.
Efficiency tip: choose your “non-negotiable” step
If you only commit to one thing every time, commit to drying between toes. Moisture trapped in toe webs is a common driver of recurring irritation.
High-value options by use case
Different dogs and different owners need different routines. Use these as plug-and-play templates.
Use case 1: Apartment living + no easy outdoor rinse
Best-value routine:
- •Knock off sand with towel at the car
- •Use a no-rinse foam inside the entryway
- •Thorough toe-web dry
- •Apply balm only if pads feel dry
Product fit:
Use case 2: Sensitive skin, frequent paw licking after beach
Best-value routine:
- •Rinse thoroughly (salt is a big trigger)
- •Dry toe webs completely
- •Patch-test a balm on one paw first
Product fit:
- •Lick-safe barrier balm after drying: Lick-Safe Dog Paw & Nose Balm | 2.1 oz All Natural Wax with Coconut Oil & Shea Butter | Winter Snow, Road Salt & Hot Pavement Protector | Moisturizer for Dry, Rough Pads & Snouts

Dog Paw&Nose Balm Lick Safe1.4oz(40g),All-Natural Ingredients Pets Paw Wax,Healing Moisturizer with Coconut Oil&Honey,for Dry Cracked Dog & Cat Paws,Nose & Elbows, Horse Hoof, Joint Care
Brand: Steigullage

Lick-Safe Dog Paw & Nose Balm, Dog Paw Wax Protector with Coconut Oil, Moisturizer Soother Dry Cracked Snout & Pads, All-Natural Nose Butter & Cream for Horse Hoof, Cat Petts Care, 2.8oz/80g
QYuekar
Use case 3: Long-coated dogs with sand-packed paws
Best-value routine:
- •Dry towel knock-off first
- •Rinse + finger-separate toe webs
- •Dry + quick brush through feathering
Optional upgrade:
- •A scrubby foam can help lift fine grit: Wahl USA Gentle Foaming Dog Paw Cleaner, No-Rinse Probiotic Formula with Soft Silicone Paw Scrubber Brush, Coconut Lime Verbena Scent, 8 fl oz – Model 3028477
Use case 4: Senior dogs or dogs with thin, easily cracked pads
Best-value routine:
- •Prioritize gentle cleaning (no harsh rubbing)
- •Dry fully
- •Balm on non-beach days too (thin layer)
Product fit:
Waste patterns to avoid
These are the most common ways owners spend more money (and still get worse paw outcomes).
Mistake 1: Rinsing without drying
Rinsing is only half the job. Damp toe webs + warm weather is a perfect environment for irritation to linger.
Fix: reserve a “dry towel” that never touches the sandy ground.
Mistake 2: Applying balm onto sandy or damp paws
This can trap grit and moisture against skin.
Fix: balm is the last step, and only after paws are clean and dry.
Mistake 3: Overusing scented products on a dog with allergies
If your dog already gets itchy paws, fragrance can be a wildcard.
Fix: start unscented, and change only one variable at a time.
Mistake 4: Skipping nail beds and dewclaws
Salt and sand collect around nail edges; dogs then lick that area intensely.
Fix: when you rinse or foam, rotate the paw and target the nail line.
Mistake 5: Buying “one more product” instead of fixing your workflow
Most paw issues improve when the routine is consistent, not when the product shelf grows.
Fix: measure time per cleanup, and simplify steps until you’ll do them every time.
Performance audit checklist
Use this checklist after 2–3 beach trips to see if your post beach paw cleanup routine is working.
Signs your routine is working
- •No gritty residue when you rub toe webs with a clean finger
- •Minimal paw licking in the evening
- •No redness between toes the next morning
- •Pads feel smooth, not sandpaper-dry
- •Your car floor isn’t becoming a sandbox
Signs you need to adjust
- •You still find sand “cement” between pads
- •Dog chews paws for more than a few minutes after cleaning
- •Toe-web redness appears within 24 hours
- •Musty odor between toes (often moisture-related)
What to change first (highest ROI)
- Add or improve toe-web drying
- Increase rinse time (especially nail beds)
- Switch to an unscented foam if fragrance may be a trigger
- Add balm only after cleanliness + dryness are consistent
When to involve your vet: persistent swelling, limping, open sores, bleeding cracks, or recurring interdigital bumps.
Final buying decision tree
Use this decision tree to pick products and keep the routine cost-effective.
Step 1: Do you have reliable water access right after the beach?
- •Yes: prioritize towels + rinse technique; add balm only if pads get dry.
- •No: a no-rinse foam becomes your best-value upgrade.
If “No,” choose:
- •Sensitive dog / allergy-prone: Paw Cleaner for Dogs & Cats | Gentle Dog Paw Washer | No Rinse Foaming | Unscented | Pet Foot Cleaner with Built-in Silicone Brush for Muddy Paws | Puppy & Kitten Paw Wash | 5 fl oz
- •You want a scented option with a scrubber feel: Wahl USA Gentle Foaming Dog Paw Cleaner, No-Rinse Probiotic Formula with Soft Silicone Paw Scrubber Brush, Coconut Lime Verbena Scent, 8 fl oz – Model 3028477
Step 2: Does your dog lick/chew paws after beach trips?
- •Yes: increase salt removal + toe-web drying; consider a lick-safe balm after.
- •No: keep it simple—rinse, dry, done.
If “Yes,” consider:
Step 3: Are pads rough or cracking during beach season?
- •Yes: add balm 2–4x/week (thin layer), not necessarily every beach visit.
- •No: save money—skip balm unless you see dryness starting.
If “Yes,” consider:
- •A simple moisturizing balm for ongoing conditioning: Dog Paw Balm, Paw Moisturizer for Dogs and Cats, Contains Coconut Oil, Nourishing and Moisturizing, Suitable for Dry, Cracked Paws and Noses, 60g
Step 4: Is sand packing into long fur between toes?
- •Yes: add a grooming step (trim/brush) before buying more cleaners.
- •No: keep the kit minimal.
If you build your routine around consistency—knock off sand, remove salt, dry toe webs—you’ll prevent most beach-related paw irritation without overspending. The best post beach paw cleanup is the one you can do every single time, even when your dog is tired, your car is full, and the sun is setting.
Paw Care Cluster
More in this topic
guide
Winter Dog Paw Care: Stop Ice, Salt, and Cracked Pads
guide
Cracked Dog Paw Pads Treatment: Causes, Fixes & Prevention
guide
Dog Paw Balm Guide: When and How to Use It Safely
comparison
Best Paw Cleaners for Daily Use: Which Type Works for Real Routines?
guide
Mud Season Paw Cleaning Routine for Busy Entryways (Apartment to Multi-Pet Homes)

guide
Winter Paw Care for Dogs: Salt, Dry Cracks, and Daily Protection
Frequently asked questions
How do I remove sand from my dog's paws without irritating the skin?
Start dry, not wet: shake paws and use a dry towel to knock off loose sand first. Then rinse with clean water (or use a no-rinse foaming paw cleaner) and finish by drying between the toes. The toe webs are where sand causes the most abrasion, so separating toes gently and towel-drying there prevents the gritty, red irritation many dogs get after the beach.
Is saltwater bad for dog paws, and what should I do right after the beach?
Saltwater can dry out paw pads and sting small cracks, and salt residue can trigger licking. Right after the beach, rinse paws thoroughly (especially nail beds and between toes), then dry well. If your dog’s pads feel rough or look dry after cleanup, apply a very thin layer of paw balm only after paws are completely clean and dry.
Should I use a paw balm before or after the beach?
For most dogs, balm works best after the beach, not before. Applying balm beforehand can make sand stick and get trapped against skin. After you clean and fully dry the paws, a thin layer of balm can help restore moisture and support the pad barrier—especially for dogs prone to cracking or irritation.
