
guide • Cat Behavior & Enrichment
Carrier Training for Cats: 10-Minute Sessions for Calm Vet Trips
Turn the carrier into a safe, predictable spot with short 10-minute sessions. Reduce hiding, yowling, and panic so vet trips feel routine.
By PetCareLab Editorial • March 5, 2026 • 16 min read
Table of contents
- Why Carrier Training Matters (and What “Success” Looks Like)
- The 10-Minute Rule: Why Short Sessions Work Better Than “One Big Practice”
- How Often Should You Train?
- Real-World Scenario: The “Carrier Only Appears Before Bad Things” Problem
- Choose the Right Carrier Setup (This Is Half the Battle)
- Hard vs Soft Carrier: Which Is Better?
- Size and Interior Comfort
- Product Recommendations (Practical, Not Sponsored)
- Scent and Calming Tools (Use Strategically)
- Prep: Set Up for Voluntary Entry (Before You Start “Training”)
- Where to Place the Carrier
- What Rewards Work Best?
- Breed Examples: Motivation and Style Differences
- The 10-Minute Session Plan: Step-by-Step Carrier Training for Cats
- Session Structure (Same Every Time)
- Stage 1: Carrier = Good Things Nearby (Days 1–3)
- Stage 2: Nose In, Head In (Days 2–6)
- Stage 3: Front Paws In, Then Full Body In (Days 4–10)
- Stage 4: Door Movement Without Closing (Days 7–14)
- Stage 5: Door Closes Briefly (Days 10–21)
- Stage 6: Lift, Carry, Set Down (Days 14–28)
- Stage 7: Short Car Practice (Optional but Powerful)
- Vet-Day Version: The “10-Minute Pre-Trip Routine” That Prevents Meltdowns
- Before You Leave (10 Minutes)
- Getting Your Cat Into the Carrier Without a Chase
- At the Clinic: Reduce Stimulus Load
- Common Mistakes That Sabotage Carrier Training (and What to Do Instead)
- Mistake 1: Only Using the Carrier for Vet Trips
- Mistake 2: Going Too Fast After One Good Session
- Mistake 3: Rewarding Panic Behavior by Accident
- Mistake 4: The Carrier Slides, Wobbles, or Smells Weird
- Mistake 5: Forcing the Cat In Through the Front Door
- Troubleshooting: What If Your Cat Is Already Terrified?
- If Your Cat Hides When They See the Carrier
- If Your Cat Won’t Take Treats During Training
- If Your Cat Pees in the Carrier
- If Your Cat Gets Carsick
- Product Recommendations and Comparisons (What Actually Helps for Stress-Free Vet Trips)
- Carrier Accessories Worth Buying
- Optional Calming Tools: What’s Hype vs Helpful?
- Quick Comparison: Best Setup by Cat Type
- Expert Tips to Make Carrier Training Stick Long-Term
- Build “Carrier Into Life,” Not Just Training
- Teach a Simple Cue
- Practice the Whole Chain (Not Just Entry)
- Use Cooperative Care at the Vet
- A Simple 2-Week Schedule You Can Follow
- Days 1–3
- Days 4–7
- Days 8–10
- Days 11–14
- When Training Isn’t Enough: Signs You Should Ask Your Vet for Help
- Quick Recap: Your Stress-Free Vet Trip Checklist
Why Carrier Training Matters (and What “Success” Looks Like)
Carrier training for cats isn’t about forcing your cat to “tolerate” the box twice a year. It’s about turning the carrier into a predictable, safe space so vet trips feel like a routine—more like “nap pod + snacks” and less like “betrayal in plastic.”
When carrier stress builds, cats often show it as:
- •Hiding the moment the carrier appears
- •Growling, panting, or drooling on the way to the clinic
- •Peeing/pooping in the carrier (stress + motion + fear)
- •“Spicy” behavior at the vet (swatting, biting, freezing, shutdown)
- •Refusing food for hours after returning home
What success looks like is simple and measurable:
- •Your cat voluntarily enters the carrier most days
- •The door can close briefly without panic
- •The carrier can be lifted and carried calmly across the room
- •Short car rides happen with minimal vocalizing
- •The carrier becomes a normal household object—not a once-a-year threat
The good news: you can build this with 10-minute sessions, a few times a week, using rewards and tiny steps. Most cats progress faster when you prioritize consistency over duration.
The 10-Minute Rule: Why Short Sessions Work Better Than “One Big Practice”
Cats learn best when training is:
- •Predictable (same routine, same cues)
- •Low-pressure (cat chooses to participate)
- •Frequent (many tiny wins instead of occasional marathons)
- •Ended early (stop while your cat is still comfortable)
A 10-minute session is long enough to make progress and short enough to avoid overstimulation. In behavior terms, we’re combining:
- •Desensitization: exposing your cat to carrier-related steps in tiny, non-scary increments
- •Counterconditioning: pairing those steps with something your cat loves (treats, play, affection)
How Often Should You Train?
A practical schedule that works for most households:
- •3–5 sessions per week for 2–4 weeks for big improvements
- •Daily mini-sessions (2–5 minutes) if your cat is very anxious or you have a vet visit soon
- •Maintenance: 1–2 sessions per week once your cat is comfortable
Real-World Scenario: The “Carrier Only Appears Before Bad Things” Problem
If the carrier only comes out before vet visits, your cat isn’t being dramatic—your cat is being accurate. Cats are pattern machines. Training is how we change the pattern from “carrier = scary” to “carrier = snacks, calm, and predictable.”
Choose the Right Carrier Setup (This Is Half the Battle)
Carrier training fails most often because the carrier itself is unpleasant. Fix the environment first.
Hard vs Soft Carrier: Which Is Better?
Hard-sided carriers (top-loading or convertible) Best for most cats and vet clinics.
- •Pros: sturdy, easy to clean, better ventilation, safer in a car, many open from the top (huge for fearful cats)
- •Cons: bulky to store, can rattle if cheap
Soft-sided carriers Great for calm cats or short trips; not ideal for cats who panic.
- •Pros: lighter, easier to carry, can fit under airplane seats
- •Cons: harder to clean, can collapse if grabbed, some cats claw through mesh, zippers can fail
My vet-tech-style recommendation: If you’re working on carrier training for cats with any history of fear, choose a hard carrier with a top-opening option (or one that splits into two halves). It makes both training and vet handling dramatically easier.
Size and Interior Comfort
A carrier should allow your cat to:
- •stand up and turn around
- •lie down comfortably
- •not slide around during movement
Add:
- •a non-slip pad or towel
- •a familiar-smelling blanket (washed in your normal detergent, not strongly scented)
- •an optional thin pee pad under the towel for travel days (especially for longer trips)
Product Recommendations (Practical, Not Sponsored)
Look for these features when shopping:
- •Top-loading door + front door
- •Metal door (more durable than plastic)
- •Strong latches that don’t pop open when bumped
- •Easy disassembly (two halves secured with screws or clips)
Examples of commonly reliable categories:
- •Top-load hard carrier (classic vet favorite)
- •Convertible hard carrier that opens like a clamshell (excellent for anxious cats)
- •Crash-tested carrier if you drive often or long distances (safety upgrade)
Scent and Calming Tools (Use Strategically)
- •Feline pheromone spray: Spritz the bedding (not the cat) 15–20 minutes before training or travel. Don’t soak—light mist.
- •Calming treats/supplements: Some cats benefit, some don’t. Test well before the vet day.
- •Medication: For severe stress, talk to your vet about gabapentin or similar pre-visit meds. Training + meds is not “cheating”—it’s humane.
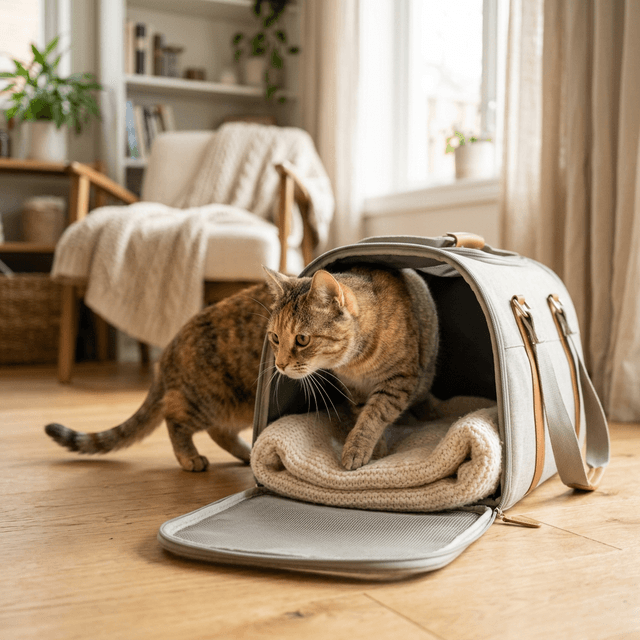
Pro-tip: A carrier can be “perfect” and still scary if it’s stored in a closet. The carrier should live out in the open like a normal piece of furniture.
[IMAGE_PLACEHOLDER_1]
Prep: Set Up for Voluntary Entry (Before You Start “Training”)
Think of this like setting up a gym at home: if it’s inconvenient or unpleasant, nobody uses it.
Where to Place the Carrier
Choose a calm spot where your cat already relaxes:
- •quiet corner of the living room
- •near a sunny window (but not overheating)
- •away from loud appliances and busy doorways
Keep the carrier:
- •door off or tied open at first (no accidental door swings)
- •lined with cozy bedding
- •stabilized so it doesn’t wobble
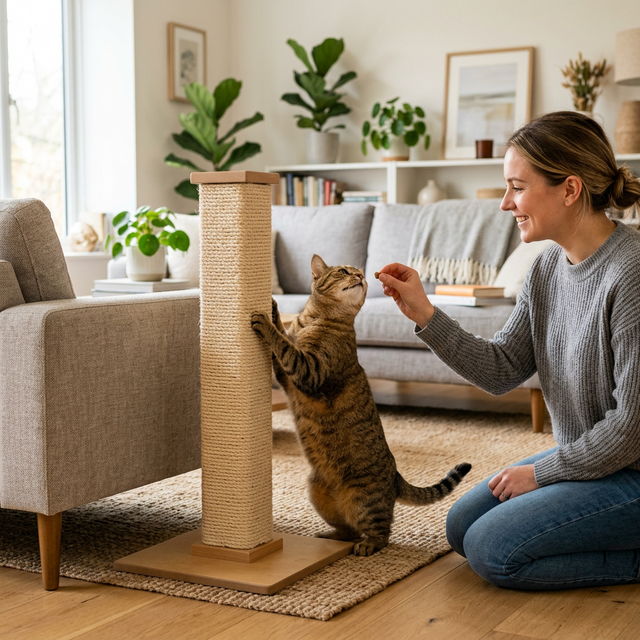
What Rewards Work Best?
Use what your cat truly values. Common high-value options:
- •Churu-style lickable treats (excellent for anxious cats)
- •tiny pieces of cooked chicken or turkey (unseasoned)
- •freeze-dried meat treats
- •a favorite toy for play-driven cats (some Bengals and Abyssinians love toy rewards)
If your cat is food-motivated, you’ll progress faster. If not, we can still train—just lean into play, affection, and environmental comfort.
Breed Examples: Motivation and Style Differences
Every cat is an individual, but breed tendencies can guide your approach:
- •Ragdoll: Often tolerant but may “freeze.” Keep sessions gentle and encourage voluntary movement with lick treats.
- •Maine Coon: Many are curious and confident; you can progress quickly, but use a larger carrier and sturdy handles.
- •Siamese/Oriental: Highly social and vocal; they may protest loudly. Focus on predictable routines and reward calm pauses.
- •Bengal/Abyssinian: Energetic and smart; incorporate short play bursts and “go in = toy appears.”
- •Persian/Exotic Shorthair: Lower energy, easily stressed by heat; ensure cool, breathable setup and avoid long sessions.
The 10-Minute Session Plan: Step-by-Step Carrier Training for Cats
Below is a practical plan you can repeat, adjusting pace to your cat. The goal is calm, voluntary participation.
Session Structure (Same Every Time)
- Set the stage (1 minute): Carrier ready, treats ready, door secured open.
- Training reps (7–8 minutes): 5–15 tiny reps depending on cat.
- Cool-down (1 minute): easy win, then end.
- Reset (optional 30 seconds): remove leftover treats so the carrier doesn’t become a snack trap without you.
Stage 1: Carrier = Good Things Nearby (Days 1–3)
Goal: Cat approaches carrier willingly.
- •Toss 1–2 treats near the entrance, not inside.
- •Praise calmly (soft voice).
- •Repeat until your cat walks up without hesitation.
If your cat won’t approach: Move treats farther away and work closer over multiple sessions. Your cat sets the distance.
Stage 2: Nose In, Head In (Days 2–6)
Goal: Cat puts head inside for a treat.
- •Place a treat just inside the lip of the carrier.
- •Let your cat lean in to eat it.
- •Gradually place treats deeper.
Keep it easy. If your cat backs out quickly, that’s fine—reward the bravery.
Stage 3: Front Paws In, Then Full Body In (Days 4–10)
Goal: Cat steps in fully and stays for 1–3 seconds.
Try these methods:
- •Treat trail: a few tiny treats leading to the back.
- •Lick treat station: smear a small amount on a spoon or a lick mat placed inside (super effective).
- •Meal-in-carrier: feed regular meals near the carrier, then just inside, then deeper over days.
Criteria to move on: Cat enters without you luring every step; they’re choosing it.
[IMAGE_PLACEHOLDER_2]
Stage 4: Door Movement Without Closing (Days 7–14)
Goal: Cat stays relaxed while the door moves.
- •With cat inside eating a lick treat, gently touch the door.
- •Move it an inch, then reward.
- •Wiggle the latch lightly, then reward.
You’re teaching: “Door noise and movement = still safe.”
Stage 5: Door Closes Briefly (Days 10–21)
Goal: Door closes for 1–10 seconds without panic.
Steps:
- Cat goes in for a lick treat.
- Close the door for 1 second.
- Open, reward, end session if needed.
Increase time slowly: 1 sec → 3 sec → 5 sec → 10 sec → 20 sec. If your cat starts to paw or vocalize, you advanced too fast. Drop back to the last calm duration.
Stage 6: Lift, Carry, Set Down (Days 14–28)
Goal: Cat learns motion is normal.
- •Close door for a few seconds.
- •Lift the carrier 1–2 inches, set it down, reward.
- •Progress to carrying across the room.
- •Add gentle rocking (tiny) only if your cat remains calm.
Important: Keep the carrier stable. Sudden swinging is a fast way to create fear.
Stage 7: Short Car Practice (Optional but Powerful)
Goal: Car = predictable, not terrifying.
Start extremely small:
- Cat in carrier, door closed, reward.
- Walk to the car, sit in the parked car for 30–60 seconds, reward.
- Return home, open carrier, reward.
Then add:
- •engine on (no driving)
- •driveway loop
- •2–5 minute drive
- •longer drives with breaks
Many cats hate the car at first. The win is reducing intensity, not creating a cat who “loves” driving.
Vet-Day Version: The “10-Minute Pre-Trip Routine” That Prevents Meltdowns
Even well-trained cats can get stressed on appointment day. Use a predictable routine.
Before You Leave (10 Minutes)
- •Pheromone spray on bedding 15–20 minutes ahead
- •Place a fresh towel with home scent inside
- •Add a small treat stash (a few pieces, not a full meal)
- •Keep the house calm (lower voices, avoid chasing or last-minute nail trims)
Getting Your Cat Into the Carrier Without a Chase
Best options, in order:
- Voluntary entry (ideal): cue your cat with a consistent phrase like “carrier time,” toss treats inside.
- Top-load technique (least stressful “assist”): remove top, place cat onto bedding, replace top.
- Burrito wrap (for scratchy cats): towel wrap gently, then place into top-load carrier.
Avoid: grabbing, cornering, or pursuing. Chasing teaches “humans become predators before the vet.”
At the Clinic: Reduce Stimulus Load
- •Keep the carrier covered with a light towel in the waiting room (visual barrier helps).
- •Place carrier on a chair, not the floor (fewer dog-level nose encounters).
- •Speak softly and avoid jostling.
Pro-tip: Ask your clinic if they have a cat-only waiting area or if you can wait in your car and get texted when a room is ready. This one change can be huge for fearful cats.
Common Mistakes That Sabotage Carrier Training (and What to Do Instead)
Mistake 1: Only Using the Carrier for Vet Trips
Fix: Make the carrier a “normal furniture item.”
- •Leave it out all the time
- •Toss occasional treats in it randomly
- •Let your cat nap in it undisturbed
Mistake 2: Going Too Fast After One Good Session
Cats have good days and cautious days. If you jump from “entered once” to “close door for 2 minutes,” you’ll often create a setback.
Fix: Follow a two-success rule:
- •Don’t increase difficulty until you’ve had two calm reps at the current level.
Mistake 3: Rewarding Panic Behavior by Accident
If your cat screams and you immediately open the door, you’re not “being kind”—you might be teaching that screaming opens doors.
Fix: Aim to open the door during a moment of quiet (even half a second). If your cat is truly panicking, open it—safety first—then adjust your training plan to prevent panic in the next session.
Mistake 4: The Carrier Slides, Wobbles, or Smells Weird
Fix:
- •Add non-slip padding
- •Replace strongly scented bedding
- •Clean accidents with an enzymatic cleaner (not ammonia-based)
Mistake 5: Forcing the Cat In Through the Front Door
Fix: Use a top-loader or clamshell-style carrier for easier, gentler handling when you must assist.
Troubleshooting: What If Your Cat Is Already Terrified?
Some cats have a history: past rough handling, car sickness, or a scary vet experience. You can still succeed—just start smaller.
If Your Cat Hides When They See the Carrier
- •Move the carrier into view without interacting for several days.
- •Do “treat rains” near it without asking for entry.
- •Consider a different carrier style (a new object can reset associations).
If Your Cat Won’t Take Treats During Training
That usually means stress is too high or the reward is too low.
Try:
- •higher-value rewards (lickables often win)
- •training at a different time (when your cat is hungry and calm)
- •shortening sessions to 2–3 minutes
- •reducing difficulty (treats near carrier only)
If Your Cat Pees in the Carrier
Possible causes:
- •severe stress
- •motion sickness
- •urinary issues (always consider medical causes)
Do this:
- •add an absorbent layer under bedding for travel day
- •talk to your vet about nausea control or anxiety meds
- •clean thoroughly with enzymatic cleaner
- •increase car desensitization (parked car sessions help)
If Your Cat Gets Carsick
Signs include drooling, vomiting, or extreme vocalizing.
Helpful steps:
- •skip food 2–3 hours pre-trip (unless your vet says otherwise)
- •keep the carrier level and secure
- •drive smoothly, avoid sharp turns
- •ask your vet about anti-nausea options and pre-visit meds
- •train car exposure gradually (engine on, then short drives)
[IMAGE_PLACEHOLDER_3]
Product Recommendations and Comparisons (What Actually Helps for Stress-Free Vet Trips)
Below are practical add-ons that often make carrier training smoother.
Carrier Accessories Worth Buying
- •Lick mat (small): Helps create calm, sustained licking (a self-soothing behavior). Use with a thin layer of lickable treat.
- •Non-slip pad: Prevents sliding during lifts and car rides; reduces motion anxiety.
- •Lightweight carrier cover: A towel works, but a fitted cover can be easier and looks neater.
- •Seatbelt strap or carrier anchor: Keeps the carrier from shifting; improves safety and reduces jostling stress.
Optional Calming Tools: What’s Hype vs Helpful?
Often helpful
- •Pheromone spray used correctly (light mist, time to dry)
- •Pre-visit pharmaceuticals for high-stress cats (vet-guided)
- •A stable, top-loading carrier
Sometimes helpful
- •Calming treats/supplements (varies widely by cat)
- •White noise in the car (some cats relax, others don’t)
Usually not enough alone
- •“Calming” toys or catnip in the carrier (catnip can overstimulate some cats)
Quick Comparison: Best Setup by Cat Type
- •Fearful/rescue cats: Hard carrier + top opening + cover + lick mat + gradual car training
- •Large cats (Maine Coon mixes): Larger hard carrier + reinforced handle + non-slip interior
- •High-energy cats (Bengal, Abyssinian): Training with play + short reps + sturdy carrier (they can bulldoze flimsy mesh)
- •Brachycephalic breeds (Persian/Exotic): Extra ventilation, avoid heat, shorter car exposure, stable interior
Expert Tips to Make Carrier Training Stick Long-Term
Build “Carrier Into Life,” Not Just Training
Make it part of normal routines:
- •Toss a treat inside when you walk by once a day
- •Occasionally feed a small snack in the carrier
- •Let your cat nap inside undisturbed (this is key)
Teach a Simple Cue
Pick one phrase and stick with it:
- •“In your carrier”
- •“Home base”
- •“Box time”
Say it once, then deliver a reward for any movement toward the carrier. Over time, the cue predicts good things.
Practice the Whole Chain (Not Just Entry)
Many cats will enter but panic at:
- •door closing
- •lifting
- •stairs
- •car noise
Train the full sequence in tiny steps so the vet day doesn’t contain “surprise levels.”
Use Cooperative Care at the Vet
Ask your clinic about:
- •Fear Free or low-stress handling methods
- •doing exams with the cat in the bottom half of a clamshell carrier
- •pre-visit meds for cats who escalate quickly
A good clinic will welcome this conversation—because calmer cats mean safer, more accurate exams.
A Simple 2-Week Schedule You Can Follow
Adjust speed based on your cat’s comfort. If your cat hesitates, stay at that step longer.
Days 1–3
- •Carrier out, door secured open
- •Treats near entrance, then just inside
- •Goal: approach and head-in
Days 4–7
- •Treats deeper inside
- •Lick treat station inside carrier
- •Goal: full-body entry for 1–3 seconds
Days 8–10
- •Door movement while eating
- •Brief door closes (1–5 seconds)
- •Goal: door closes calmly
Days 11–14
- •Door closes (5–30 seconds)
- •Lift/set down
- •Carry across room
- •Optional: parked car sit (30–60 seconds)
If you have a vet visit sooner than two weeks, focus on the highest-impact pieces: voluntary entry, calm door closing, and gentle lifting.
When Training Isn’t Enough: Signs You Should Ask Your Vet for Help
Carrier training for cats can dramatically reduce stress, but it’s not a cure-all—especially for cats with intense fear or previous trauma.
Talk to your vet if you see:
- •extreme panic: open-mouth breathing, frantic thrashing, self-injury
- •refusal to eat for an extended time after practice sessions
- •repeated vomiting during car practice
- •aggression that escalates rapidly despite slow training
In many cases, the best plan is a combination of:
- •continued short training sessions
- •clinic accommodations (cat-only time/room)
- •pre-visit meds for humane stress reduction
That combo often turns “impossible vet visits” into manageable ones within a couple of appointments.
Quick Recap: Your Stress-Free Vet Trip Checklist
- •Choose a sturdy, comfortable carrier (ideally top-loading or clamshell)
- •Leave it out as a normal object, with cozy bedding
- •Train in 10-minute sessions using tiny steps and high-value rewards
- •Practice the full chain: entry → door → lift → carry → car
- •On vet day, use a predictable routine, cover the carrier, and reduce waiting room stress
- •If fear is severe, pair training with vet-guided medication and low-stress handling
If you want, tell me your cat’s age, breed (or best guess), current reaction to the carrier (hides, growls, freezes, etc.), and how soon the next vet trip is—and I can map the exact starting step and a week-by-week progression.
Topic Cluster
More in this topic


Frequently asked questions
How long does carrier training for cats take?
Most cats improve in a few days to a few weeks, depending on past experiences and how consistent you are. Short, positive 10-minute sessions build trust faster than occasional long attempts, especially when you stop before your cat gets stressed.
What type of carrier works best for training?
A sturdy hard-sided carrier with a top-opening option is often easiest because you can lower your cat in gently and handle them safely. Choose a size that lets your cat stand, turn, and lie down, and add familiar bedding so it smells like home.
What if my cat already hates the carrier?
Start by leaving the carrier out full-time and reward any calm interaction, even a glance or sniff, so the carrier predicts good things. Gradually work up to eating treats inside, short door-closes, and brief lifts, backing up a step if your cat shows fear signals.
